Manuals
Copy course material from Sandbox Brightspace to course environment Brightspace
Sometimes you want to see how specific parts of the course content work before you put it in the Brightspace course. To do this, you can use your own Sandbox environment. In this environment, you can test all Brightspace activities. When you are satisfied with the activities and content that you have created in the Sandbox, it is possible to copy them to the Brightspace course.
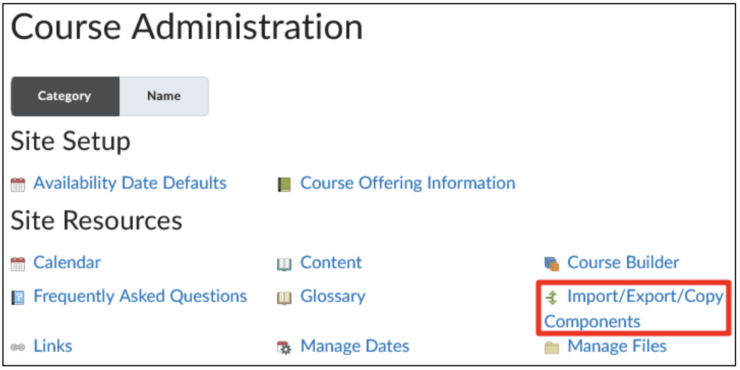
To transfer the content, navigate to the course you want to copy the content to. This can be done via the course grid at the top right or via My Courses on your homepage. Then navigate to ‘Course Management’ -> ‘Course Admin’ -> ‘Import/Export/Copy Components’. 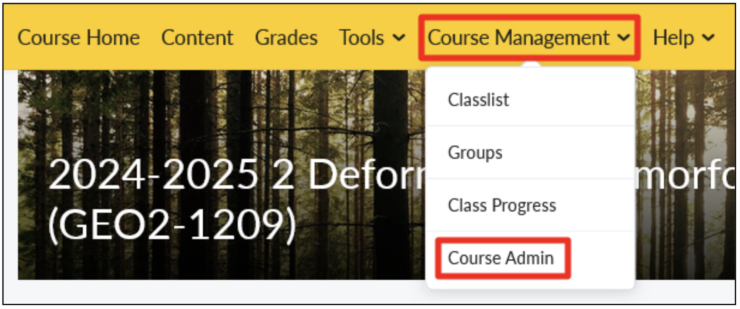
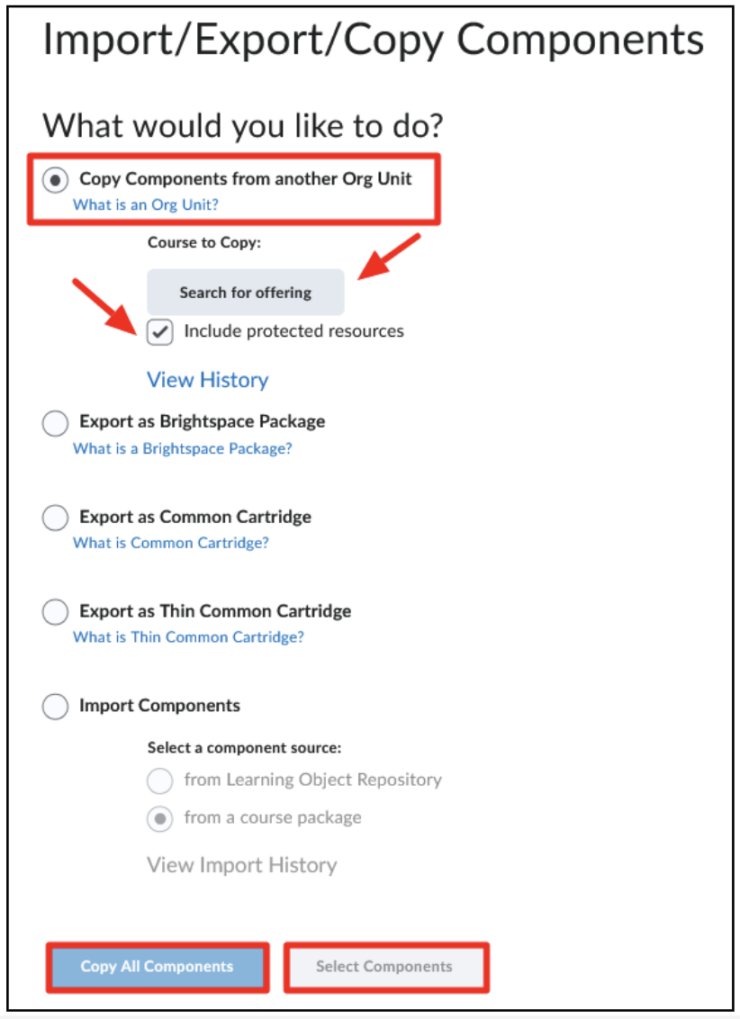
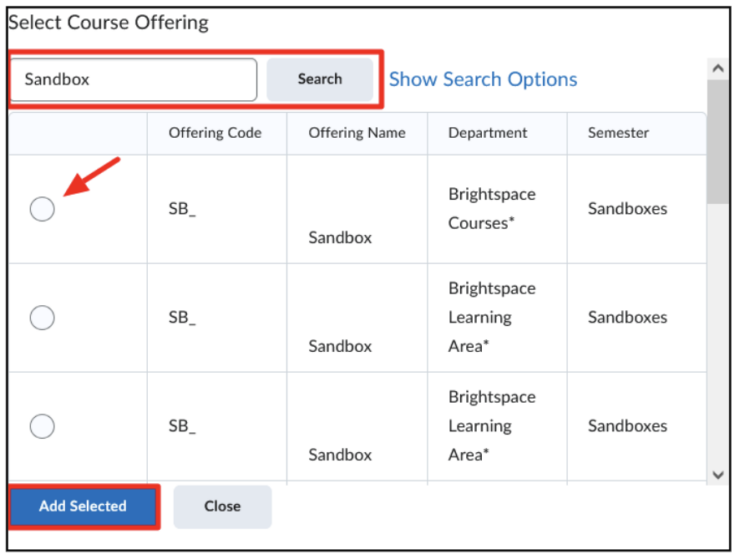
 On the next screen, click on ‘Copy Components from another Org Unit’. Then click on the button ‘Search for offering’. A pop-up tab will open, select your Sandbox here. You can use the search field to find it. Then click on ‘Add Selected’, the Sandbox will now be added as an offering. Keep the box for Include protected sources checked. Then click on ‘Copy All Components’ if you want to put all components from your Sandbox in the course, or click on ‘Select Components’ if you want to copy specific components.
 If you have selected ‘Copy All Components’, Brightspace will now copy all components from your Sandbox to the course. The copied content will be placed at the bottom in Content.
If you have selected ‘Select Components’, you can select components to copy on the next screen. Here you have the option to copy all components per category or to copy individual items. You can view the components by clicking on ‘Show the current course components’, if you want to view the components before making a choice. Select per category whether you want to copy it by checking the box. Then you can choose within the category whether you want to copy all components (‘Copy all items’) or whether you want to select individual items (‘Select individual items to copy’).
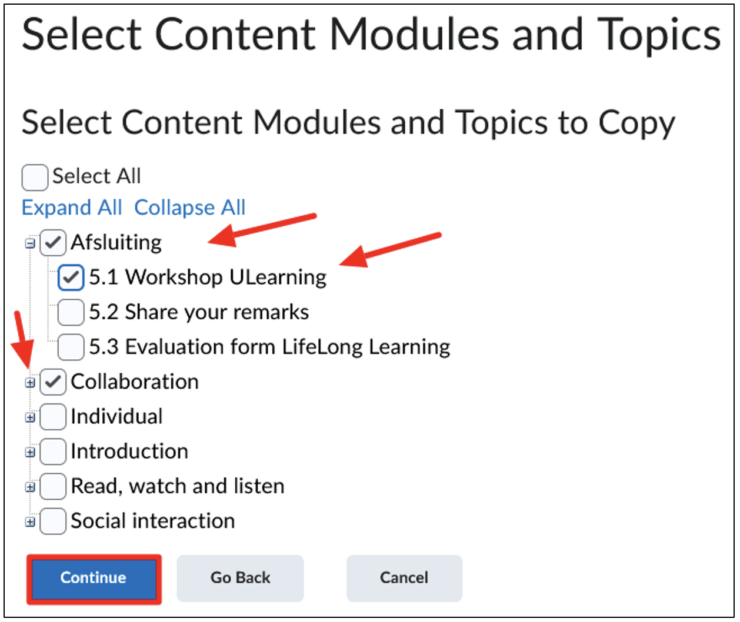
Keep the box for ‘Include associated files’ checked if you want to copy files that have been uploaded to Content or Discussions, for example. When you have made your choices, click on ‘Continue’. 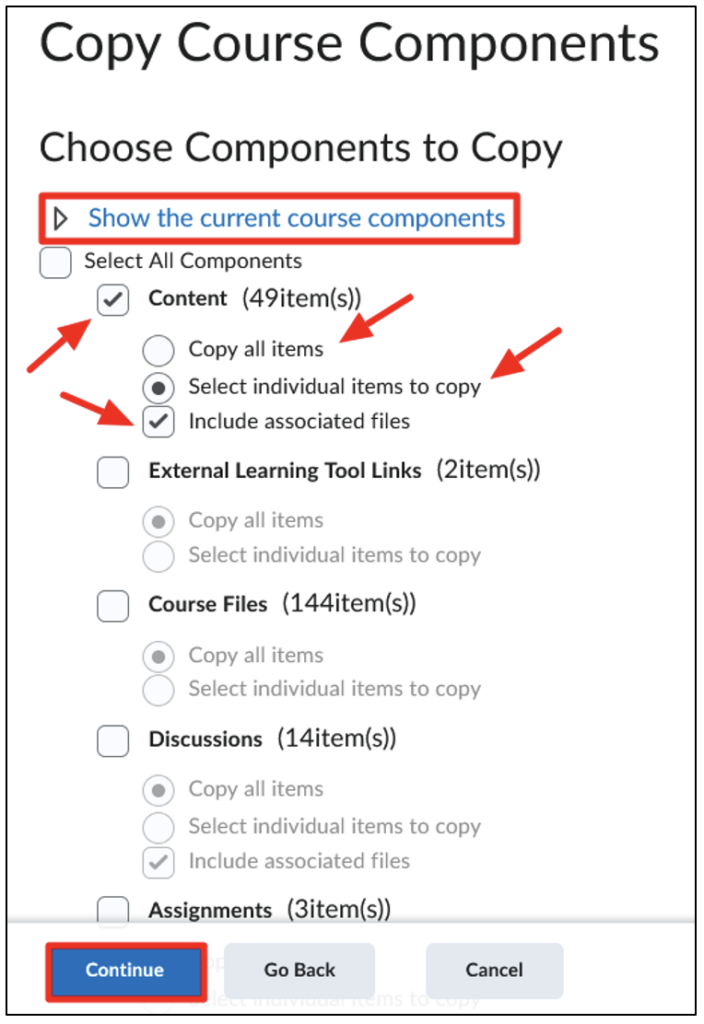 If you have selected ‘Select individual items to copy’ for a category, you can select which items you want to copy on the next screen. Check the box next to the Item to copy it. If necessary, click the plus sign if you want to (de-)select further components of an item. Click ‘Continue’ when you have made your selection.
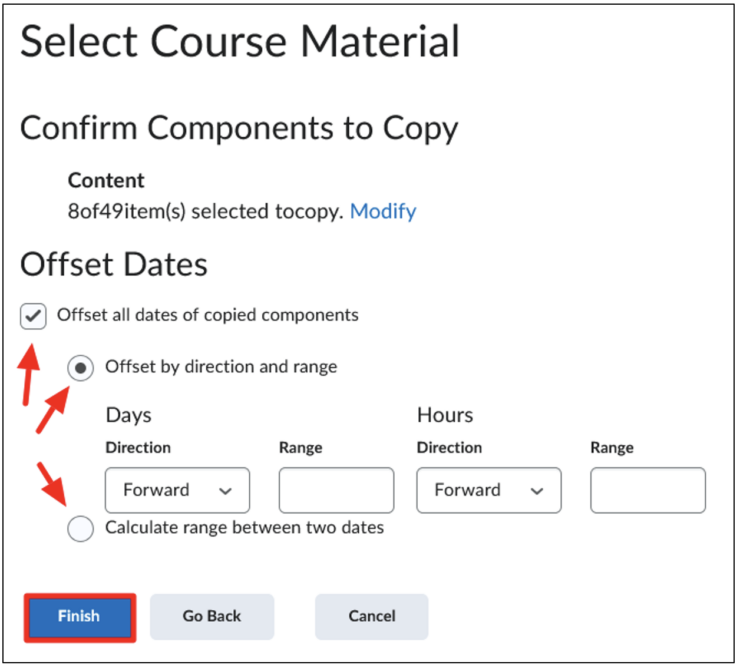
  On the next screen, it is possible to shift the dates of copied components to match those of the course. This is useful, for example, if you want to copy Assignments with deadlines. Check the box at ‘Offset all dates of copied components’ to do this. Then choose between ‘Offset by direction and range’ to manually fill in how the dates should be shifted and ‘Calculate range between two dates’ to fill in two dates that the program uses to calculate how the dates should be shifted. Then click ‘Finish’. The components you have chosen will now be copied into the course.