Manuals
How do I use checklists?
Checklists contain important assignments, sources, and other tasks that students need to complete. Each checklist is split up in multiple Categories and Items in which tasks are organised. The checklist can be used by students to keep track of which tasks they have completed.
Contents
- Creating a new checklist
- Adding Categories and Items
- Adding release conditions
- Copying checklist
- Linking Checklist to Content
Creating a new checklist
Go to Checklists by navigating whithin the course to ‘Course Management’ -> ‘Course Admin’ -> ‘Checklists’.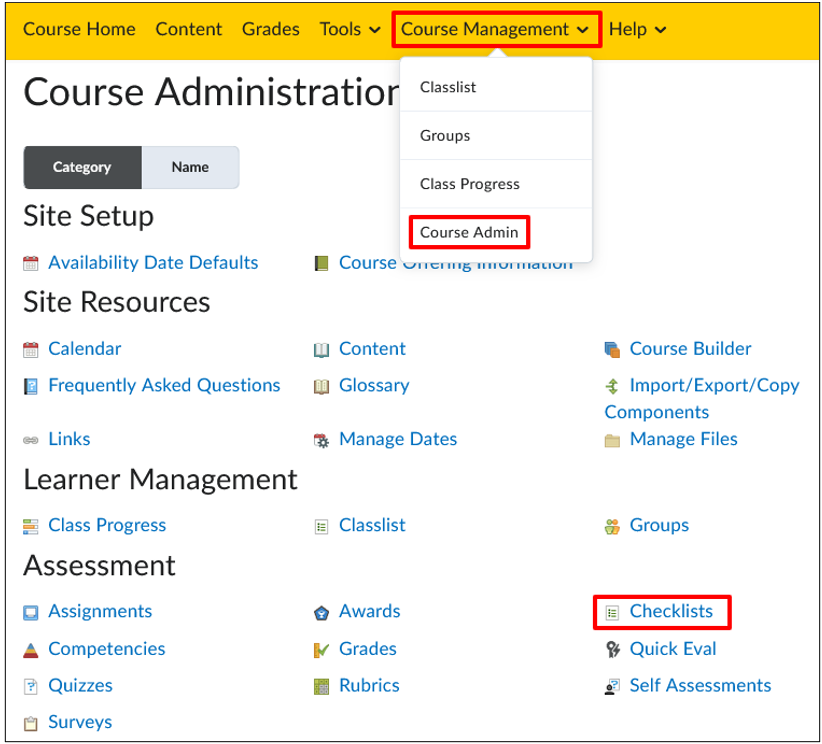 Click ‘New Checklist’ to make a new checklist. A new checklist can also be created directly from content by clicking ‘Create New’ -> ‘Checklist’.
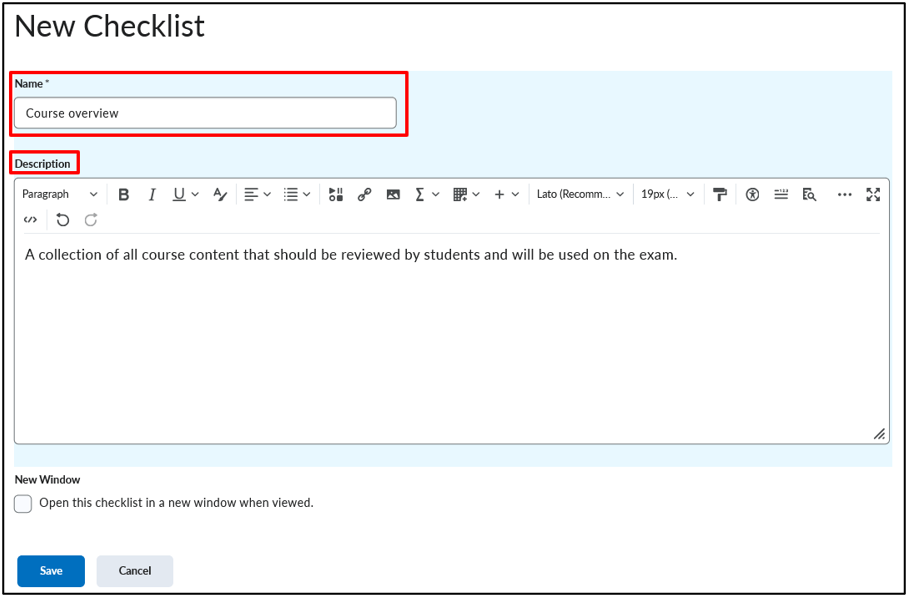
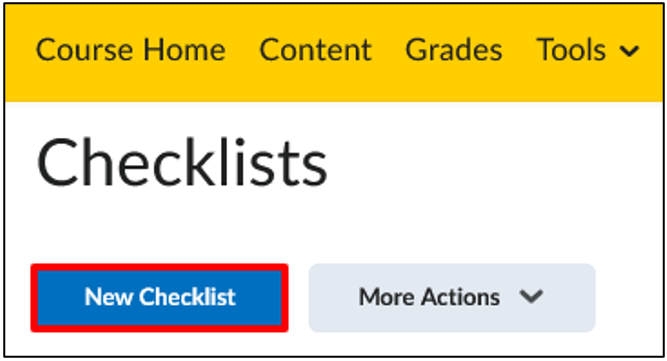 On the next screen you can fill in the name and description of the checklist. The checklist will always be opened in a new tab. Click ‘Save’.
Adding Categories and Items
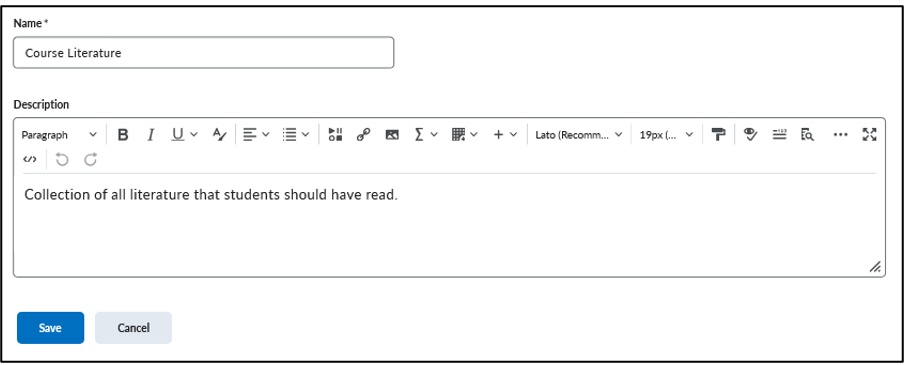
You will find yourself on the following screen, here you can add Categories and Items to the checklist, as well as change their order. Use the buttons at the bottom of the page to do so.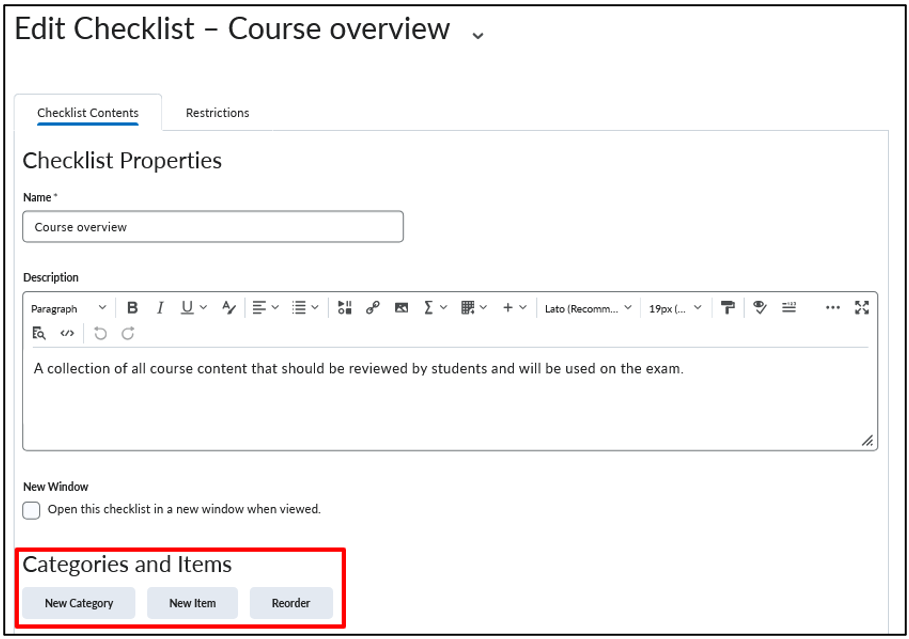 When you click ‘New Category’ you go to the following screen, here you can change the name and description of the category.
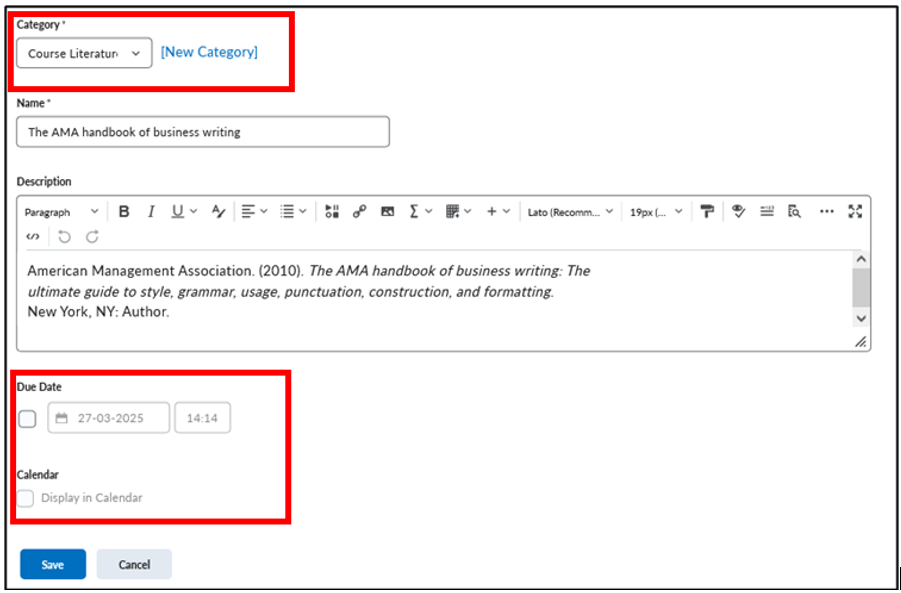
 When you click ‘New Item’ you go to the following screen, here you can add the name and description of the Item and choose to which category it belongs (see image). You can also add a Due Date, if you add a Due Date you can choose to let it show in the calendar (see image).
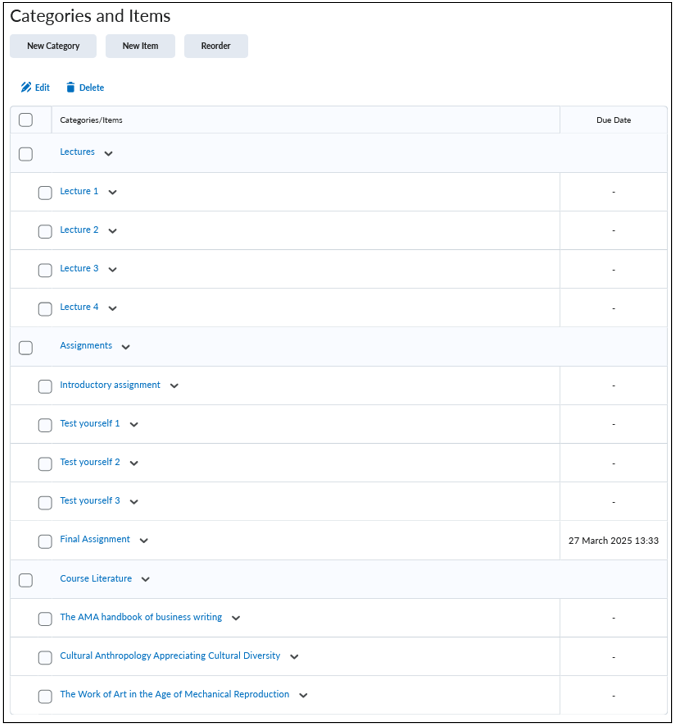
 Use multiple Categories to clearly organise Items, like in the example below.
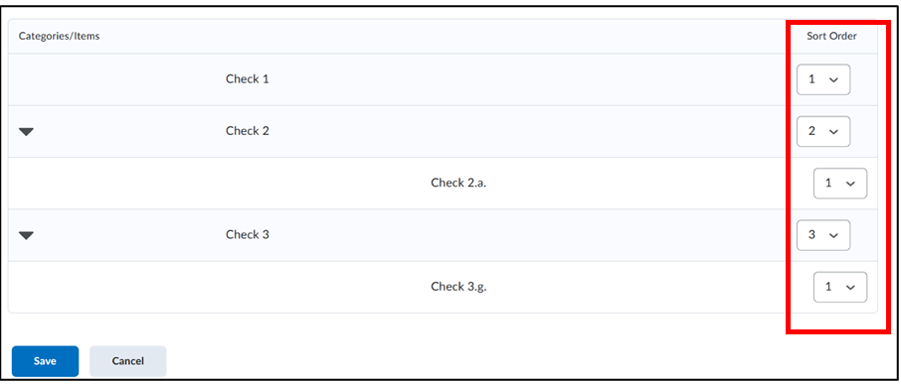
 When you click on ‘Reorder’, you can reorganise the order of the categories and items. Use the Sort order on the right-hand side of the screen to edit the order per category or item.
Adding release conditions
By navigating to the Restrictions tab it is possible to add Release Conditions to the checklist. To learn how Release Conditions work, use this manual.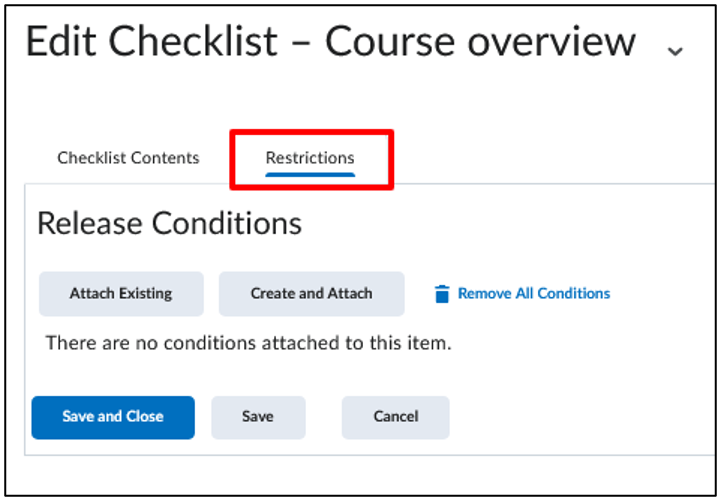
Copying checklist
To make a copy of a checklist, navigate to the Checklists page via ‘Course Management’ -> ‘Course Admin’ -> ‘Checklists’. Click on the arrow next to the correct checklist and click ‘Copy’. The copy can be found at the bottom of the list of checklists under the name Copy of [original checklist name].
Linking checklist to Content
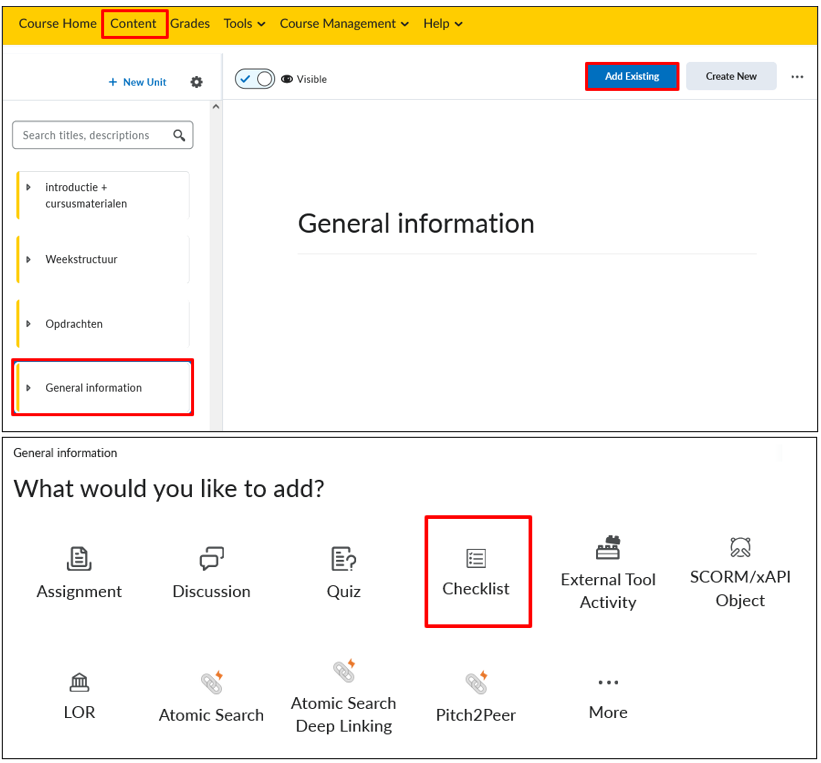
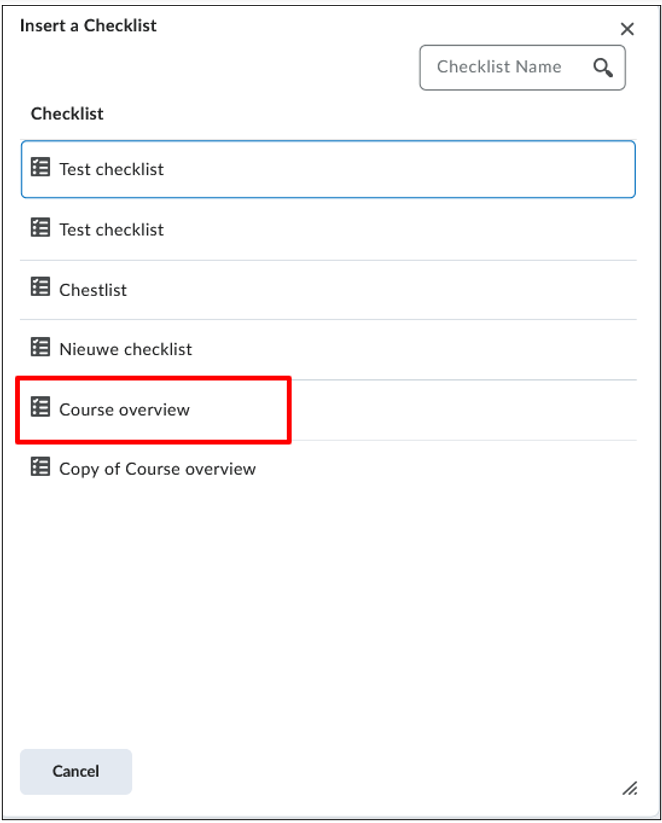
To link the checklist to Content, navigate to the correct content page. Click in the navigation bar on ‘Content’ and select the right unit, lesson, or folder. Click on ‘Add Existing’. Then choose ‘Checklist’ and pick the correct one from the menu. If you made the checklist by using ‘Create New’ in Content, the checklist will automatically be linked to the content page, so you will not have to link it manually.