Manuals
How do I use the HTML editor?
In Brightspace you can use the HTML editor to edit texts. This manual will explain what function are provided by the editor and how to use them. In the screenshot below all functions are indicated by a number and they will be discussed in the text below. At the bottom of the page a picture shows how text for the different functions in the HTMLeditor looks like.
The HTML editor can be used for several different purposes. For example, when creating a new course, assignment or creating a new page. The HTML editor can change in options available or look when creating different content. 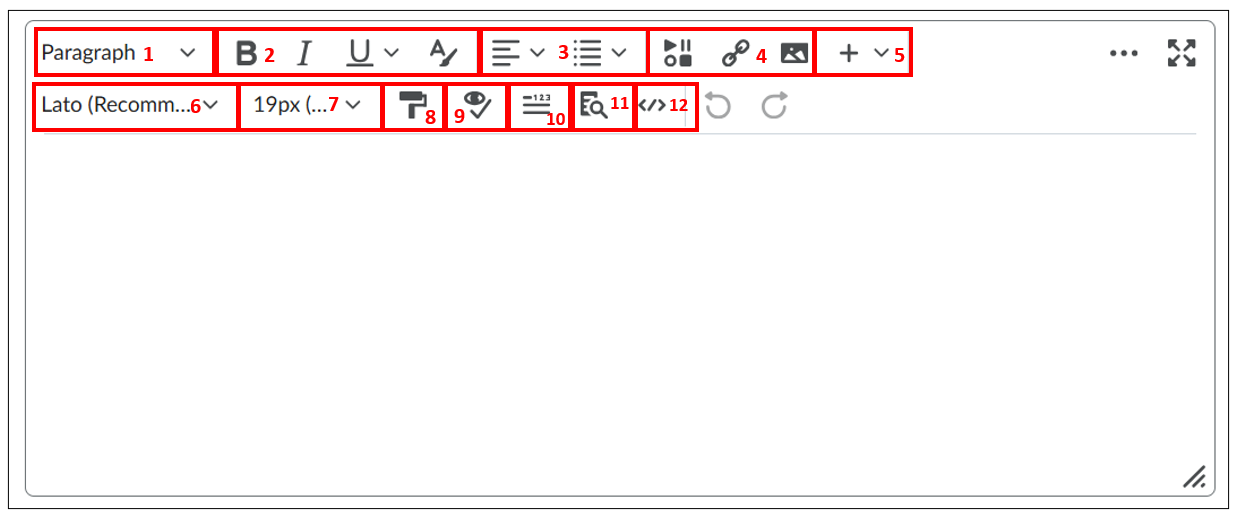
- Paragraph Styling Options- Here you can choose between different text styles (e.g. Heading 1, Heading 2) to create different titles and paragraphs.
- Text Formatting Options- Here you can choose between different formats to change different parts of your text. B for Bold, I for italic, U for underlined and the A with the brush can be used to select the text colour.
- Paragraph Formatting options- Here you can choose the formatting of your paragraphs. The first button can be used to choose the alignment (Left, Centre, Right or Justify). The second button can be used to add or remove indents either by creating a bulleted or numbered list or only adjusting the indent.
- Insert options
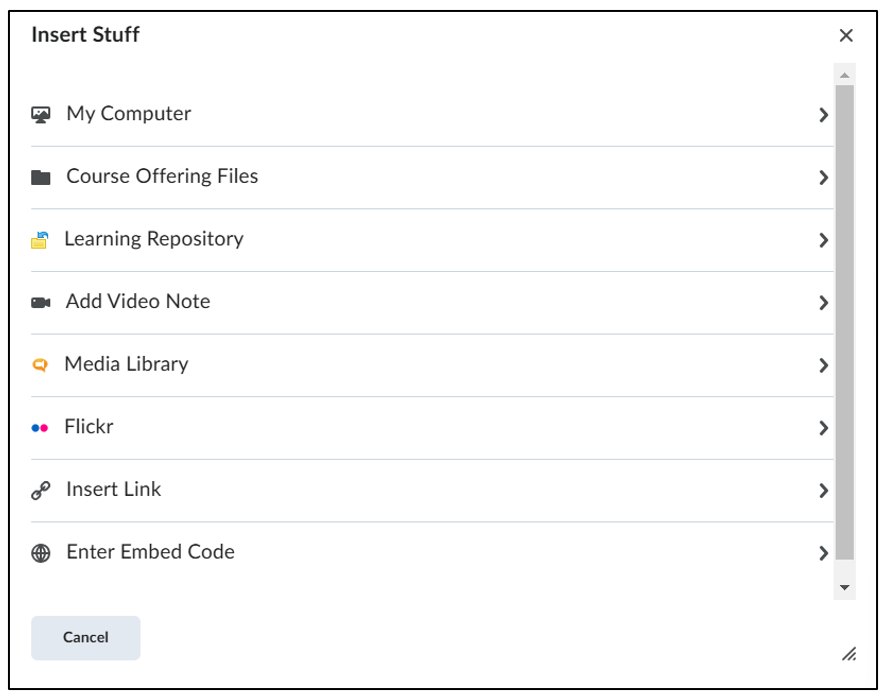
- Insert stuff: The first button can be used for adding a wide variety of content to the HTML editor. There are several options available.
- My Computer: upload a file from your computer.
- Course Offering Files: add a file that has previously been added to the course.
- Learning Repository: add an object from the Learning Repository to your Content, such as a Quiz or an image that a colleague has posted in a different course.
- Add Video Note: record a video and add it to the Content or upload a pre-existing video from your computer.
- Media Library: this gives you an overview of all audio/video files in this course. Select the one you want to add it to the Content.
- Flickr: search for images on Flickr and add it to the Content. These images will automatically be cited.
- Insert Link: add a link to a file or webpage.
- Enter Embed Code: use this option to add embedded content, such as a YouTube video, using an embed link.
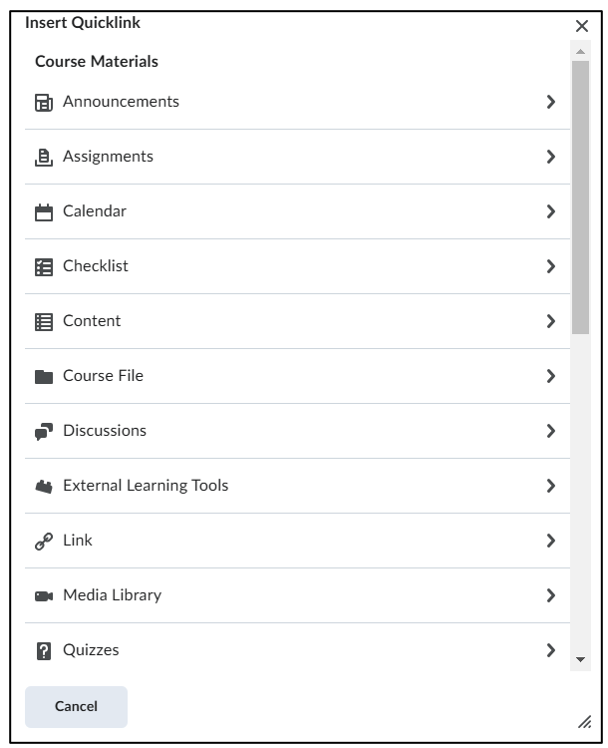
- Insert Quicklink: The second button can be used to add links to content within the course. Select to which part of the course you want to link in the pop-up menu. The link will show in the HTML-editor.
- Insert image: Here you can add an image. You can upload the image from your computer files, add a link or choose an image from your course files.
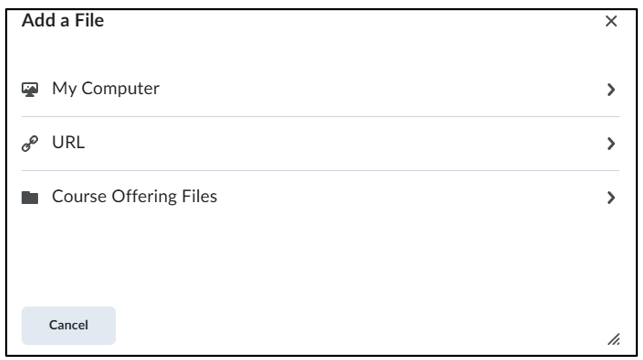
- Insert stuff: The first button can be used for adding a wide variety of content to the HTML editor. There are several options available.
- Other insertion options- This button opens a dropdown menu with other insert options.
-
- Equation: Here you can add a mathematical or statistical equations/ formulas to the HTML-editor. For a more extensive explanation of this function, see the following section of this manual (Equation Editor).
- Attributes: Select a part of the text and click on attributes to set an attribute for that specific part. You can for example choose the direction of the text.
- Divider: When you click on this option, a line will be placed in the text. This can be used as a divider between different text parts. The divider will show where has been clicked or typed last.
- Emojis: Here you can select an emoji that will be added to the editor.
- Symbols: Here you can select special symbols that will be added to the editor.
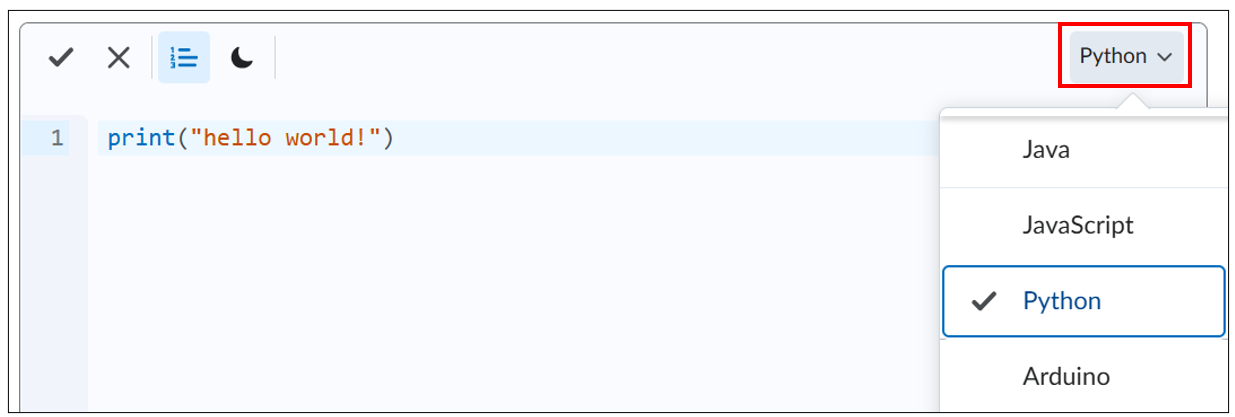
- Insert code: Here you can add code in the HTML-editor. The code will not be executed in the editor but will show with a different lay-out than normal text, in order to be able to show the code in an organized manner. Type your code in the pop-up editor, select in the upper right corner which language your code is in and when you are finished click on the ‘check mark’ in the upper left corner or the ‘cross’ to cancel.
-
- Letter type- Here the letter type can be chosen.
- Letter size- Here you can adjust the letter size.
- Format painter- Here you can copy a text format and paste it onto a different text. First select the text, that you want to copy. Then click on the button. Finally, click on the text you want to update to the copied style.
- Accessibility checker- Here you can check the accessibility of your written paragraph. For example, if there are limitations in your text which limits visually impaired persons in reading your text.
- Word count- Here you can view the word count of your document.
- Preview- Here you can view your text in a preview mode, this allows you to preview the content and ensure that it displays as intended prior to saving any changes.
- HTML source editor- Here you can format the content by looking at the code that structures and formats the content. Use this view if you have experience with HTML and prefer to author your own content.
Equation editor
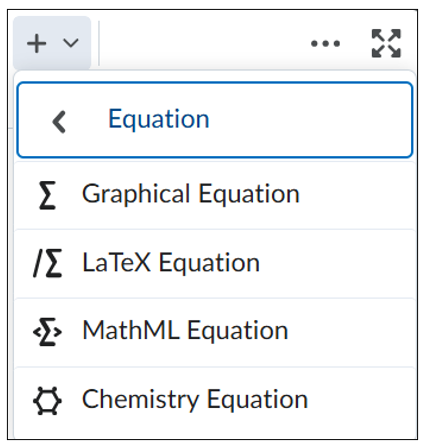
You can open the equation editor by clicking on the ‘+-icon’ in the menu. Then click on ‘equation’. 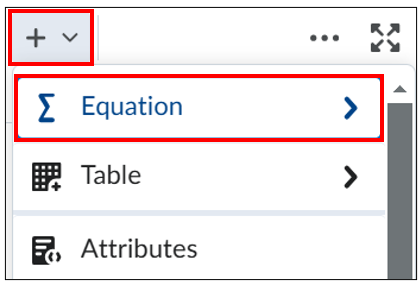 Now you can choose from different editor options.
- Graphical Equation: This opens the formula-editor, comparable with the editor from Microsoft Word.
- Chemistry Equation: You can use this one to add chemical equations.
- MathML Equation: Use this one for adding a formula in the MathML-markup language.
After selecting which editor you want to use a formula-editor will open in a new pop-up window.
Enter your formula by clicking on the symbols below ‘Insert Equation. Click on the ‘Arrow icon </>’ to switch the formula to the graphic/ MathML form.
Click on ‘insert’ to close this window and add the formula.
Adding formulas with LaTeX code
If you are familiar with LaTeX code, then you can add formulas in the editor itself, by typing direct inline LaTeX code. When you click on ‘preview’ you can see if the formula looks as you wanted. 


