Manuals
How do I create a quiz?
This manual explains how you can create a quiz and tailor it to your needs. It also explains how you can add questions to the quiz.
Create a New Quiz
Navigate to ‘Tools’ in the navigation bar of the course.
Click on ‘Quizzes’. You end up on the start page of the quiz. Click on ‘New Quiz’.
 Quiz Title: Fill in a title for the quiz.
 Grade Out Of: If you want to assign a grade to the quiz. When you click on ‘Not In Grade Book’ you have the option to: Add the quiz to the Gradebook, so that the grade will automatically show (‘Add to Grade Book’) OR Categorise the quiz by linking a Grade item to it (For example: Quizzes Semester 1). Here you can link the quiz to an existing Grade Item, or make a new one (‘Edit or Link to Existing’).
 Description: If necessary, enter a description/introduction.
 Questions: Click on ‘Add Existing’ to add an existing question, and ‘Create New’ to create a new question. For further explanation on adding questions to a quiz, see the section Add A Question.
Availability Dates & Conditions
Here you can: Add a ‘Start-‘ and ‘End’ date.
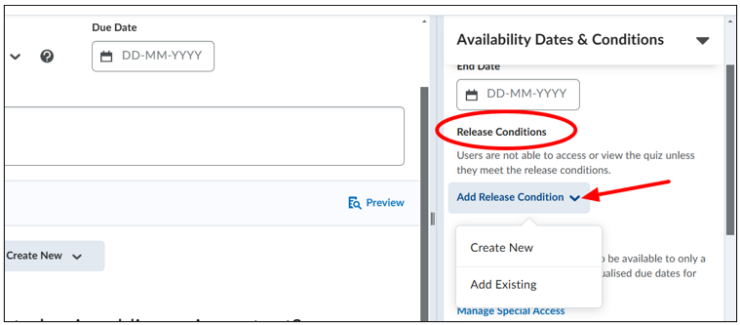
 Add ‘Release Conditions’ by clicking on ‘Add Release Condition’ – students cannot open or see the quiz unless they meet the release conditions. You can also remove release conditions.
 Enable ‘Special Access’ for students who need more time by clicking on ‘Manage Special Access’.
 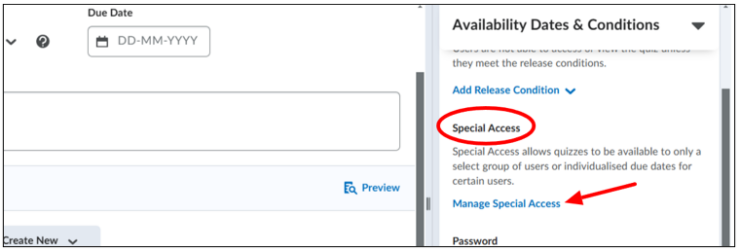 This opens a new window where you can choose to give selected users special access to the quiz or only let users with special access see the quiz. If you click on ‘Add Users to Special Access’, you can set a special submission date, availability date, time limit and total attempts allowed for specific students.
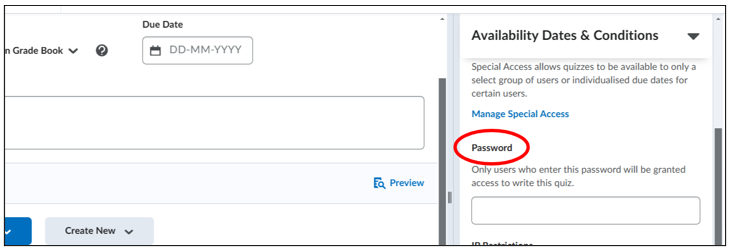
 Password: Add a password so that only people with the password have access to the quiz.
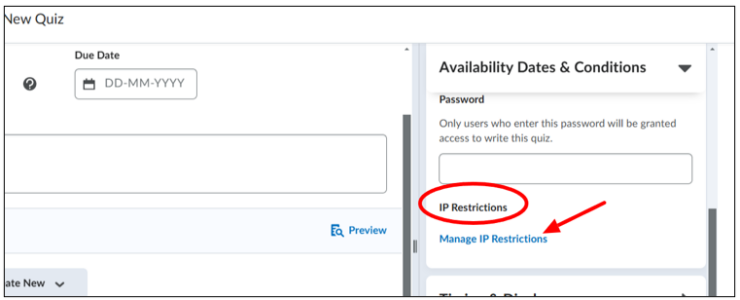
 Click on ‘Manage IP Restrictions’ to only allow students with a specific IP address access.
Timing & Display
Here you can: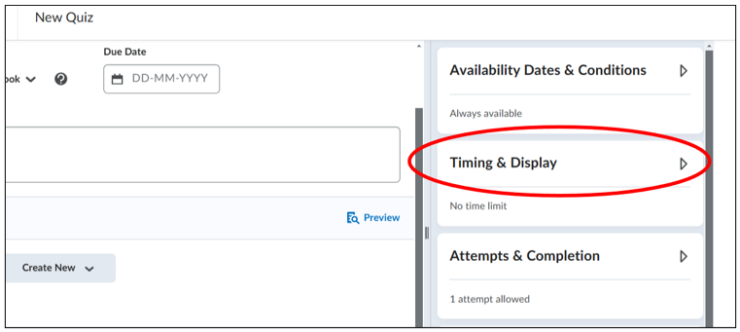 Set time limit: Determine how much time students have for the quiz. If you want to set a time limit, check the box ‘Set time limit’.
 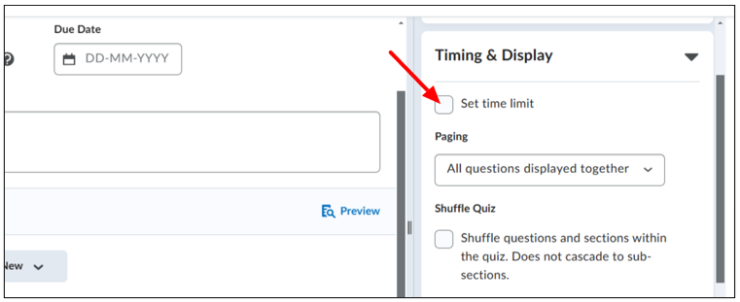 The option then appears for you to fill in how many minutes you would like the quiz time limit to be.
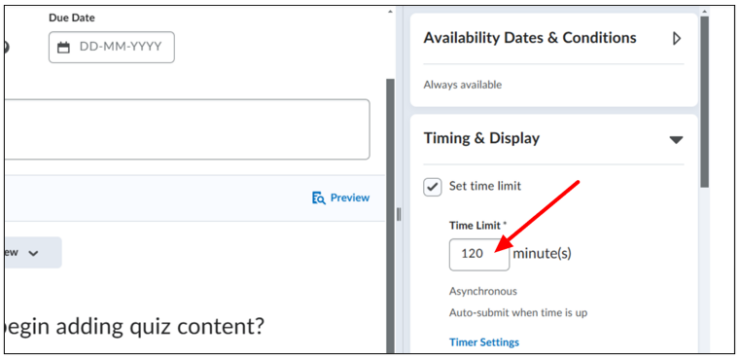 Click on ‘Timer Settings’:
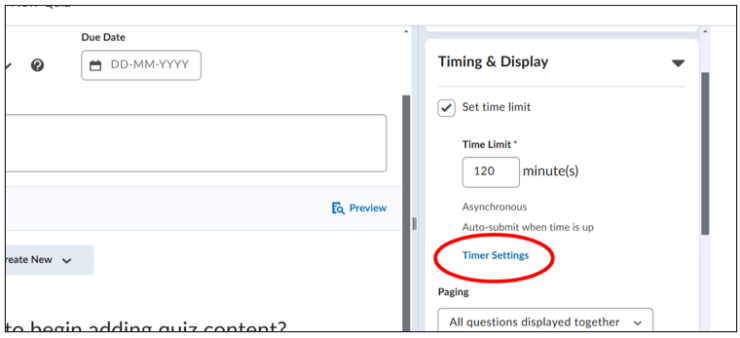 A window opens where you can customise settings for when the timer starts (under Quiz Start) and what happens if the time limit has expired (under When The Time Limit Expires).
You can decide if the timer of the quiz starts when the student starts the quiz (‘Asynchronous’) or when a joint start date has been reached (‘Synchronous’).
You can decide if the quiz automatically gets submitted once the student has gone over the time limit (‘Automatically submit the quiz attempt’).
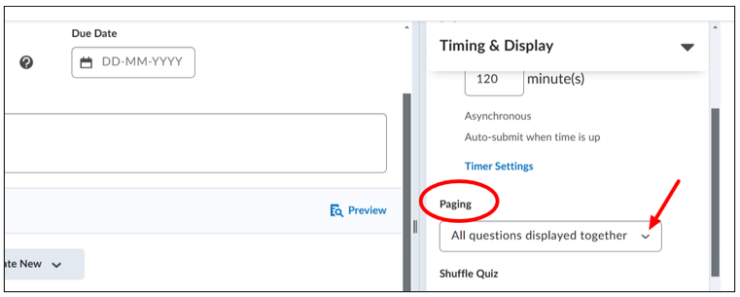
Click on ‘OK’ to save the changes.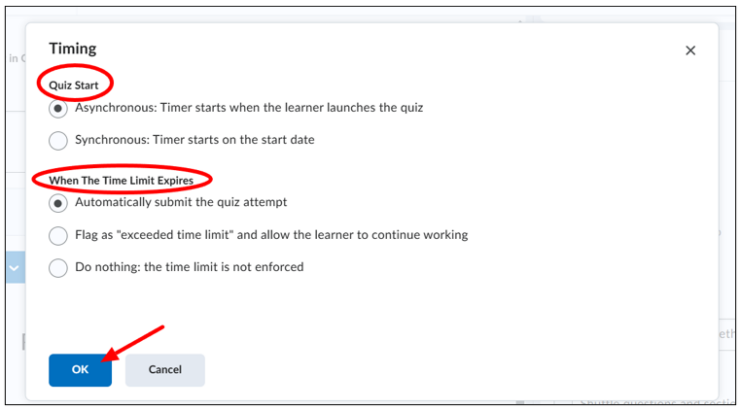 Paging: Determine if students can see all the questions at once, or only per question.
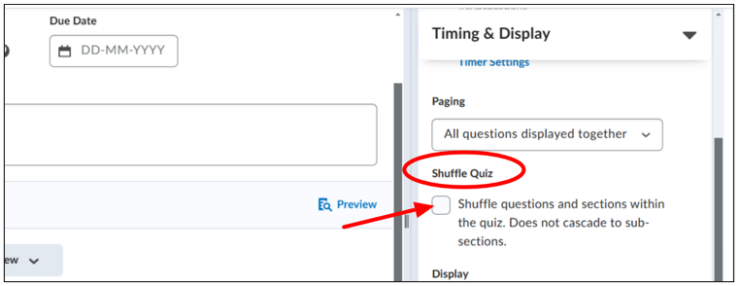
 Shuffle Quiz: Randomize the questions per student.
 Display:
‘Allow hints’: Determine whether students can use a hint. (Hints need to be created per question, but should be turned on here if you want to use them. This is useful for example when you want to import questions with hints).
How to add a hint to a question: This information can be found in this manual.
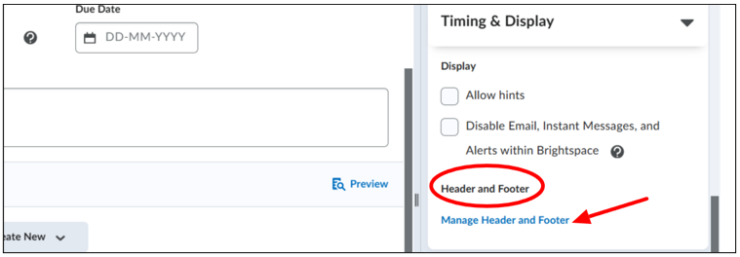
‘Disable Email, Instant Messages, and Alerts within Brightspace’: Indicate whether you want to disable Brightspace’s email and message functionalities when students are working on the quiz.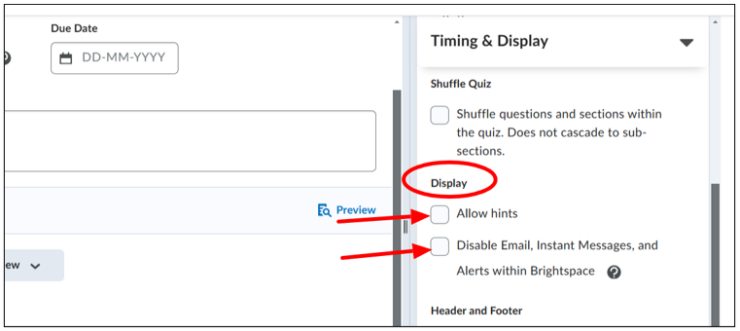 Add a Header and Footer by clicking on ‘Manage Header and Footer’. Once added, they will be visible at the top and bottom of the quiz.
Attempts & Completion
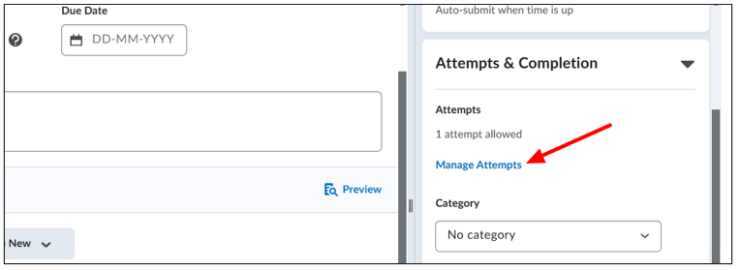
Here you can: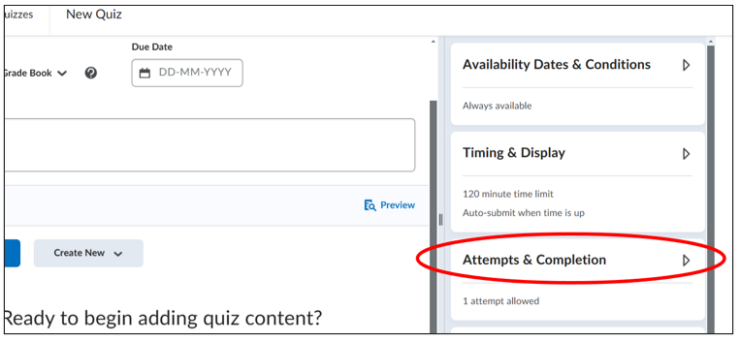 Click on Manage Attempts: Choose how often a student can take the quiz.
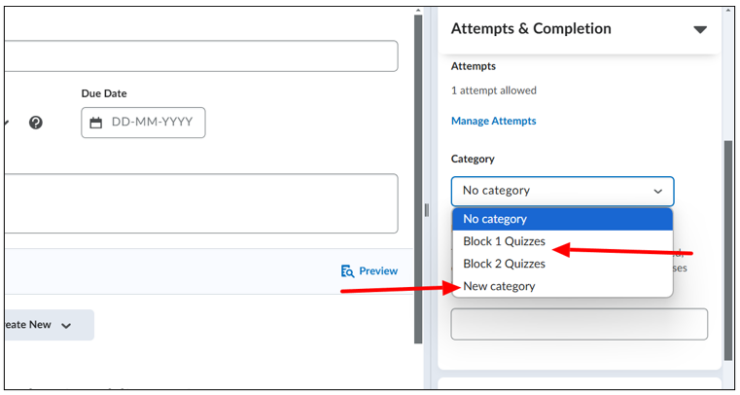
 Under Category you can choose to group quizzes by adding the quiz to a category.
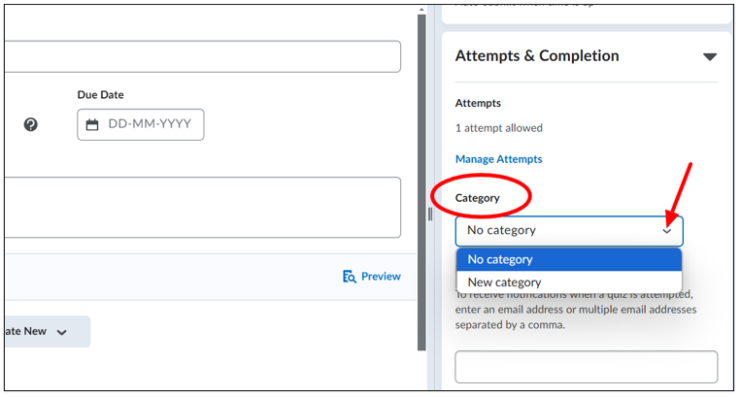 You can select ‘New category’ to create a new category, or choose from a list of existing categories you’ve previously created.
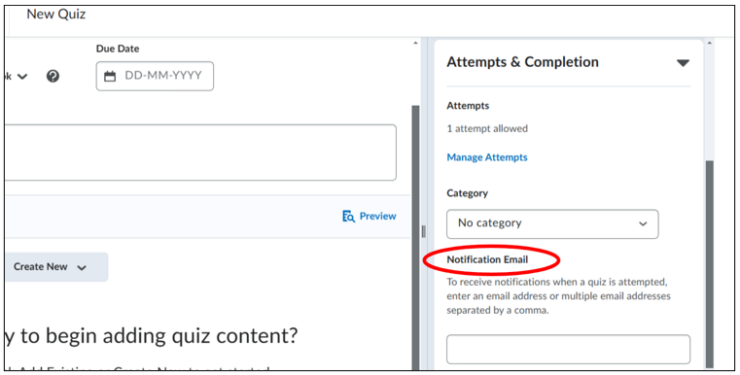
 Under Notification Email you can enter an email address if you want to receive notifications per attempt.
Evaluation & Feedback
Here you can: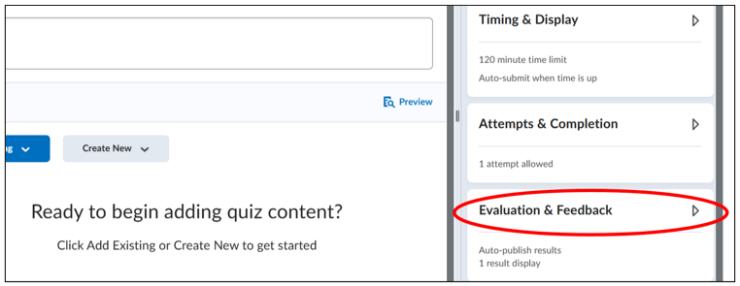 Choose to automatically publish the quiz results when the student completes the quiz. (This is only possible if the quiz does not contain open-ended questions.) OR Synchronize the quiz to the Grade Book. (This is only possible when the quiz is already linked to the Grade Book).
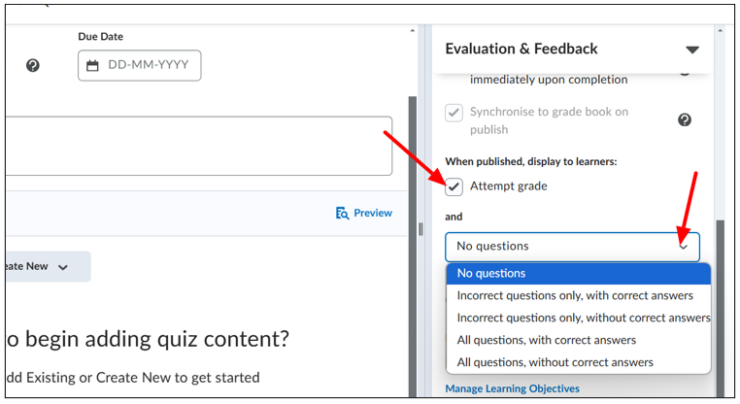
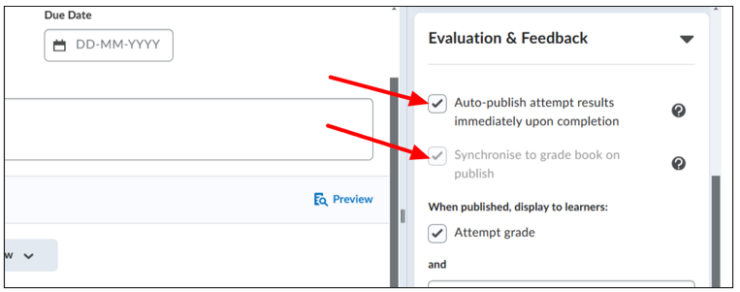 Determine whether students can see their grades when they complete the quiz, and whether they can see the following:
- No questions.
- Only the questions they got wrong, with the correct answers.
- Only the questions they got wrong, without the correct answers.
- All the questions, including the ones they answered correctly.
- All the questions, but without the correct answers.
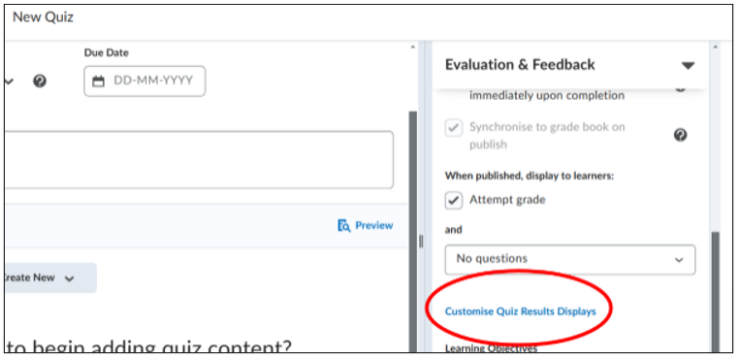
 Customize Quiz Results Displays: Click here to customize what students see when they submit the quiz. This displays the student’s message, grade, questions, answers, and response. This view can be edited to show additional information. Click here to customize what students see when they submit the quiz.
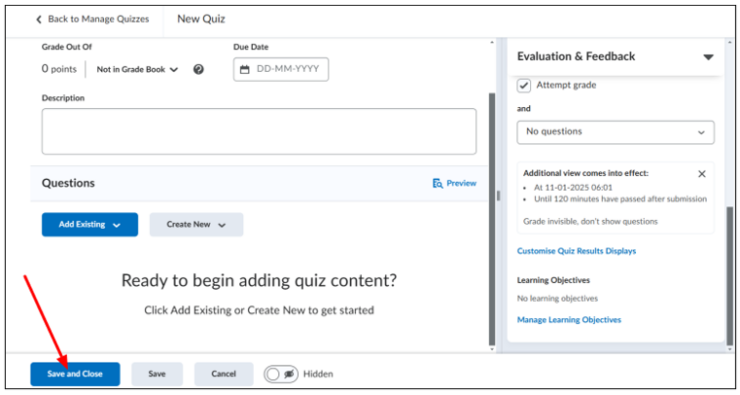
 Click on ‘Save and Close’ to go back to the starting page of the quiz.
 Your quiz is now saved with the title you gave it, and you can see it under the ‘Manage Quizzes’ tab.
Add A Question
There are two ways to add questions: via ‘Add Existing’ or via ‘Create New’.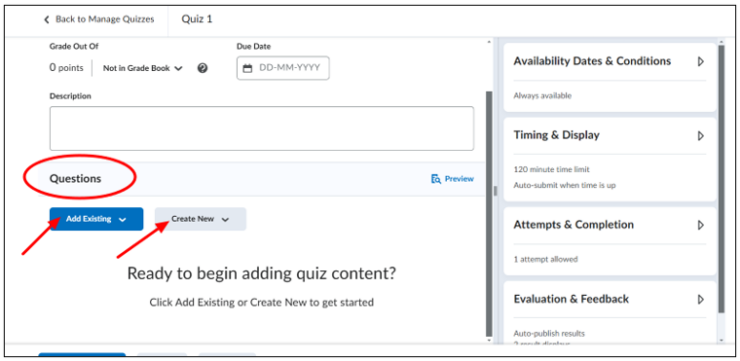 Add Existing
If you want to add existing questions from a Brightspace course, for example, there are three options. Via Upload a File, Browse Question Library, or Import from Learning Repository. Please note, the Browse Question Library option is only possible if these questions have already been added to the Brightspace course.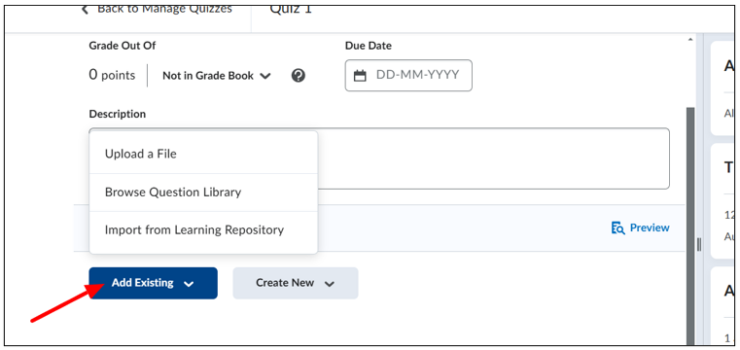 Upload a File: To successfully upload a file, it must have a (suggested) CSV template. It is possible to download an example in the upload page.
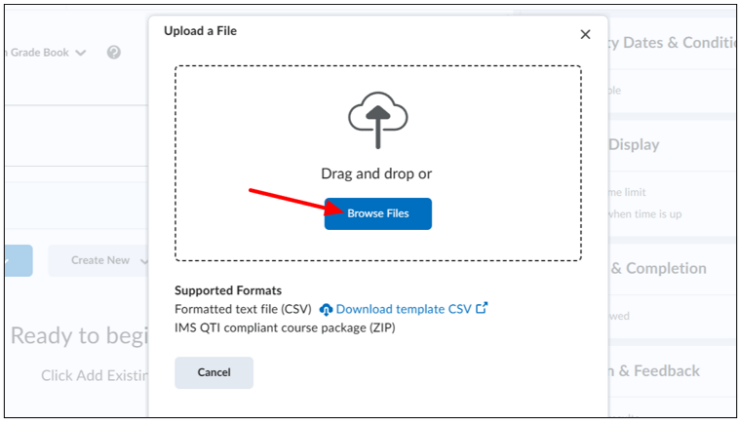
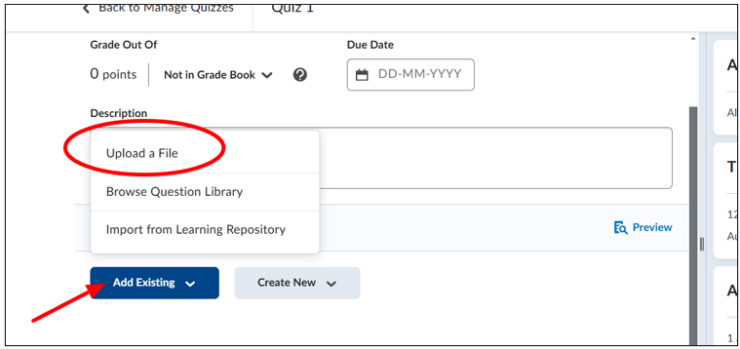 Once the file is in order, all you need to do is click on ‘Browse Files‘ and ‘Upload’.
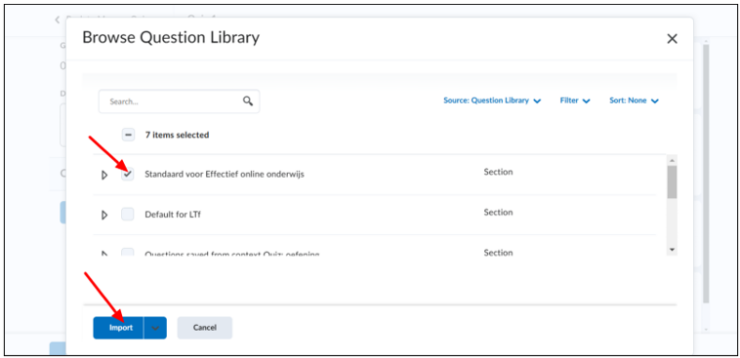
 Browse Question Library: Here you can search for a specific question, filter by question type and sort the questions alphabetically or by points.
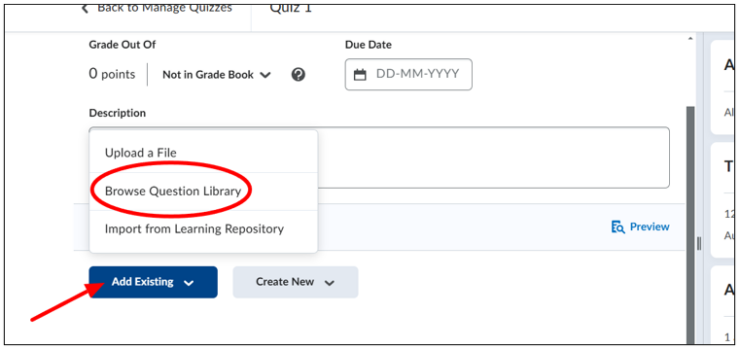 Once you have found the questions you want to add, check the questions and click ‘Import’. You can then determine where the question will end up in the questionnaire: at the top, at the bottom, or in a specific section.
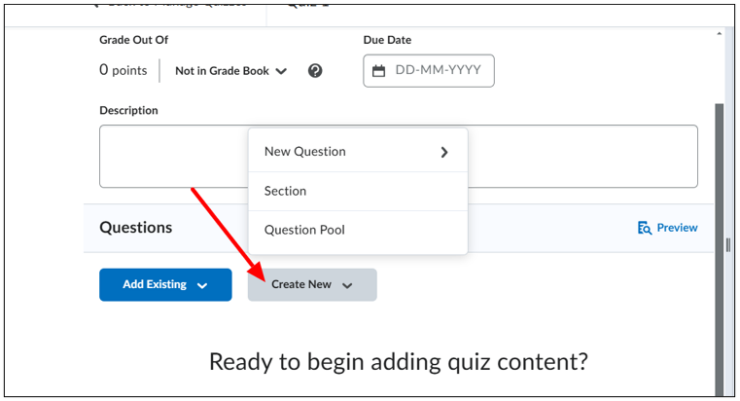
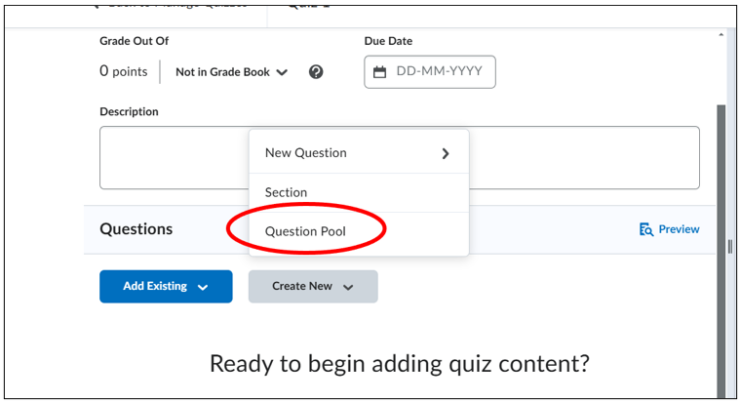
 Select Create New if you want to make new questions.
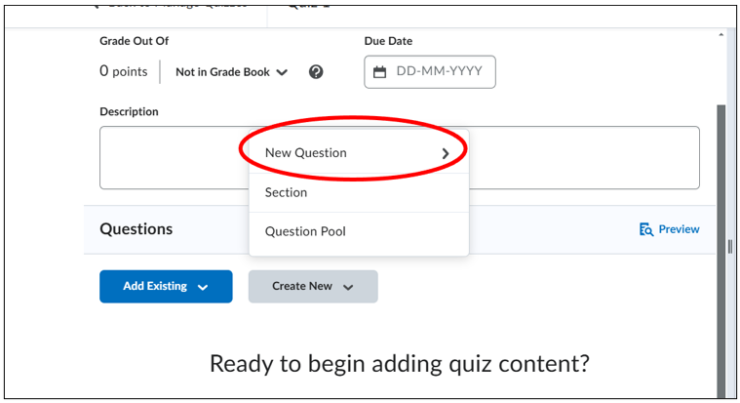
 New Question: Create a new question. Click on this article for the different types of questions you can add to a quiz.
 Section: to add a section to the quiz
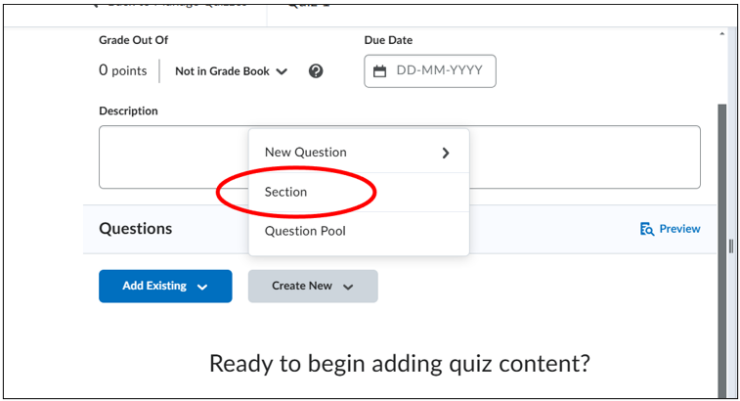 Question Pool: to add a question pool.
 Click on ‘Save and Close’ to go back to the home page of the quiz.

