
Manuals
How do I share or print the calendar?
It is possible to synchronise the Brightspace calendar with other calendars such as Microsoft Outlook or Google Calendar.
Table of Contents
- Sharing calendar
- Printing calendar
Sharing calendar
On the homepage, select the arrow next to Calendar > ‘Go to Calendar’ > ‘Settings’.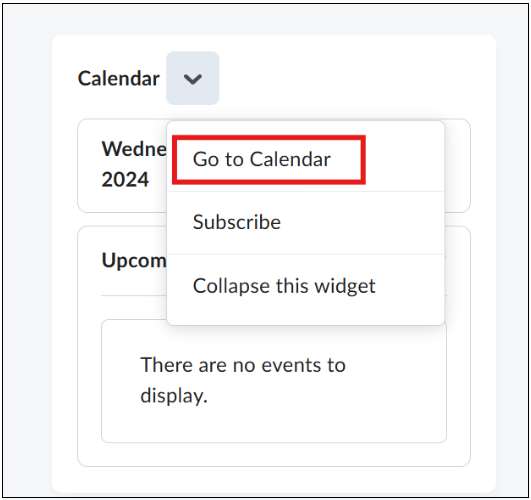 Select ‘Enable Calendar Feeds’.
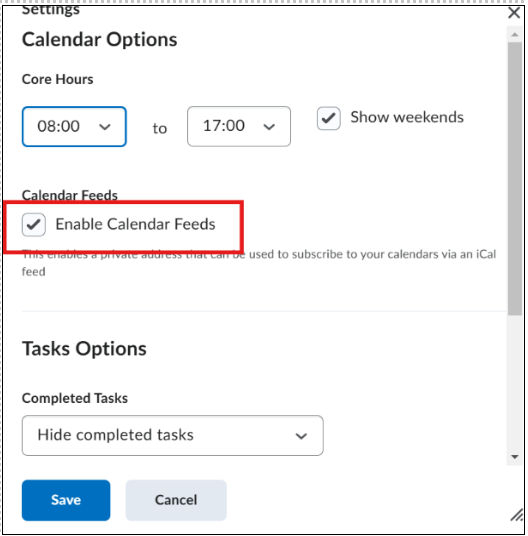 Click ‘Save’.
You now see a new icon on the ‘Calendar’ page. Click ‘Subscribe’.
Under ‘Calendar Subscriptions’, choose which calendar(s)/tasks you want to add in the external application. You can select a single course, just your tasks, or everything. Select and copy the link. Add the copied link to the external application.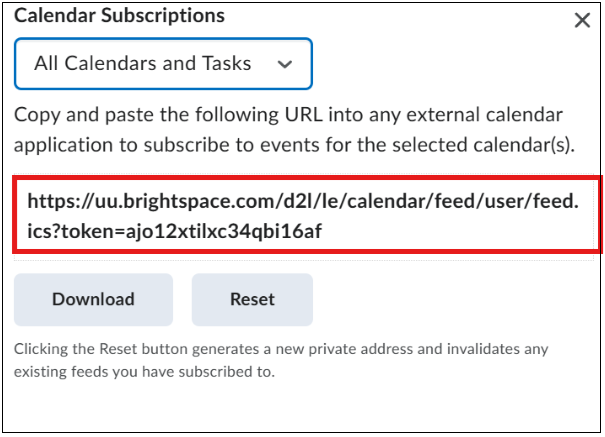 Click ‘Close’.
You can also download the contents of the calendar for use without an internet connection. Please note that changes to the calendar are not updated. Click Download. You can now open the generated .ics file with your offline application.
Printing calendar
Select the ‘Calendar’ that you want to print. Select ‘All Calendars’ to print all calendars.  Click ‘Print’.
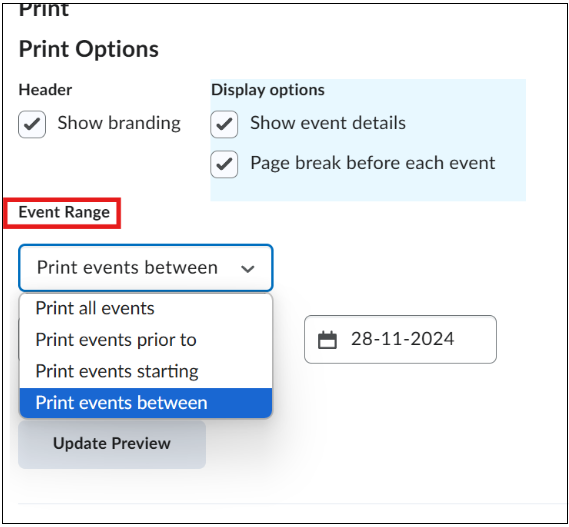
In the pop-up that appears, you can choose what you want to print. Select ‘Show Branding’ to show the title of the selected agenda. Under ‘Display Options’, choose from the following options:
- Select ‘Show event details’ to show the details or description of an event.
- Select ‘Page break before each event’ to have each event printed on a separate page.
Choose one of the following options under ‘Event Range’:
- ‘Print all events’: print everything.
- ‘Print events prior to’: print everything up to a certain date. Fill in the date under this option.
- ‘Print events starting’: print everything starting from a certain date. Fill in the date under this option.
- ‘Print events between’: print everything between two specific dates. Fill in the dates under this option.
Click on ‘Update Preview’ to check at ‘Print Review’ what you are going to print. 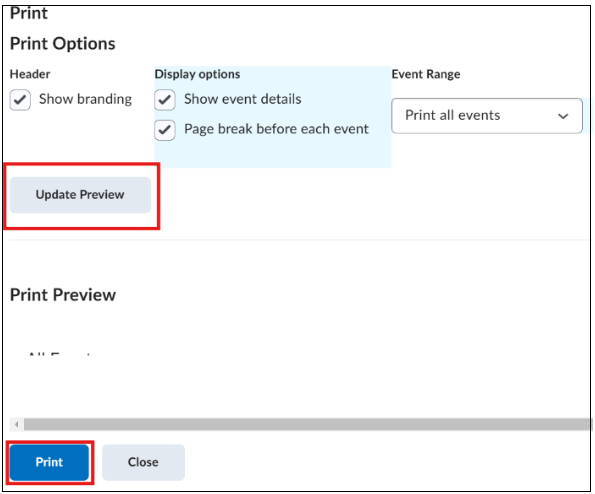 Click ‘Print’.