
How can I change the visibility of my course?
A course is automatically set as ‘Active’ the moment it comes from Osiris via the link.. This means that the course is visible to students in their Course Overview and all published content is visible to students from its start date.
This allows students to view the content of the course even if you and/or your colleagues are not done editing. However, there are three options that you can follow to make sure that students cannot access the study material before you want them to.
- Option 1: make content (in)visible
- Option 2: create a start date for your course
- Option 3: set your course as inactive
Option 1: making content (in)visible
One option is to make items invisible in the contents of your course.
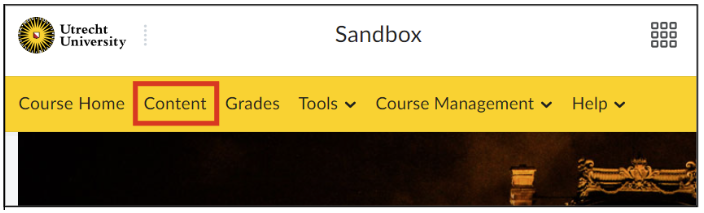
Click on ‘Content’ within the course on the navigation bar.
 Click on the unit that needs to be made (in)visible. You can check if you are editing the correct unit by ensuring that the blue circle is around the correct unit. In this example, the lesson 0.1 Welcome to the course is being edited. By sliding the toggle next to the eye, the content can be made visible or invisible.
 You can hide every unit and its contents from students. In this way, students will be able to enter the course environment, but without seeing any of the content.
Note: If you decide to use this option, keep in mind that ‘Announcements’ cannot be hidden. However, you can schedule Announcements by setting a different ‘Start Date’.
Option 2: create a start date for your course
By setting a start date for a course, the visibility can be changed. Navigate to ‘Course Management’ in the navigation bar of the specific course. Click on ‘Course Admin’. 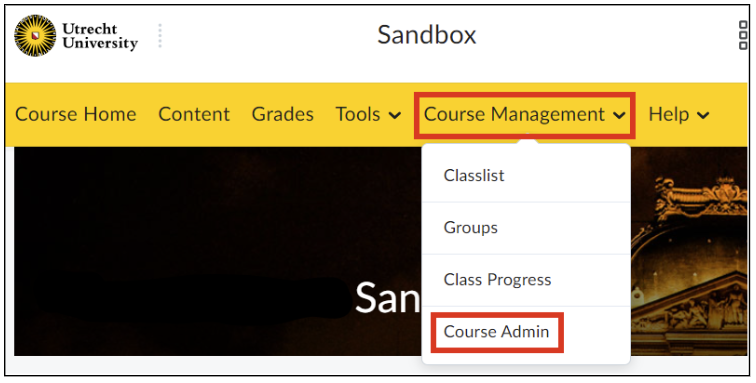 Click on ‘Course Offering Information’.
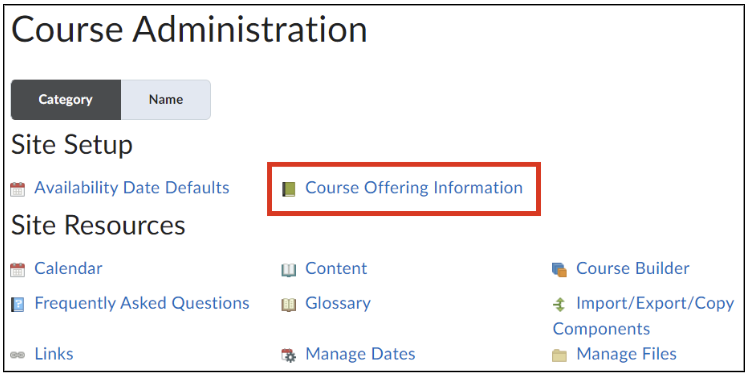
Scroll down to ‘Course has start date’ and ‘Course has end date’. 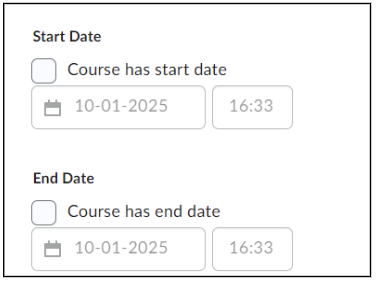 Add a start date (and/or end date) to your course:
- Check the ‘Course has a start date’ box and fill in the specific date and time from the moment the course should become available to students.
Note: Students will see the course on their Course Overview and the start date will appear on the course banner. They will, however, not be able to access the course before the start date.
Option 3: set your course as inactive
As a last option, you can temporarily set the course as inactive. To do this:
Navigate to ‘Course Management’ in the navigation bar of the specific course. Click on ‘Course Admin’. Click on ‘Course Offering Information’.
Scroll down until you see ‘Active’. 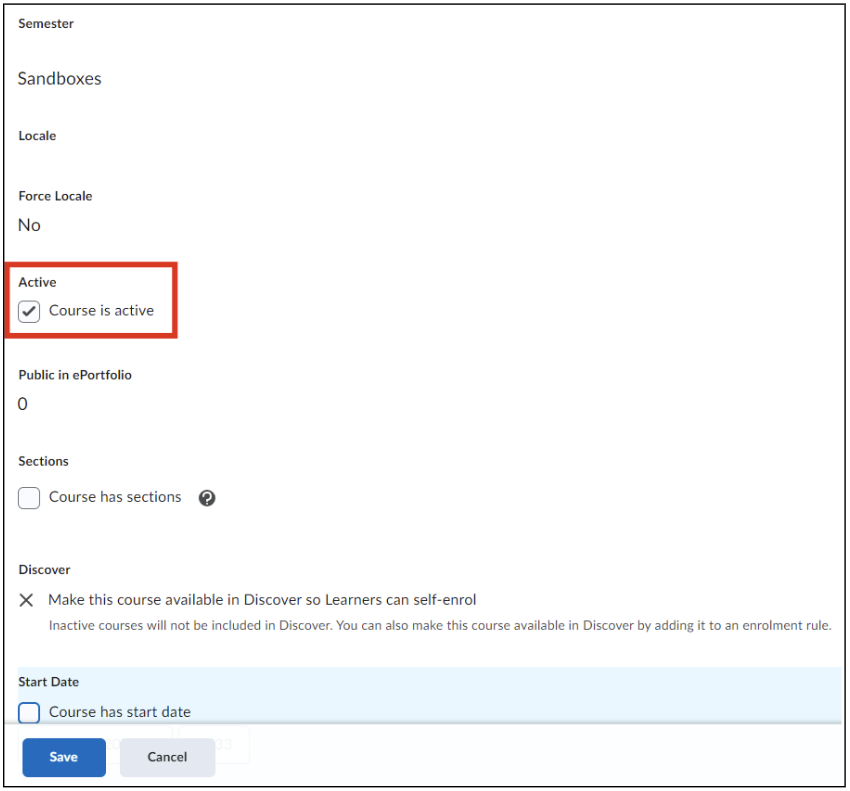 Uncheck the box to set the course to inactive.
Note: Make sure to set the box back to active, by following the same steps, once students need to see the course again.