
How do I set up groups (in bulk)?
This guide explains how to create large numbers of groups at the same time by creating Group Categories. At the bottom of this manual, you can also find how to enroll students in groups in bulk.
At the bottom of the homepage of every course you can find the following widget. Using this widget, a classlist (.csv) can be downloaded and groups can be uploaded. You will be referred to an instruction page if you click on ‘Instructions’. Read this as well, here you can also find an example import file there.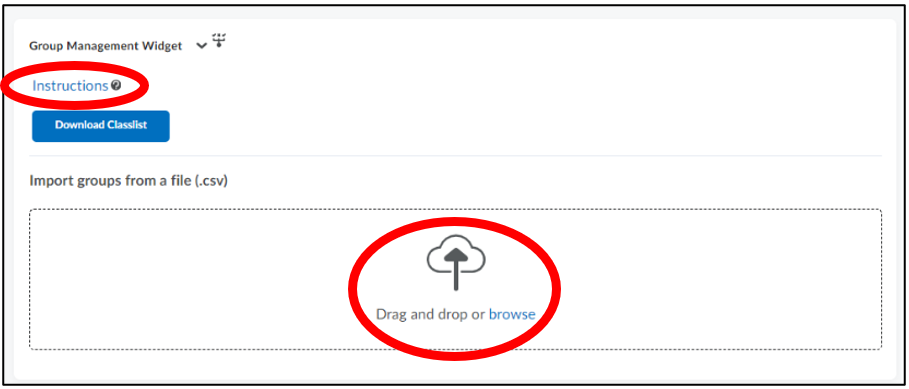
Adding groups
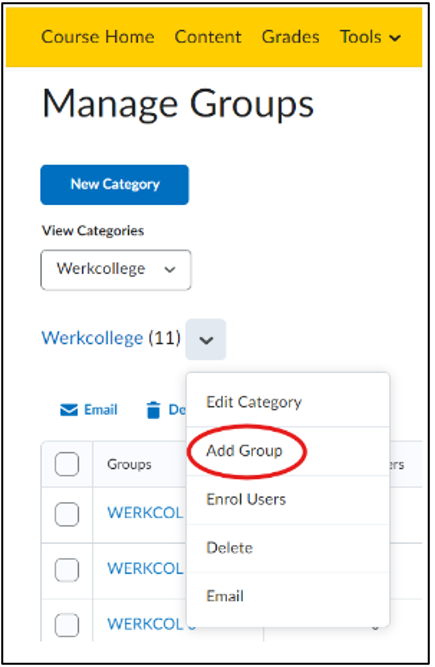
Use the Navbar within the course and navigate to ’Groups’ via ‘Course Management’ and create a new Category.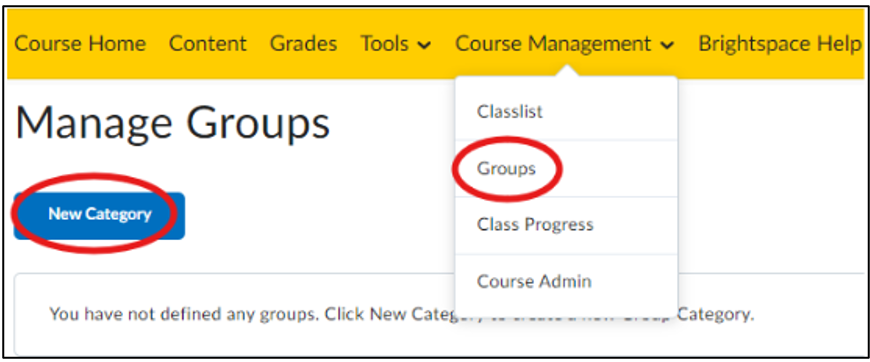 Give the category a name.
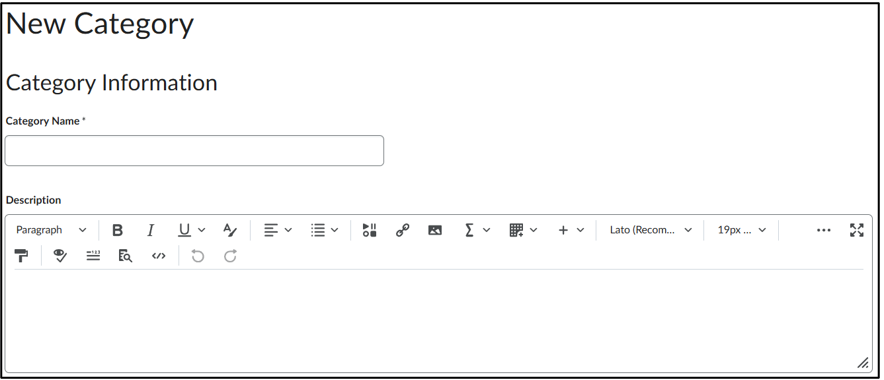 For example, each category could represent an assignment. In this example, you might name the category: ‘Groups for Assignment 1’. If you want to create groups according to OSIRIS’ subdividing students in groups, then name the category the Instructional Mode (Werkvorm in Dutch) from OSIRIS that you want. For example, the names ‘Seminar (Werkcollege in Dutch)’ and ‘Practical (Practicum in Dutch)’ are often used:
This way, you can use a CSV from OSIRIS’ grouping to enroll students in the same groups. This is further explained under “Only follow these next instructions if you want to enroll students based on OSIRIS’ grouping”.
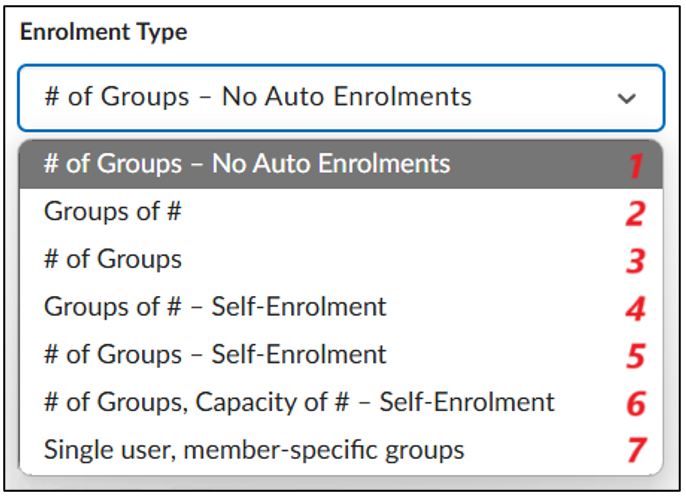
Now choose the enrollment type. These are the different options:
- # of Groups (1, 3, 5): This enrollment type creates a set number of groups. Fill in the number of groups you want to create.
- # of Groups, Capacity of # (6): This enrollment type also caps the number of students that can be enrolled into one group.
- Groups of # (2, 4): This enrollment type creates a number of groups calculated by the number of enrolled students divided by the group size, which you can set.
- Single user, member specific groups (7): This enrollment type creates a number of groups that can only contain a single user.
By default, the students in your course will be automatically enrolled into the groups you created. If you don’t want this, select one of these options with the enrollment type:
- No auto enrollments (1): With this option, students will not be automatically enrolled into the groups. You can manually add each student to a group or add an excel sheet to add students to groups.
- Self-enrollment (4, 5, 6): With this option, students will not be automatically enrolled into the groups. The students themselves can enroll into a group. This way, they can work together with whomever they want.
 Now, you can select the appropriate amounts that you have to fill in according to your enrollment type.
Then, if you want, you can restrict students being enrolled into groups to students that are already in other groups or categories.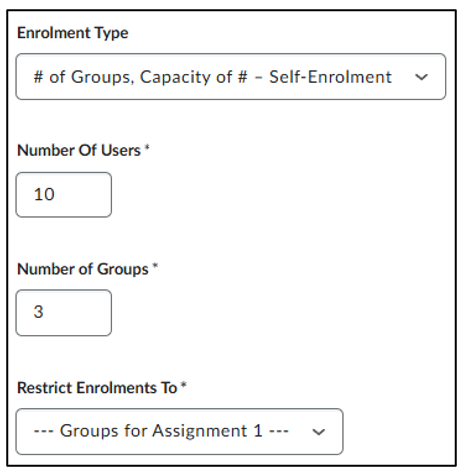
 It is always possible to create an unlimited number of groups at a later date
If you leave the prefix empty the groups will automatically be created as: Group #. If you want to give them a different name you can use a different term here. For example, WORKGROUP. They will be numbered based on the number of groups you selected. Do not use a space behind the word you are using, this will be automatically added in front of the number. It is also possible to configure some advanced settings. Scroll down and if the settings are not yet visible, click ‘Show Advanced Properties’ and ‘Expand the additional options’.
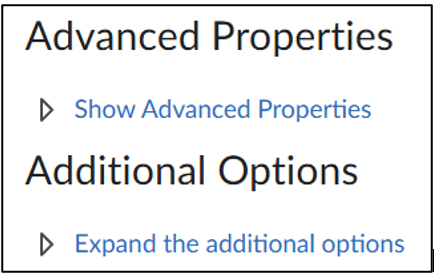 Uncheck all boxes in Advanced Properties and Additional Options, unless desired otherwise. These settings can also be changed after making and filling in the groups. (See below)
 Click ‘Save’. Groups will now be automatically created based on the settings you provided. This can take a moment.
Only follow these next instructions if you want to enroll students based on OSIRIS’ grouping:
Go to the course homepage, scroll down towards the Group Management Widget. This should be at the bottom of the course homepage.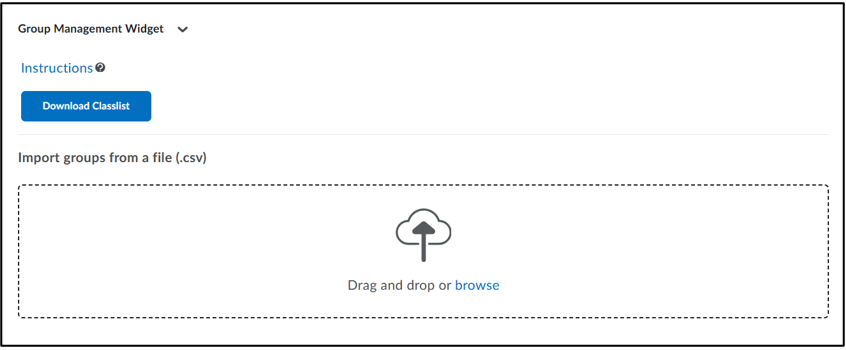 Now make a CSV based on the groups in Osiris. A couple of examples can be found below.
- Use Osiris GROUP NUMBER.
- Make sure all GroupName corresponds to the group names that you have created.
- As action only ENROLL and UNENROLL can be used, this is not case sensitive.
- Only the fields Username, GroupName, GroupCategoryName, and Action are mandatory. Other fields may be left empty.
- The name of the import file must start with ‘classlist_’.
- If you save the file as CSV from an Excel-file, make sure to change the ‘;’ to ‘,’.
- Make sure that the leading zeroes are in the file.
- The widget does not work with FireFox, use Chrome.
Drag and drop the CSV onto the widget or browse for a CSV file and click import.
Errors
If there are errors in the file, a new file will be downloaded automatically which will contain the error message. Common error messages can be found on the Instructions-page in the widget. You can also find more detailed instructions there.
One possible error that is not in this file is if there is a group in the CSV-file which doesn’t exist in the category. The category will then automatically be created, however, it will create this new category for every single user leading to many copies of the same category each filled with one user. So, make sure to create the categories before filling a group using CSV.
Examples
Example 1: normal enrolment of 3 students.
Example 2: moving student 2 from group 2 to group 1.