How to edit a video in Brightspace
This manual consists of three different sections, namely:
- How to upload a video
- How to open the video edit environment
- How to edit the video
3a. How to add a table of contents
3b. How to trim the video
3c: How to add captions- Auto-generating
- Uploading
- Editting
Sectie 1: Upload video
If you have already uploaded the video, you can skip this step.
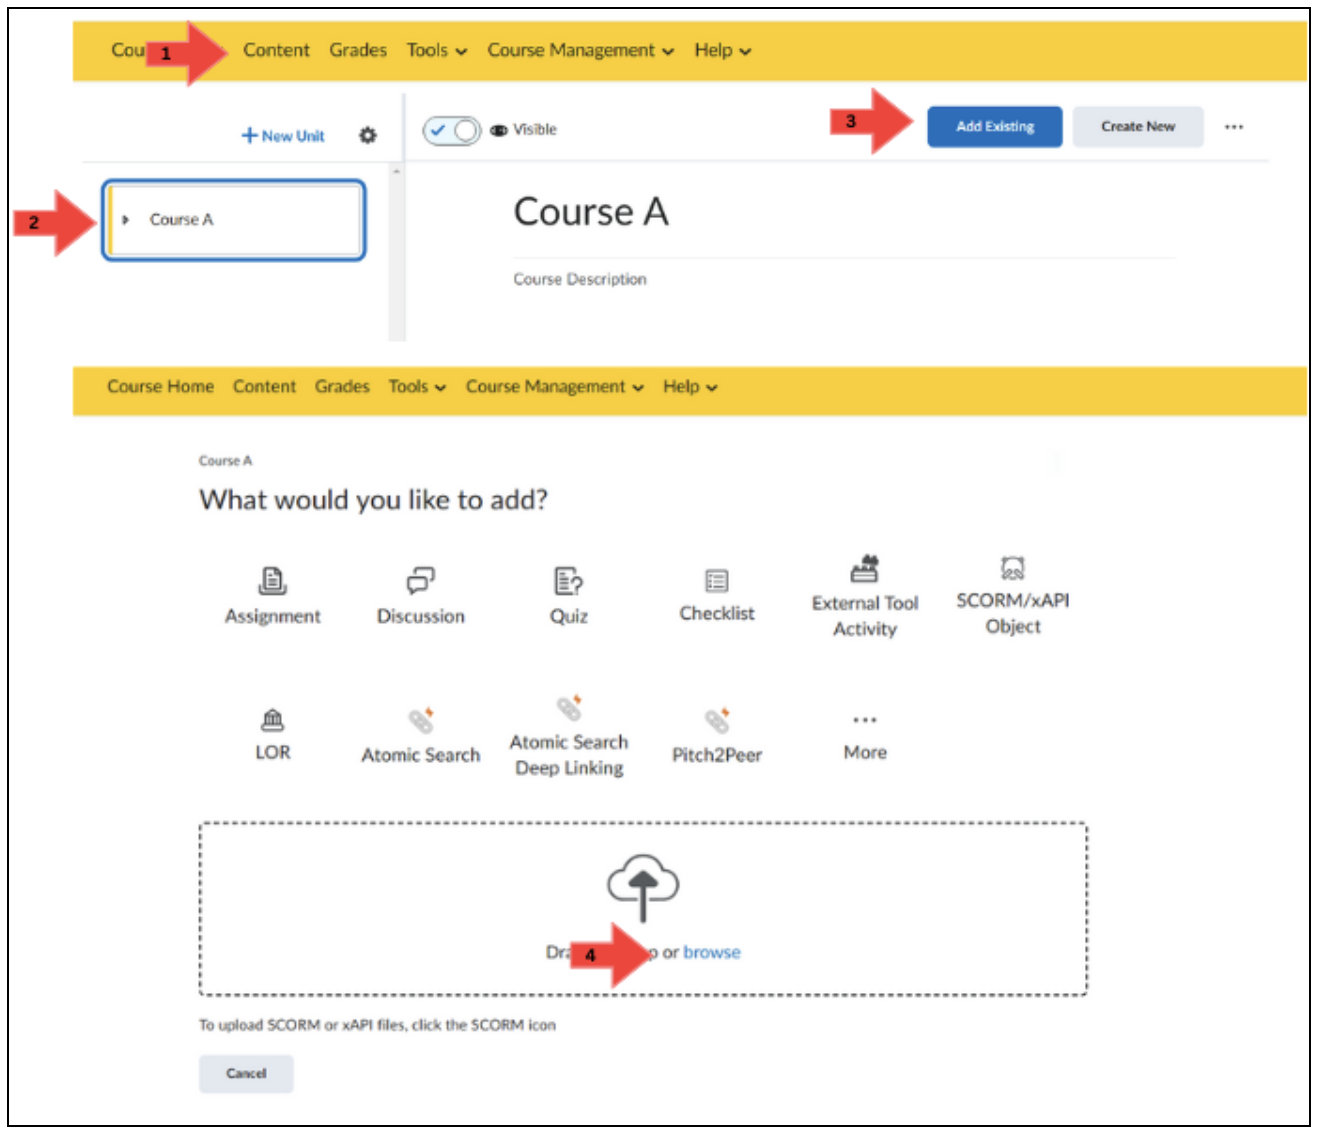
Step 1: Navigate to Content in the menu bar of the course.
Step 2: Select the course you want to upload the video to.
Step 3: Click on the button “Add Existing”.
Step 4: Click on browse and add the video from your computer.
Sectie 2: Open video edit environment
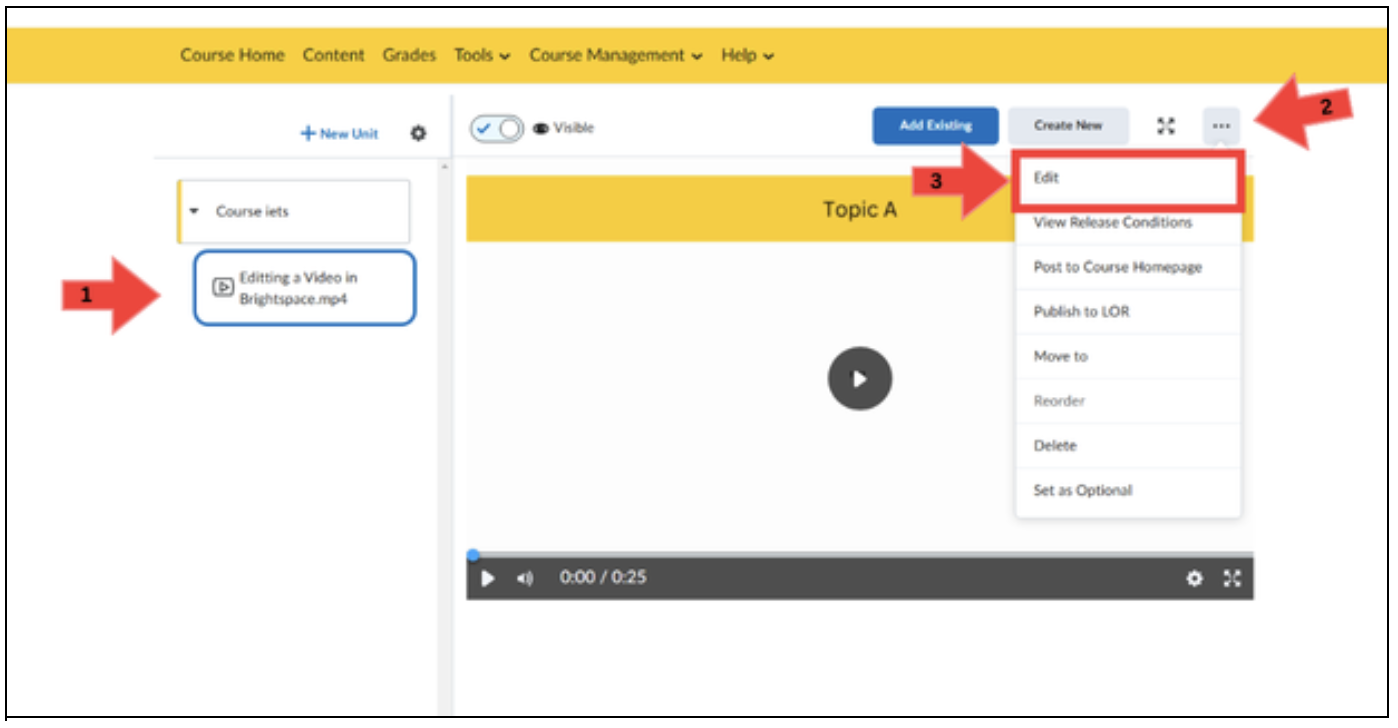
Step 1: Within Content select the video file.
Step 2: Click on the three dots in the upper right corner.
Step 3: Click on “Edit”.
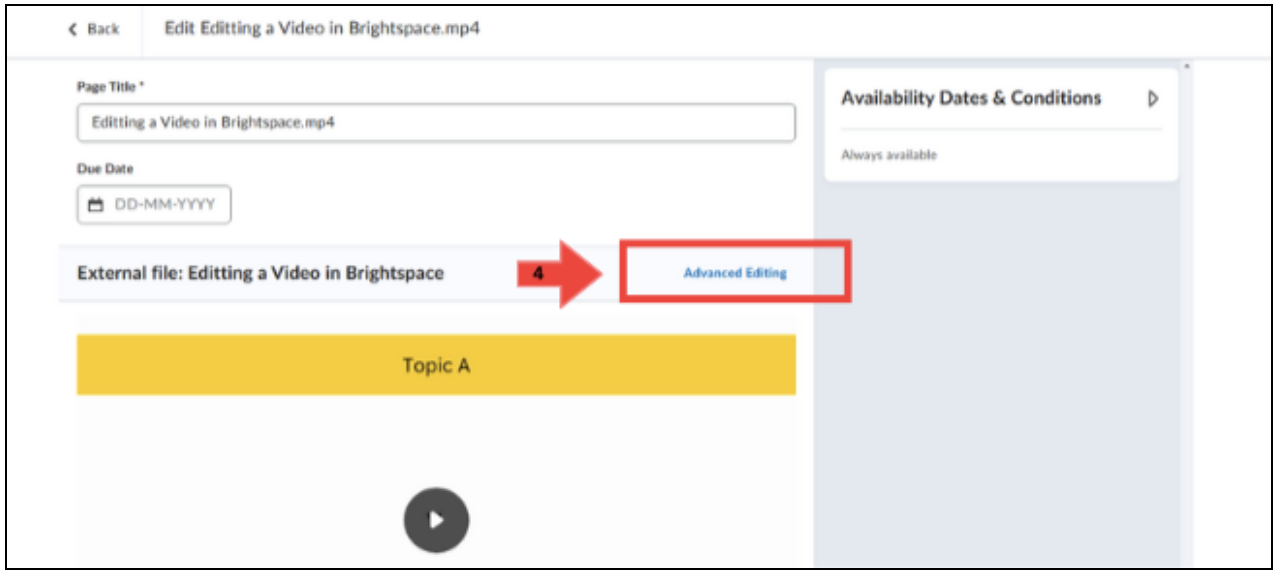
Step 4: On this screen details such as the page Title, due date and whether it is visible for students can be edited. For video editing we need to go to advanced editing.
Sectie 3: Edit video
The video edit environment can be used to add a table of contents (assign chapters) to the video, trim the video and to add subtitles. Which will be explained respectively in section 3a, 3b and 3c.
3a. Add a table of contents to the video
Step 1: Type the title of the chapter.
Step 2: Click on “+” to add the chapter.
Step 3: Add all the chapters you want to add.

Step 4:
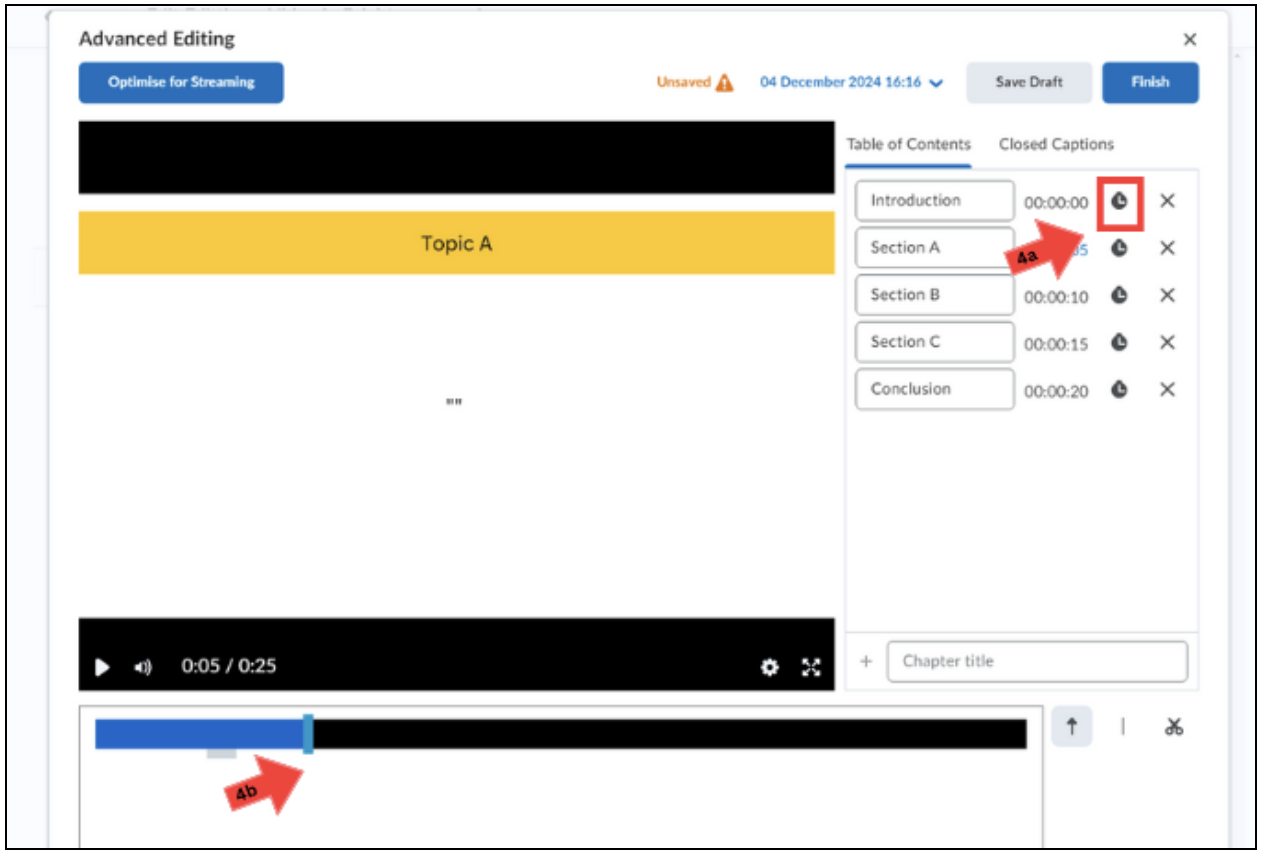
(a) Change the start times of the chapters by clicking on the stopwatch icon next to the start time.
(b) Then move the blue bar to the correct start time. Repeat for every chapter. See image on the next page.
Step 5: Click the Finish button when you are finished or the Save Draft button if you want to continue editing.
3b. Trim a part of the video
Steps are shown in pictures below.
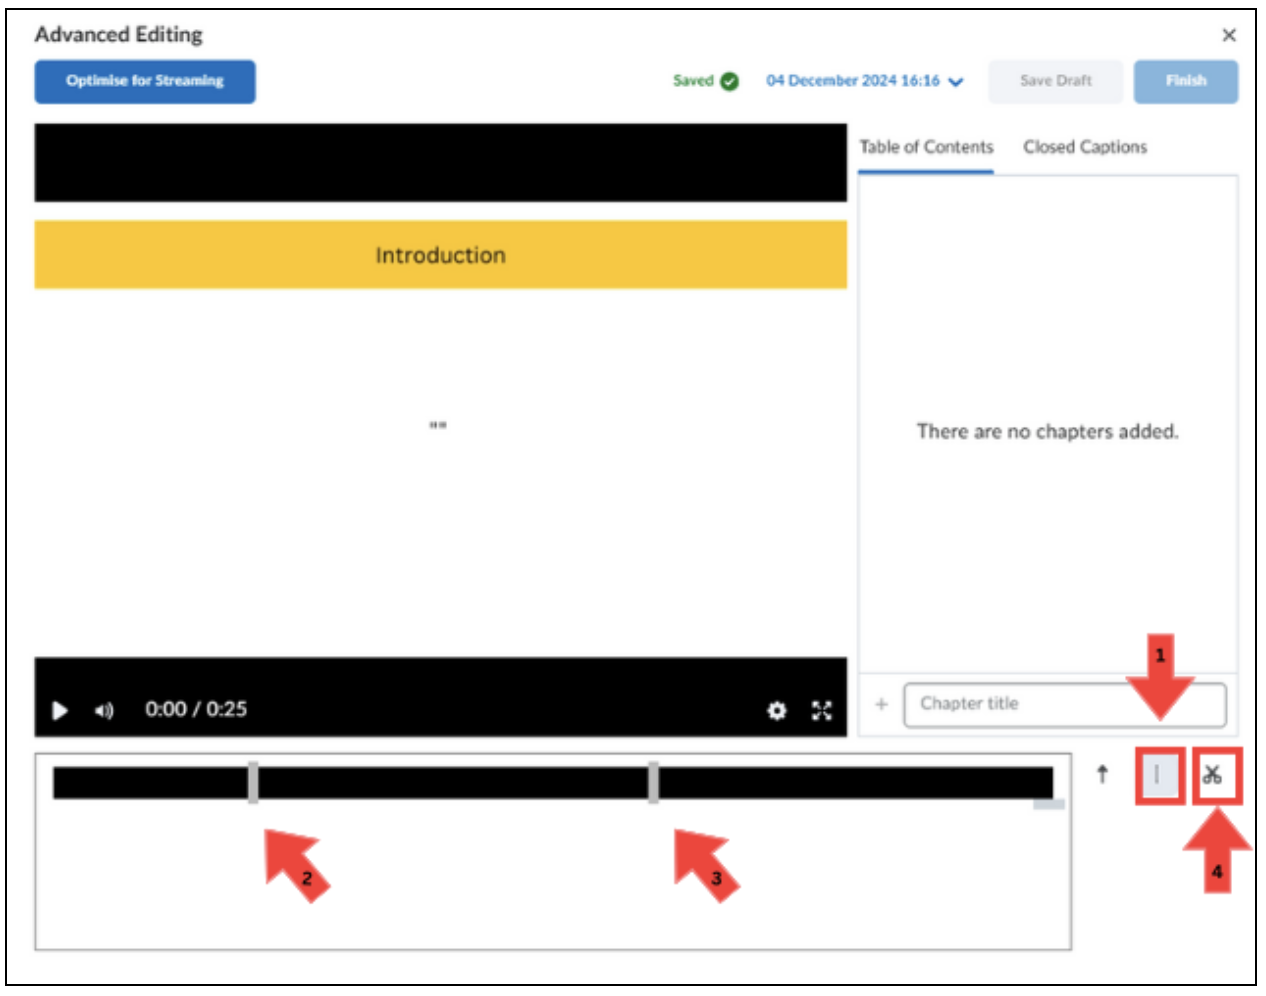
Step 1: Select the “|” to the right of the time bar.
Step 2: Select the start time on the time bar of the part that you want to remove. A mark is placed at that time point. This is referred to as the in point.
Step 3: Select the end time on the time bar of the part you want to remove, A mark is placed on that time point. This is referred to as the out point.
Note: You can add as many time marks as you want by using the “|” icon. There is no difference between an in or out point. It is an in or out point depending on the section selected and you can thus swap step 2 and 3 if you please.
Step 4: Select the scissors icon on the right side of the time bar.
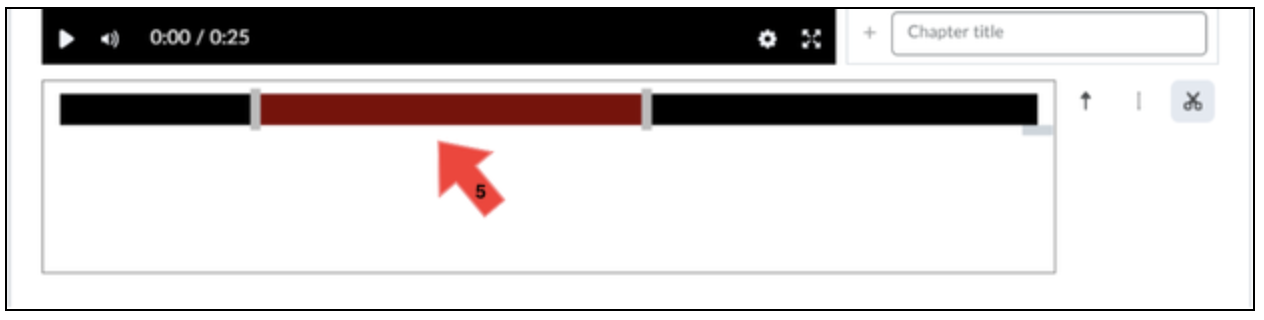
Step 5: Click on the part of the time bar you want to remove. A part can only be removed if it has an in and an out point (mark). When this is done successfully the part will become red and will be skipped when the video is played.
Step 6: Click the Finish button when you are finished or the Save Draft button if you want to continue editing.
 3c. Add captions to the video
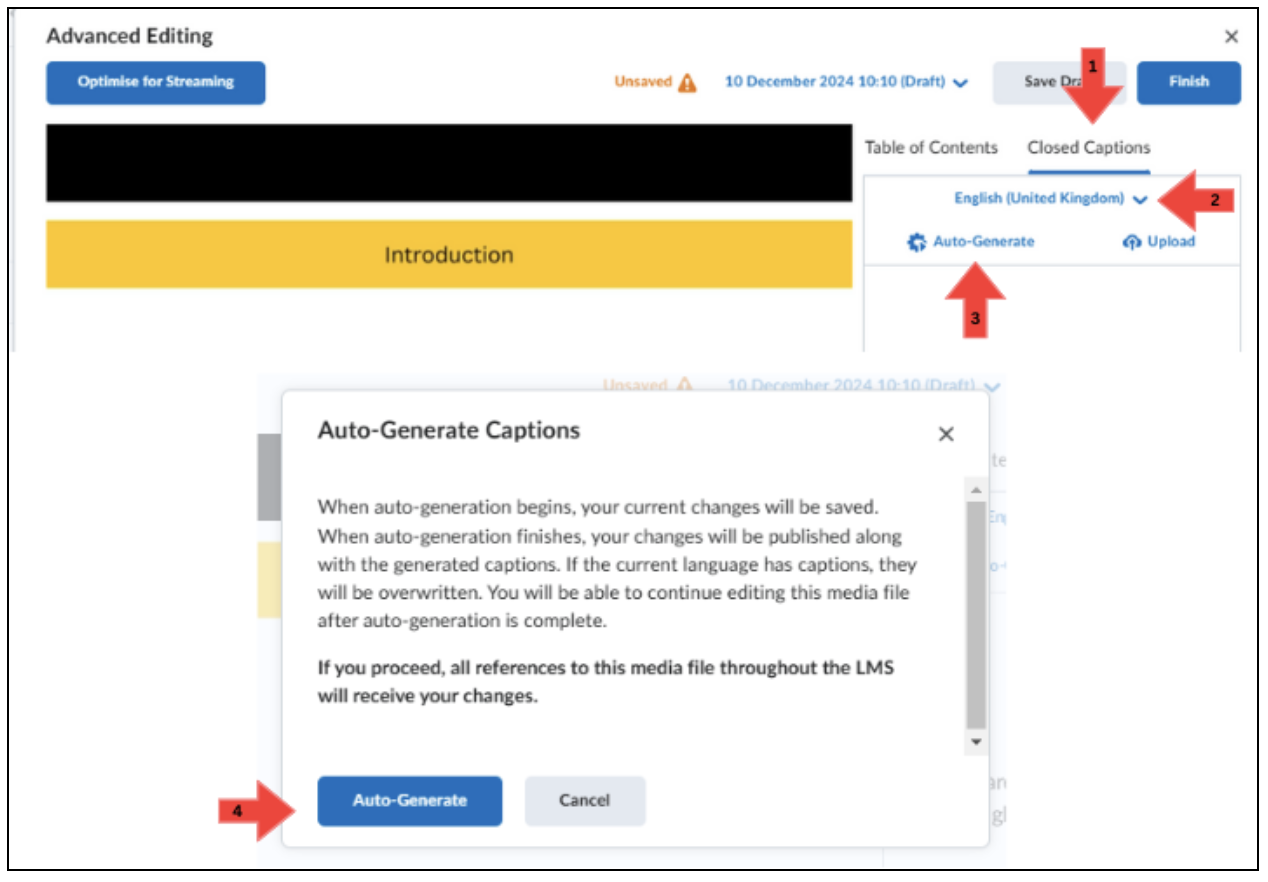
Step 1: Go to Closed Captions.
Step 2: Verify if the language displayed in the drop-down menu is the correct language for the captions.
Step 3: Click Auto-generate.
Step 4: Click Auto-generate on confirmation pop-up.
Step 5: Processing captions may take up to an hour depending upon length of video.
3d. Add existing caption file to the video
Step 1: Go to the Closed Captions tab.
Step 2: Click the Upload button.
Step 3: Open your WebVTT (.vtt) or Subrip (.srt) captions file with the pop-up that comes up. (any other file format then .vtt or .srt will not be accepted).
Step 4: Click the Finish button when you are finished or the Save Draft button if you want to continue editing.

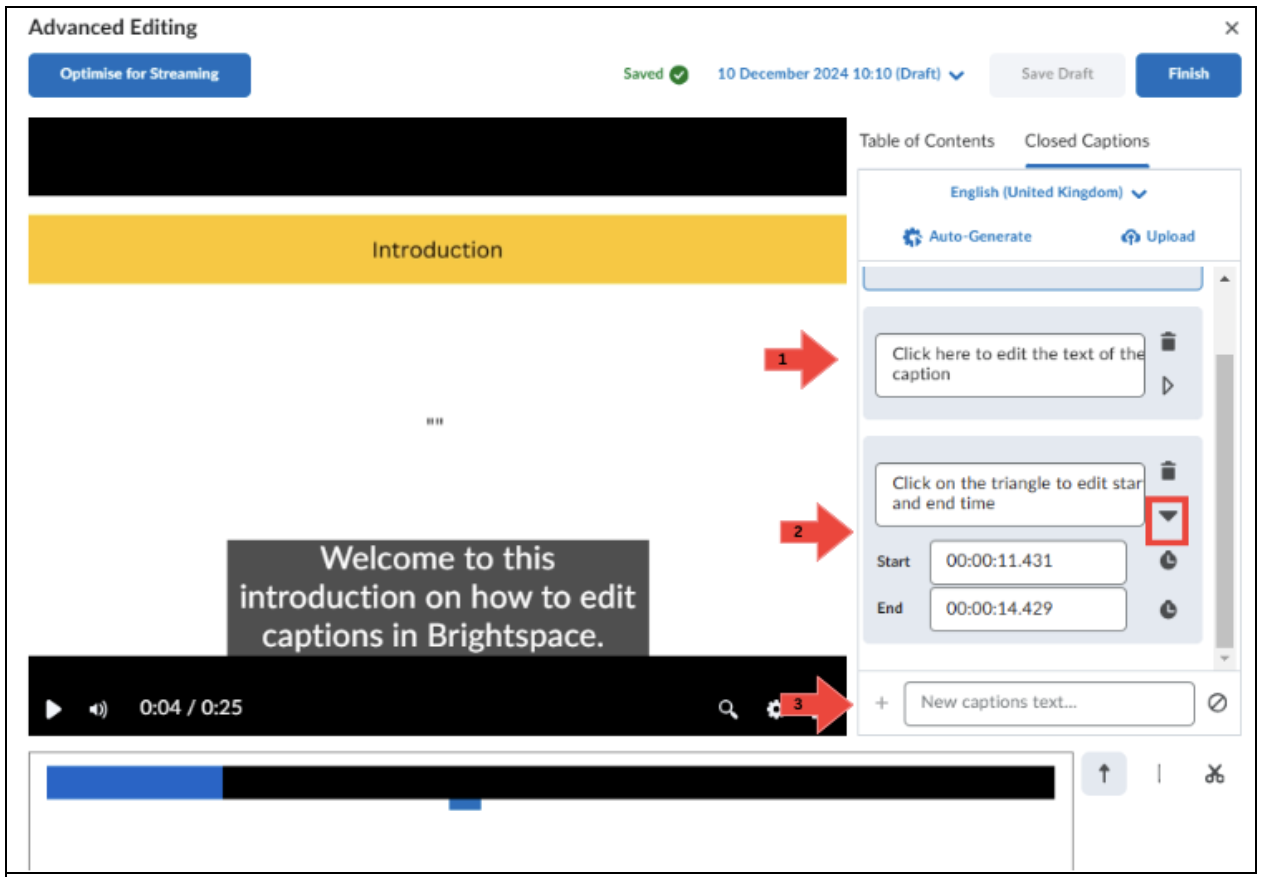
3e. Edit captions
See picture below for visualization.
Go to Closed Captions
- Editing text of captions: Captions will be displayed in blocks of text, as they will appear when playing the video. Click on any block of text to edit text.
- Changing start- and end time of a caption: Click on the triangle icon below the trash can icon. The menu will open up further and you can enter the start- and end time of your choice.
- Adding new captions manually: You can add new Captions as well by typing text in the box that states “New captions text…”. Type your caption text here, and either add it by pressing enter or the ‘+’ icon to the left of the box.
Click the Finish button when you are finished or the Save Draft button if you want to continue editing.