
How do I set up Grade Categories?
What are Grade Categories?
Within a Gradebook, you can create different Grade Items for the various tests, practical assignments, and more grade components. For the overview, it can be useful to divide these Grade Items into categories. To do this, you can create Grade Categories.
How do I find the Grade Categories settings?
First Grade Category
This only works for setting up your first Grade Category. Otherwise, otherwise skip to Add more categories.
From the course homepage, you can access Grade Categories by clicking ‘Grades’, and then clicking ‘Setup Wizard’ in the submenu.  If you have not yet set up the Gradebook, you cannot yet create Grade Categories, and there will also be a message that the Gradebook still needs to be set. In that case, follow the manual: How do I set up a Gradebook with the Grades Setup Wizard for the first time.
Once the Gradebook is set up, under Setup Wizard you will find these options; click ‘Create a New Grade Category’: 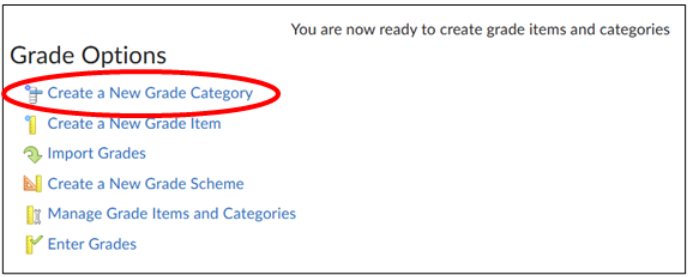 Add more categories
This is the normal procedure for creating a Grade Category if the Gradebook is already set up.
From the homepage, go back to ‘Grades’, then click ‘Manage Grades’. Here you will see a list of Grade Categories and Grade Items. Click on ‘New’ → ‘Category’ to create a new category. 
How do I set a Grade Category?
In this section, example values have been entered in the various options to illustrate. Options marked with * are required to be filled in.
Properties – General
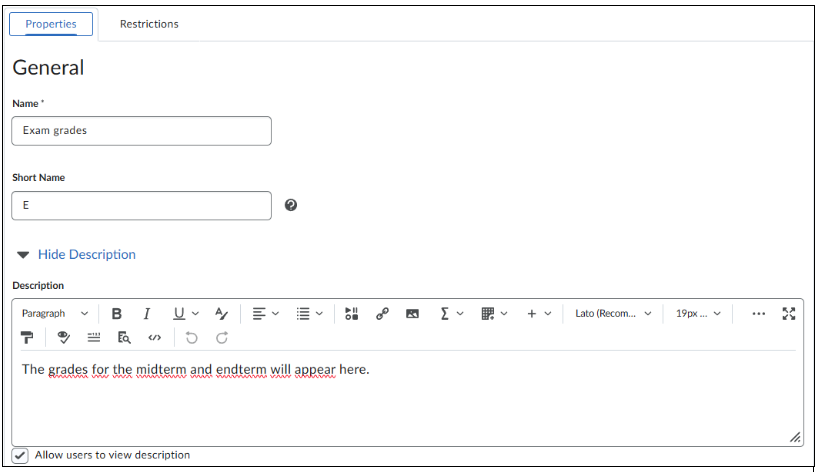
This contains general information about the Grade Category.
- Name* is the name of the category.
- Short Name is the abbreviation of the category (for saving space).
- Description is the description of the category.
- Turn on ‘Allow users to view description’ if you want students to see the description.
 Properties – Grading
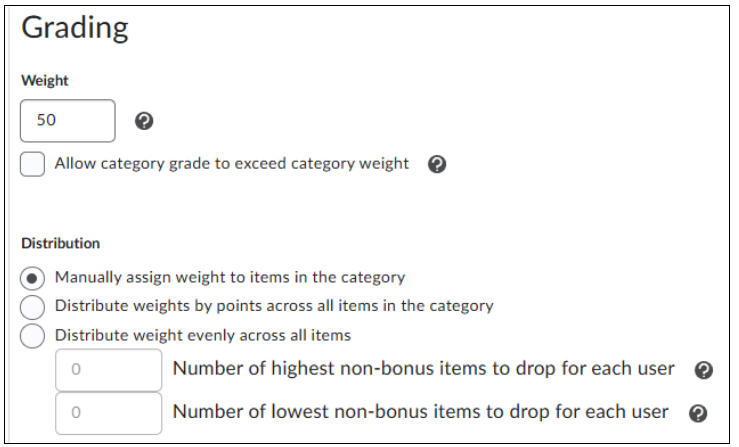
This subheading concerns settings for grading items within this category.
- Weight is the weight that this category, and therefore all grades within it, have in the calculation for the final grade.
- Turn on ‘Allow category grade to exceed category weight’ if grades within this category can exceed the normal maximum (for example, a 105% or a 10.5).
- Distribution is how the Grade Items within this category are weighted.
- ‘Manually assign weight to items in the category’ means that you can adjust the weights of the Grade Items in the category yourself.
- ‘Distribute weight by points across all items in the category’ means that the maximum number of points you can get for a Grade Item is also the relative weight for that assignment.
- ‘Distribute weight evenly across all items’ means that each Grade Item in the category has the same relative weight for the category grade.
- Number of highest non-bonus items to drop for each user is how many of the highest graded assignments are not included in the calculation.
- Number of lowest non-bonus items to drop for each user is how many of the lowest graded assignments are not included in the calculation.
 An example of how categories can be classified by weight:
The Exam grades are set to ‘Manually assign weight’ and the Practical grades are set to ‘Distribute weight by points’. 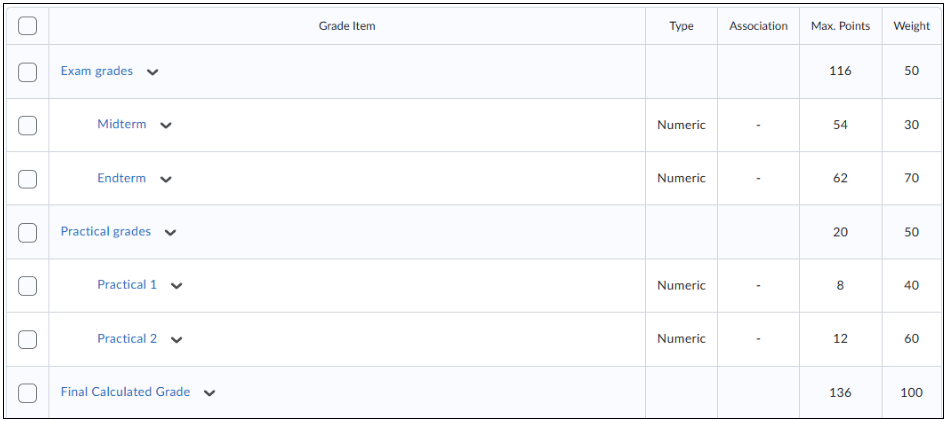 Properties – Display Options
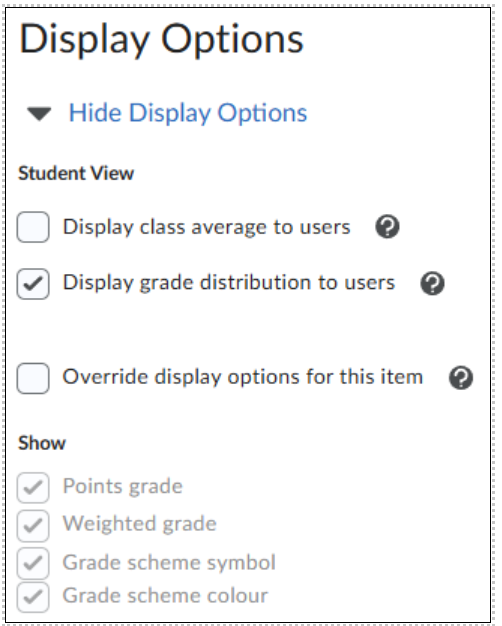
In the Display Options, you can adjust settings for displaying the category’s final grade to students.
Student View:
- Turn on ‘Display class average to users’ if you want to show the average grade of the entire class to the students.
- Turn on ‘Display grade distribution to users’ if you want to show the distribution of grades of the entire class in a graph to the students.
- ‘Override display options for this item’ allows you to override the Gradebook’s display settings for the students.
- ‘Points Grade’ shows the points earned.
- ‘Weighted grade’ shows the weighting of the grade.
- ‘Grade scheme symbol’ shows the grade scheme.
- ‘Grade scheme colour’ adds color to the grade.
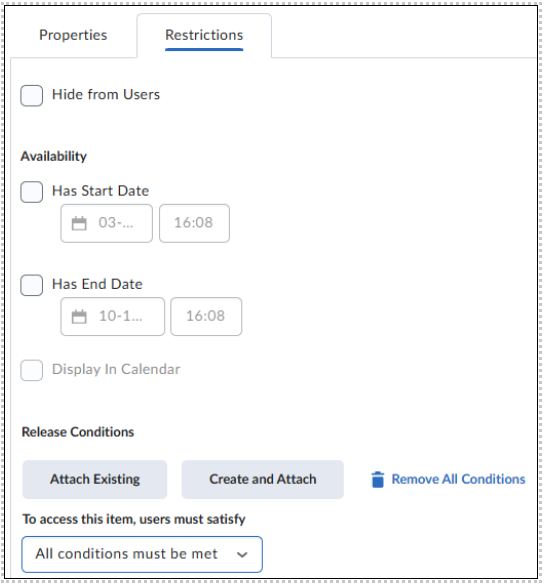
 Restrictions
Turn on ‘Hide from Users’ to not make the category visible to the students (yet). Availability includes options to make the category available only within a certain time.
- With ‘Has Start Date’ you can set a date and time when the category should become available to the students.
- With ‘Has End Date’ you can set a date and time when the category should no longer be available to the students.
- Turn on ‘Display In Calendar’ if this start and/or end date should be put in the calendar of the course.
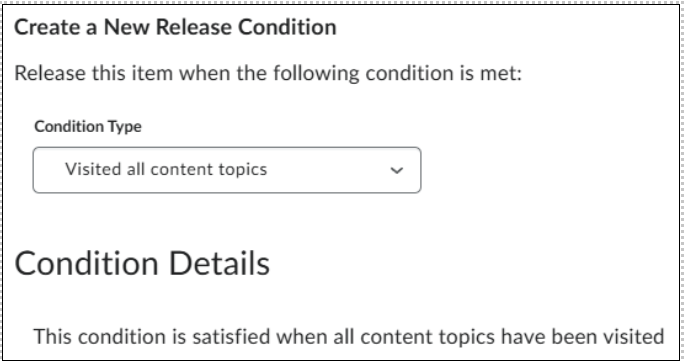
- Release conditions are options to make the Grade Category available to students if a certain condition is met. An example of this could be to make the Grade Category available if a student has visited all Content Topics.
If you have added one or more release conditions, you can also choose whether the Grade Category should become available if one or all of the release conditions are met.
 Saving
Of course, save the changes by clicking:
- ‘Save and Close’ to save and close the settings.
- ‘Save and New’ to save and start creating a new Grade Category.
- ‘Save’ to save and continue editing settings.
- ‘Cancel’ to close the settings without saving the changes.

To create new Grade Items, follow the manual: Publishing grades to your students.