Units/lessons/folders/topics
Brightspace allows structuring a course using a folder structure. This structure consists of four levels, ordered from largest to smallest: Units/Lessons/Folders/Topics. It is possible to include up to five “layers” (Unit > Lesson > Folder > Folder > Topic) of content. However, we recommend using no more than three layers for optimal user experience. This is explained further below with an example.
This article consists of two parts:
- What are Units/Lessons/Folders/Topics?
- How do I create Units/Lessons/Folders/Topics?
What are Units/Lessons/Folders/Topics?
Units, Lessons, and Folders are all types of ‘containers’ that can store topics or other containers. They can be used to create a hierarchy of information within your course.
1. Units
- Units are the largest organizational sections in a course where lessons or topics are structured by theme or chapter.
- Example: In the course “Photosynthesis” there are three units. Introduction, which contains the syllabus, a short Quiz to assess prior knowledge, a link to sign up for office hours, and other general course information; Lesson Days, which includes the weekly structure and all lesson materials; and Assignments, which contains all assignment information and links to submission points.
2. Lessons
- Lessons cover smaller sections within a unit that focus on a specific learning objective.
- Example: In the course “Photosynthesis” under Lesson Days, the Lessons could be:
Week 1: Light Reactions
Week 2: The Calvin Cycle
3. Topics
- Topics consist of the specific content files within units, lessons, or folders.
- Example: In the course “Photosynthesis” in the Lesson Days Unit and in the Week 1 Lesson, these could be:
A video about plant cells
An HTML page with information about the next lecture and a PDF with the slides
A quiz on photosynthesis
4. Folders
- Folders are containers used to further organize related content (such as documents, videos, or assignments) into more specific sections.
- Example: A Lesson for “Week 1” contains the Topic (the file) “Practice Exercises”. Within this, a folder can be created to store the files “Answer to Question 1” and “Answer to Question 2”. This is a smaller category of files within a larger category of files.
We recommend limiting the use of Folders as much as possible. While it may seem practical and a good way to further structure content, keep in mind that you and your students may need to click four times to finally reach the relevant information.
General example of Units/Lessons/Topics/Folders:
As shown below, there are generally three ways to structure content:
- Topics are placed directly in a unit, without using Lessons and Folders;
- The Unit consists of two (or more) Lessons, each with its own Topics;
- The Unit contains two Lessons, and each of these Lessons has its own Folders with several Topics inside.
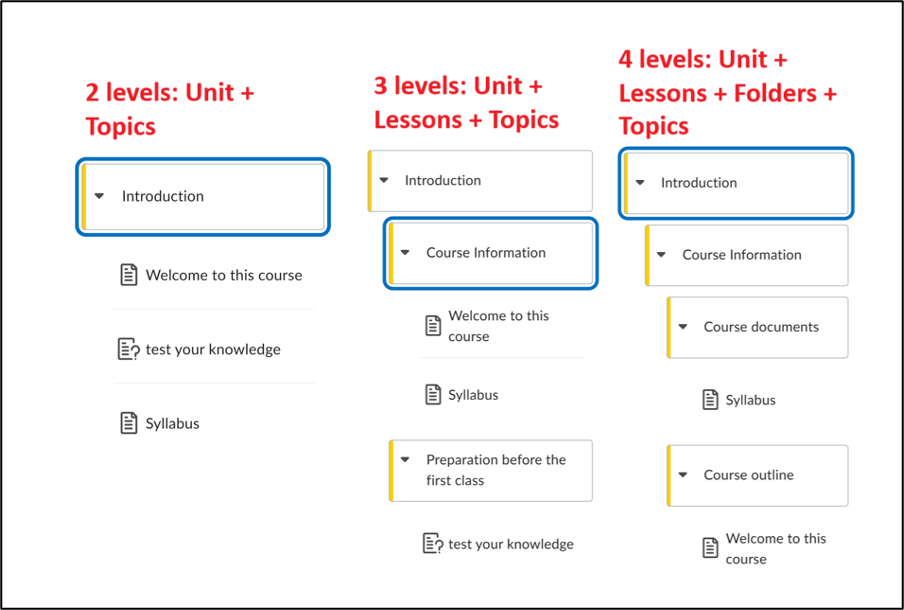
Why would I use 2 levels: Units + Topics?
- The information that you and your students need is accessible within just two clicks. This makes it very easy to use and keeps everything clear and organized.
Why would I use 3 levels: Units + Lessons + Topics?
- Including Topics within Lessons can be a useful way to group information.
- For example, by exam type, by week, or by student group.
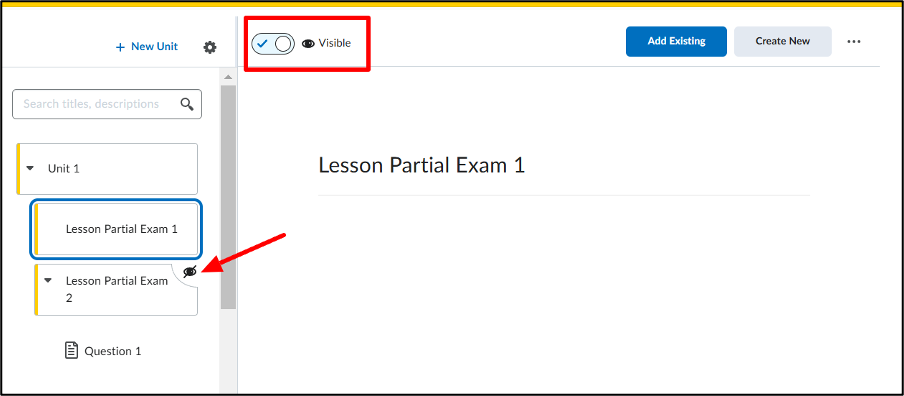
- Additionally, you can set release conditions for a single Lesson and its underlying content while keeping the rest of the Unit visible. You can hide it by clicking the button next to ‘Visible’.
- For example, in the image below, the content of Lesson Partial Exam 1 is set to visible, while the information in Lesson Partial Exam 2 is still hidden (eye icon with a slash through it).
Why would I use 4 levels: Units + Lessons + Folders + Topics?
- Although it may seem practical and a good way to further structure the content, keep in mind that both you and your students will need to click four times to finally reach the relevant information.
- For this reason, we strongly discourage using Folders. Consider restructuring the content or using another Lesson instead, such as:
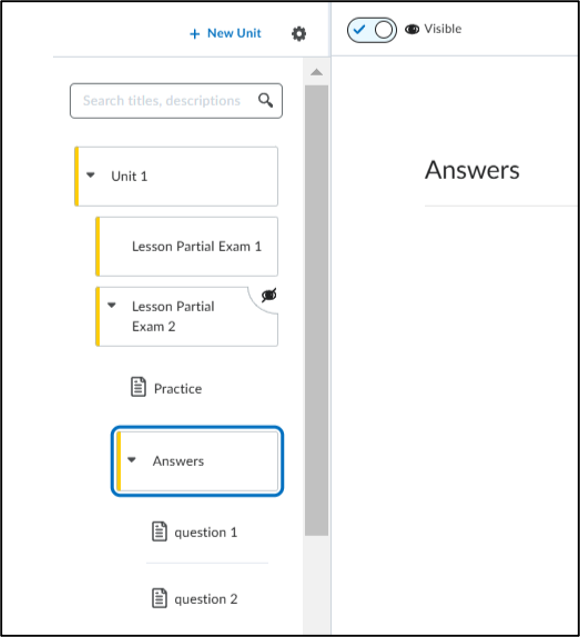
- In the image below, you could consider placing the topics question 1 and question 2 directly under the Lesson Partial Exam 2,
- Or you could create a new lesson called Answers Partial Exam 2 with the topics question 1 and question 2 and set the Lesson to invisible until you want to release all the answers.
How do I create Units/Lessons/Folders/Topics?
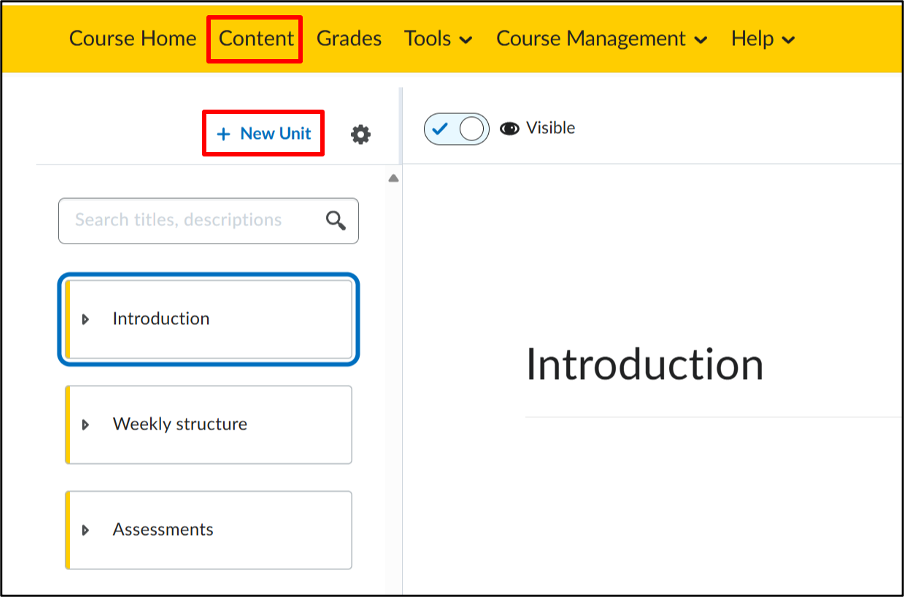
- Go to the Content tab in the yellow navigation menu.
- On the left side of the screen, you will see an overview of all existing Units. If no Units are present yet, they must be created first before Lessons, Folders, and Topics can be added.
- Create a new Unit by clicking on ‘+ New Unit’.
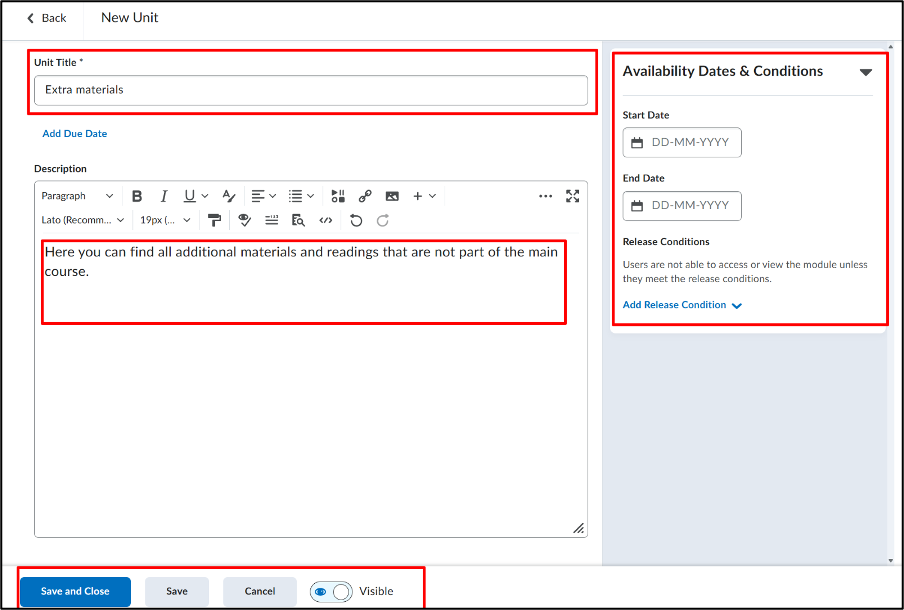
4. This will take you to the New Unit screen. Here, you can give the Unit a name, provide a short description of its content, and format it using the HTML editor.
Optionally, you can set availability dates and conditions.
This is useful for gradually releasing content and ensuring that students progress through the course material in the correct order.
On the right side of the screen, you will see the Availability Dates & Conditions section:
- Start Date: Set the date from which students will have access to this Unit.
- End Date: Set the date until which the Unit remains visible.
- Release Conditions: Add optional conditions for access, such as achieving a certain score on a quiz.
5. Click ‘Save and Close’ to publish the Unit, ‘Save’ to save it as a draft, or ‘Cancel’ to discard changes.
Creating a Lesson:
A Lesson is a smaller section within a Unit.
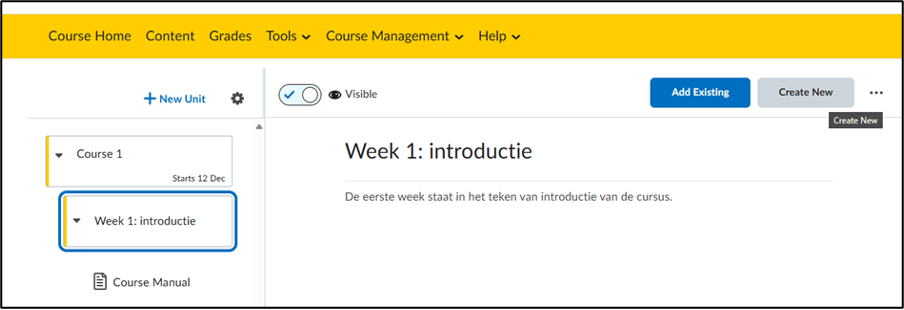
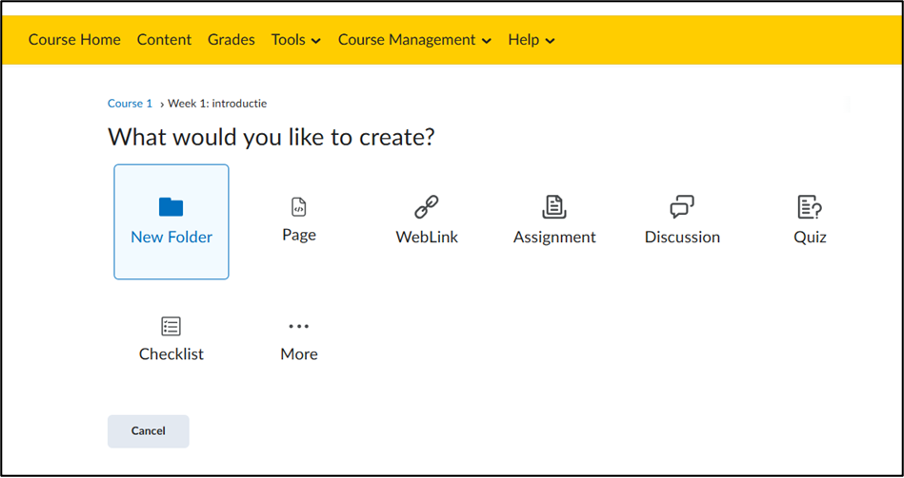
- Create a new Lesson by clicking on the relevant Unit and then selecting ‘Create New’ in the top right corner.

2. You will be taken to the next page, which displays several options. Click on ‘New Lesson.’
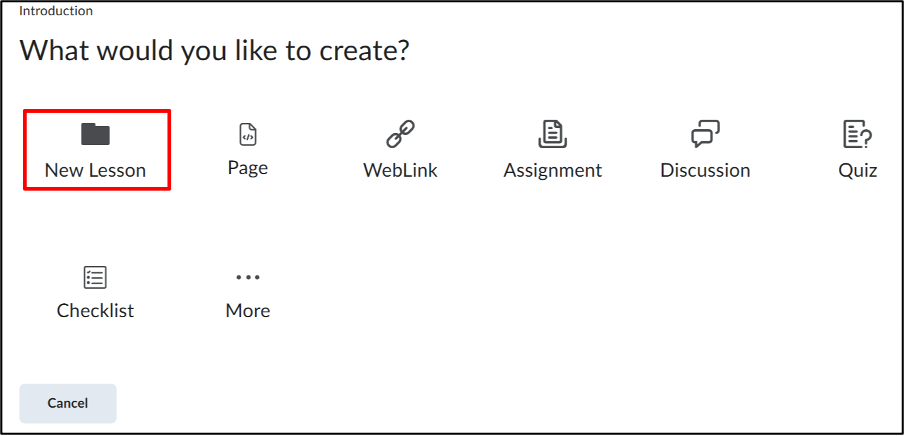
3. You will now be taken to the New Lesson page.
4. Fill in the following details:
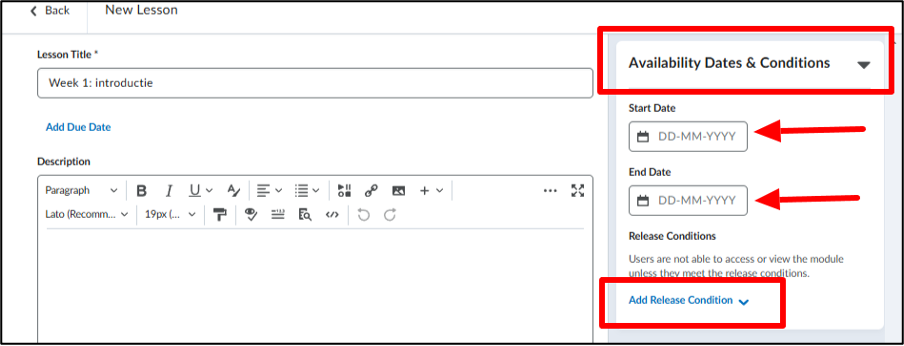
- Lesson Title: Provide a clear and descriptive title, for example, “Week 1: Introduction.”
- Description: Add a short description explaining the content and objectives of this Lesson. For example: “The first week focuses on an introduction to the course.”
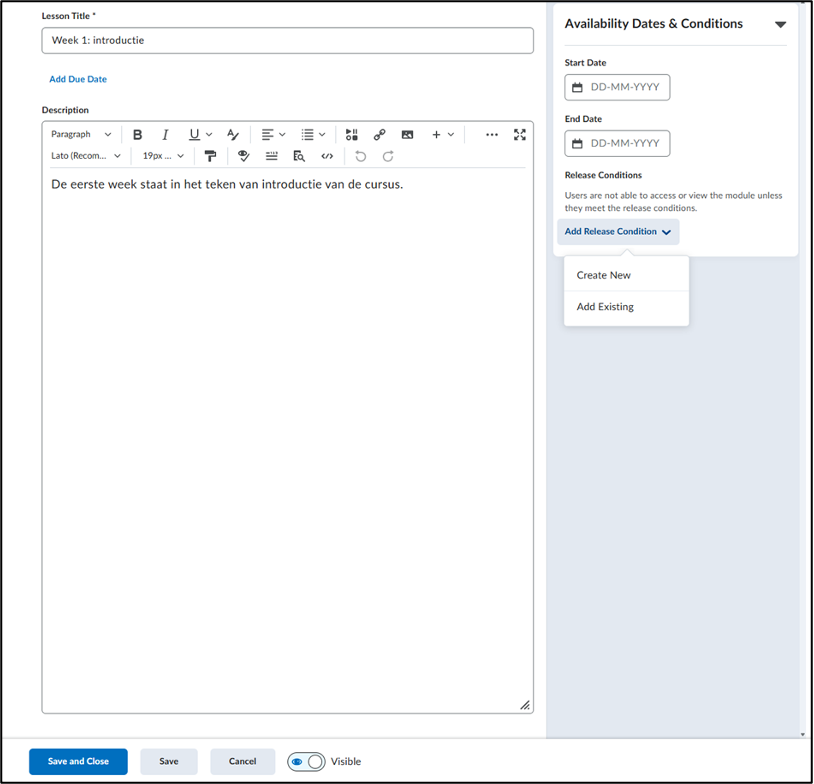
5. Set availability dates and conditions. This is useful for gradually releasing content and ensuring that students’ progress through the course material in the correct order.
On the right side of the screen, you will see the Availability Dates & Conditions section:
- Start Date: Set the date from which students will have access to this Lesson.
- End Date: Set the date until which the Lesson remains visible.
- Release Conditions: Add optional conditions for access, such as achieving a certain score on a quiz.
6. Click ‘Save and Close’ when you are done. You can also choose:
- Save: Saves the changes but keeps the window open for further editing.
- Cancel: Cancels the creation of the new Lesson.
- With the ‘Visible’ toggle, you can decide whether students can see the Lesson immediately or if you want to make it visible manually later.

How do I create Topics within my Lesson?
Topics are files, such as an HTML page with information about the location of the next lecture or a PDF document with practice questions.
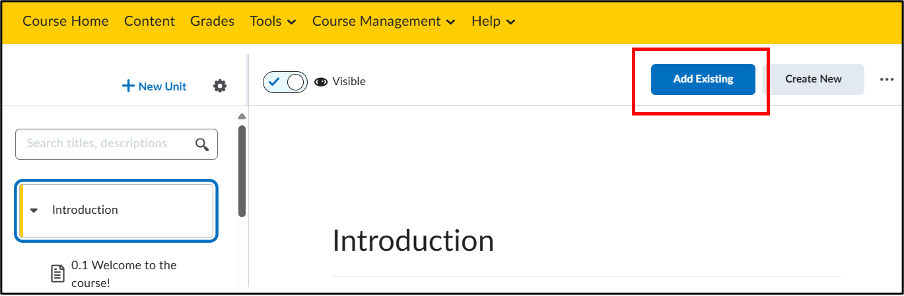
- If you want to create a Topic, navigate to the relevant Lesson or Unit.
- There are two different ways to add Topics, depending on whether the Topic already exists or if you want to create a new one:
a. If the Topic already exists, such as an Assignment or a PDF of the syllabus:
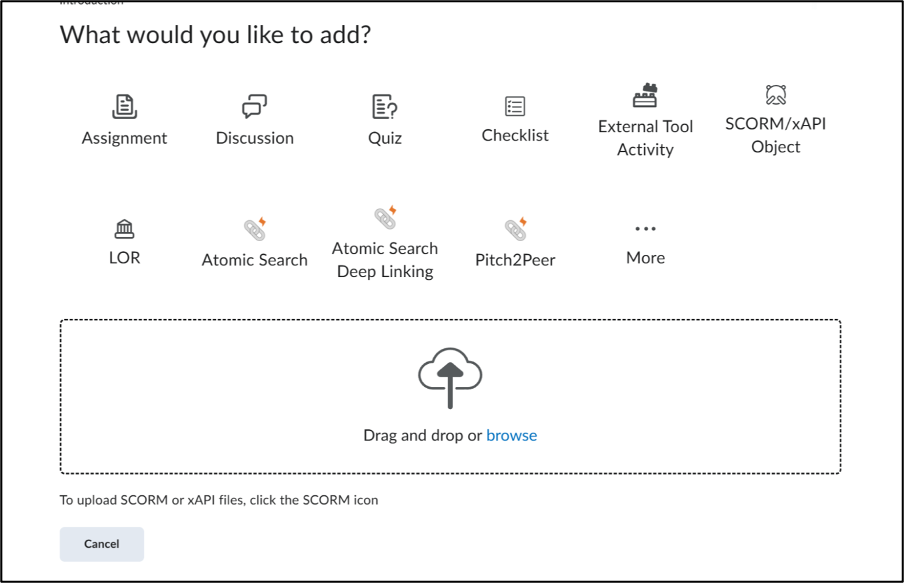
- Click on ‘Add Existing’.
You will then arrive at a page where you can choose from different options. These options will either take you to an overview of existing Assignments/Discussions/Quizzes/Checklists or to a screen where you can add external activities and/or SCORM/xAPI Objects. Additionally, you can upload files from your computer here.
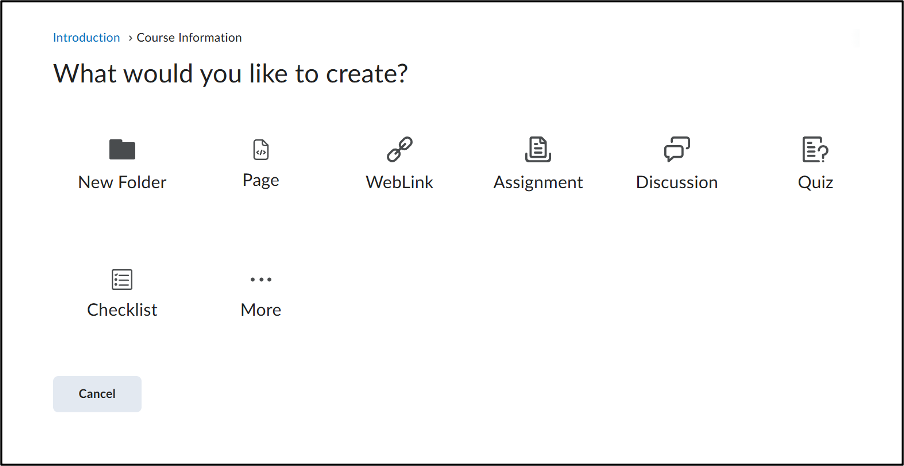
b. It is also possible to create new Topics and add them to your content. To do this, navigate to the relevant Unit/Folder and click on ‘Create New’.
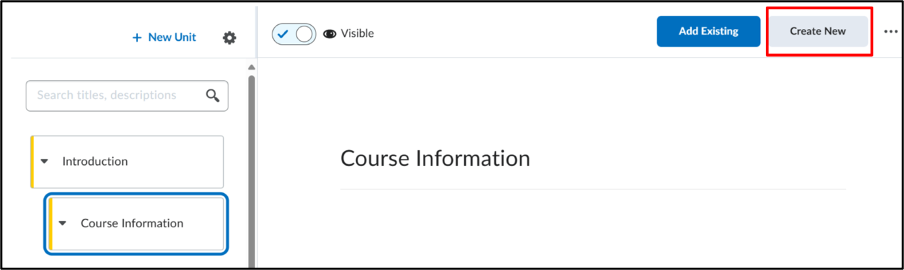
- Here, you have the option to create different types of Topics. You can also create a new Folder in this section. This will be explained further in this article.
3. If you have selected and created an existing Topic or a new one, you will automatically return to the course content.
4. You will see that the file has now been added under the relevant course. However, it may not yet be placed under the correct Lesson. If that is the case, move the file by dragging it with the mouse to the desired location.
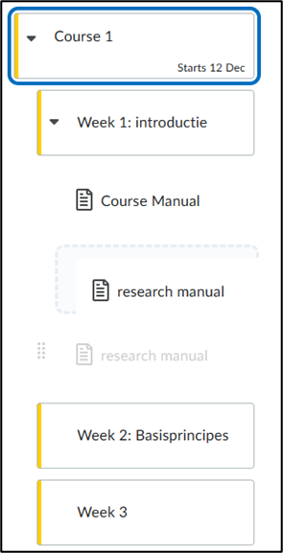
5. Now, both ‘Course Manual’ and ‘Research Manual’ are part of the Lesson under the correct dropdown menu.
Creating ‘Folders’ within your Lesson:
Folders contain even more specific related content within a Lesson—essentially, a folder within a folder. However, we recommend avoiding the use of this feature. See the previously described example.
- Click on the relevant Lesson.
Note: Folders can only be created under Lessons, not under Units.
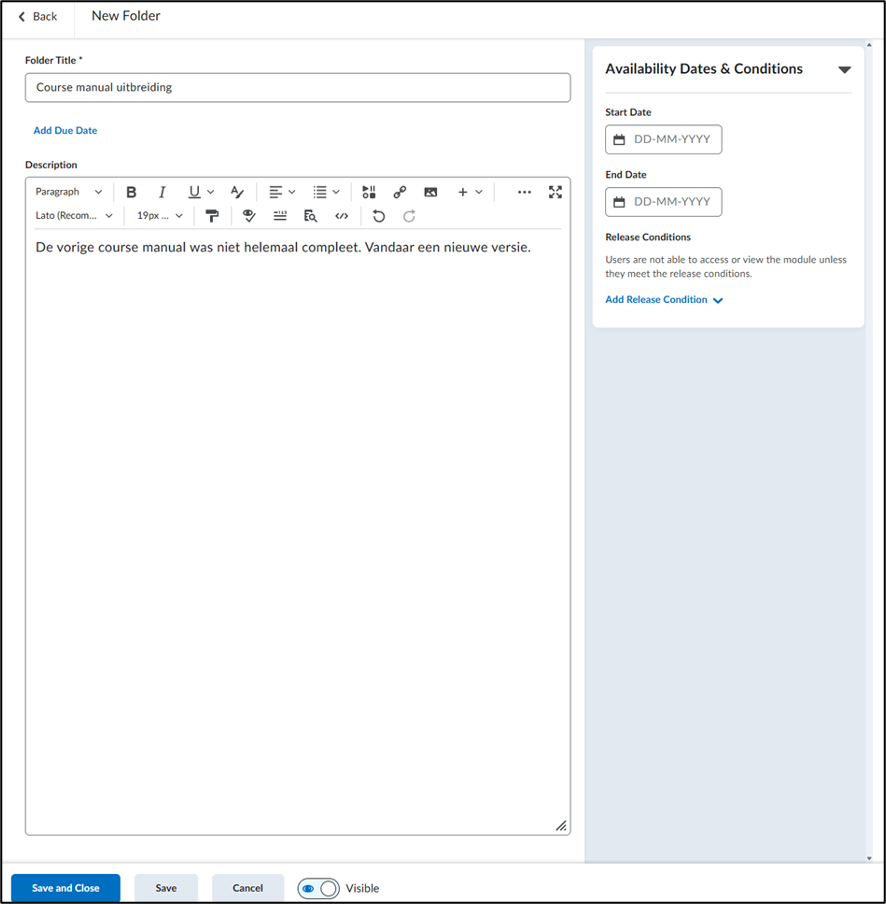
2. Click on ‘Create New’. You will be taken to the following menu:
3. Describe the title of the Folder and optionally provide a description. Then, click ‘Save and Close’.
4. You have now created a folder within your folder. It looks like this:
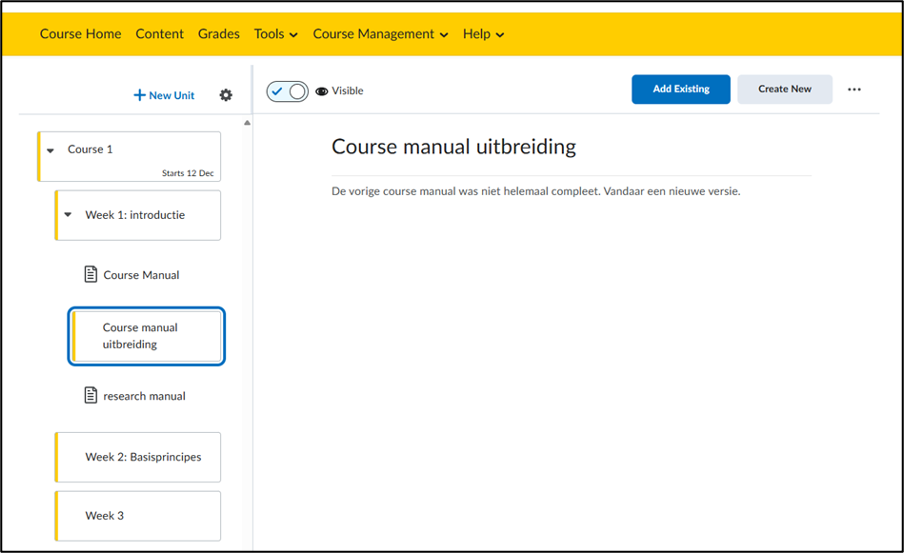
5. Topics can be added to Folders by clicking ‘Add Existing’ or ‘Create New’. For more information on what is possible here, scroll up to the section about Lessons.
6. You have now created a Folder within a Topic, within a Lesson, within a Unit.
Since this requires a lot of clicking and can be quite complex, we do not recommend it.
It is better to stick to Lessons and Topics within your Unit, as this usually allows you to create a well-structured course.
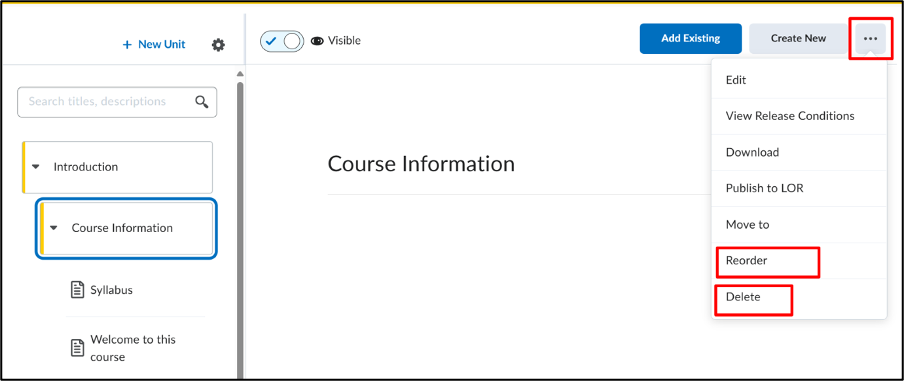
Editing a Unit/Lesson/Folder:
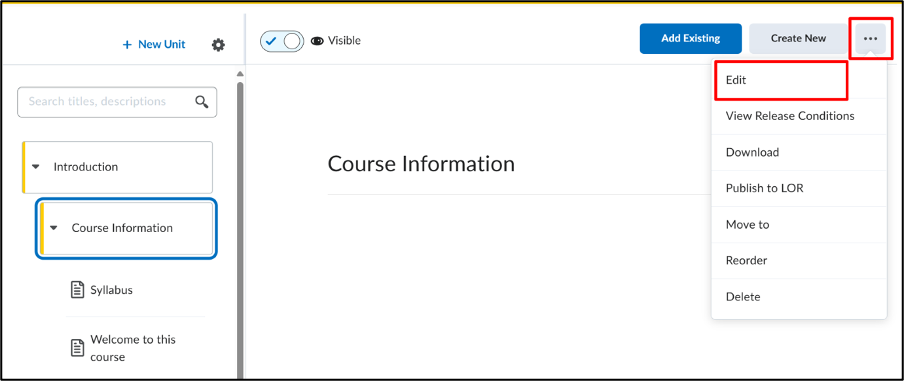
- If you want to modify a Unit, Lesson, or Folder, for example, to adjust the description or change the start/end date, you can do so by clicking on the relevant Unit, Lesson, or Folder in the overview.
- Click on the three dots in the top right corner and select ‘Edit’. The following images use a Lesson as an example.
3. You will now enter the same menu you worked in when creating the Lesson.
4. Make your changes and click ‘Save and Close’. The updates will be immediately applied to the Lesson.
Optional:
- If you have placed the Lesson under the wrong Unit, you can click ‘Move To’ (under the three dots). Follow the steps in the next menu and select the course where you want to move your Lesson.
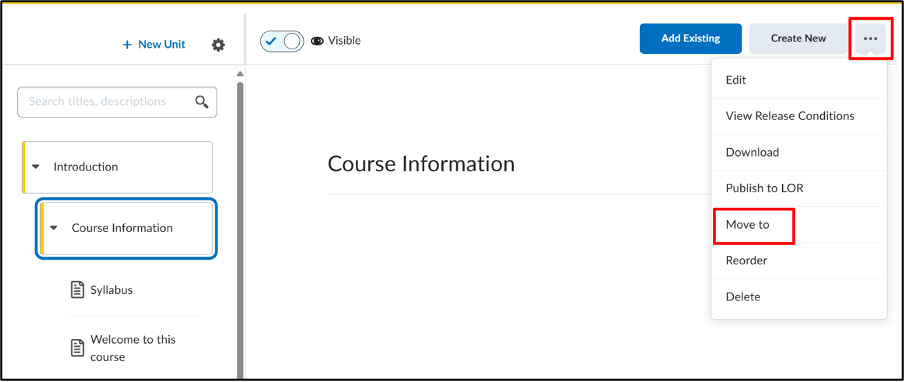
- You can also move it up or down using ‘Reorder’.
- ‘Delete’ will remove the entire Lesson, including all Topics and Folders underneath it.