
Adding or deleting content
In Brightspace, you structure your course via ‘Content’: here you create a welcome page and organize the course program into Units, Lessons, and Folders that you fill with important course information (Content) such as the course syllabus, media files or documents, and links to web pages or Brightspace activities like discussions and quizzes. This way, you create a clear course and help students easily navigate through the learning material.
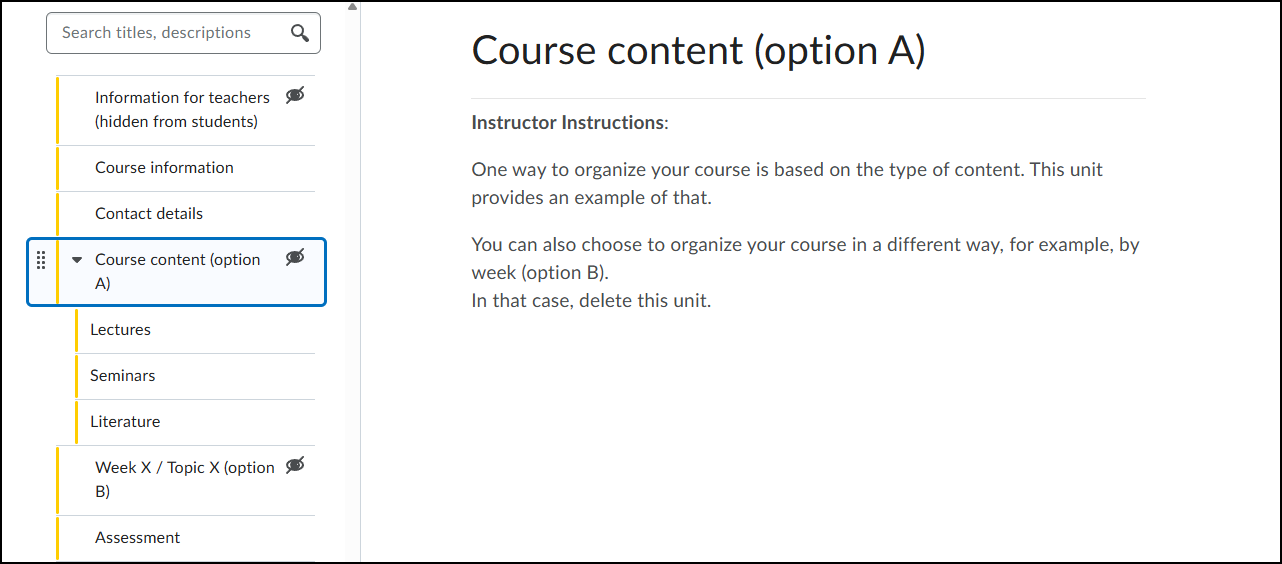
Click on ‘Content’ in the navigation bar of your course. The menu on the left side of the screen shows you the course content:
- The entire course content is displayed in a table of contents format, an ordered list of folders containing course materials.
- Structure your course and choose a logical layout, for example, create a folder for each course week.
- Place the relevant course materials in the folders, such as a PowerPoint presentation or an e-book. You can upload files from your computer and link to web pages or activities like assignments and quizzes.
This manual answers the following questions:
- What is the structure of Content?
- How do you manage Content?
- What do the three buttons on the right side of Create New do?
- How do you add Units, Lessons, and Folders?
- How do you delete Content?
What is the structure of Content?
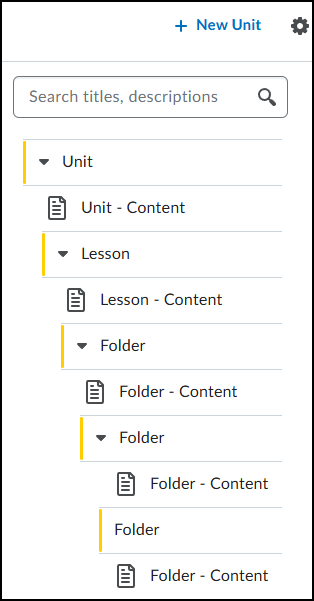
- Under ‘Content‘ you can first create ‘Units’.
- A ‘Unit’ is a folder you create at the highest level in ‘Content‘. A ‘Unit‘ can be expanded and shows lessons, folders, and content when you click on the bar.
- Under ‘Units‘ you can create ‘Lessons‘
- A ‘Lesson’ has the same possibilities as a ‘Unit‘ and is essentially a folder under a ‘Unit‘
- Under ‘Lessons‘ you can create ‘Folders‘
- A ‘Folder’ has the same possibilities as a ‘Lesson‘ and is essentially a folder under a ‘Lesson‘
- The contents of the folders can be an assignment, video, lecture, uploaded file (pdf, word, excel, etc.), tool such as discussion board, or other forms of course content.
The first folder in Brightspace is called a ‘Unit‘. The folder within a ‘Unit‘ is a ‘Lesson‘, and a folder within a ‘Lesson‘ is called a ‘Folder‘. Within a ‘Folder‘ you can create 2 more ‘Folders‘, so you have 5 levels of folders in Brightspace.
Although the names are all different, they are all folders within ‘Content‘ with the same functionalities and possibilities.
How do you manage Content?
- You can add new or existing files via ‘Create New’ and ‘Add Existing’.
- By clicking the white slider on the left side of the Display Area, you can indicate whether you want students to see the content or not. If you see the word ‘Visible’, students can see the content.
What do the three buttons on the right side of Create New do?
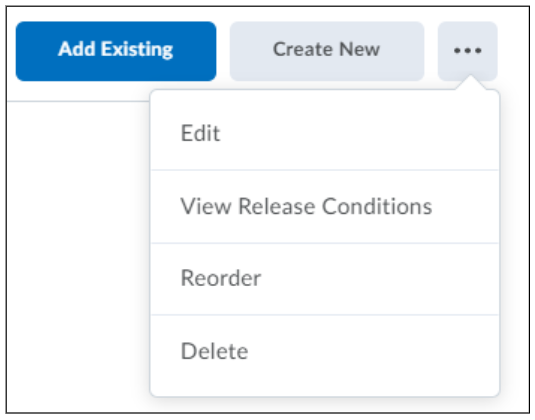
The three buttons on the right show a menu with various options:
- Edit the selected item
- View Release Conditions
- Reorder the content items
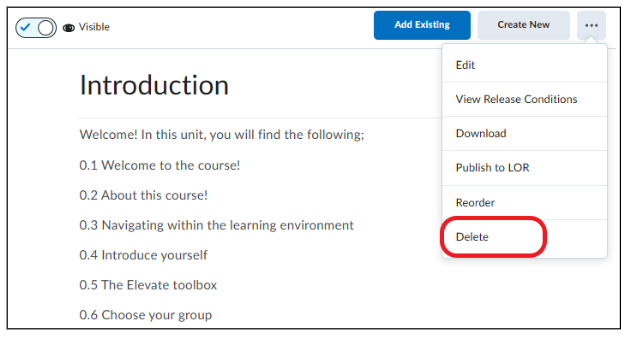
- Delete the selected content item
How do you add Units, Lessons, Folders, and Content?
- Create a new Unit by clicking New Unit at the top of the Content.

- Under a new Unit or an existing Unit, you can now add a Lesson (folder).
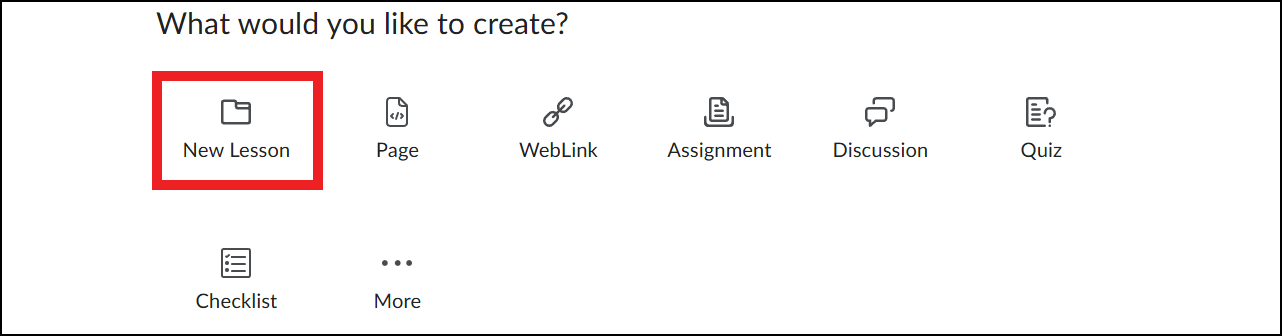
- Go to Content, click ‘Create New’ and then click ‘New Lesson’.

- Under a new Lesson or an existing Lesson, you can now add a Folder (folder).
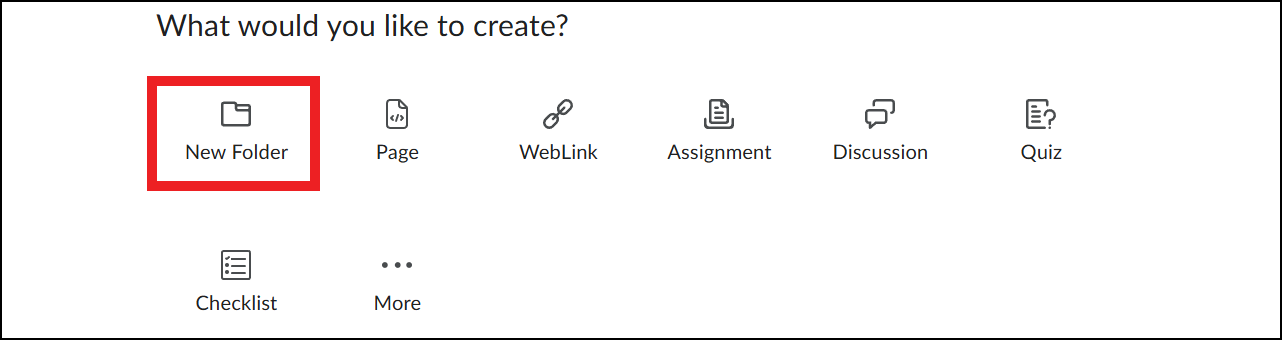
- Go to Content, click ‘Create New’ and then click ‘New Folder’.
- You can also add different types of content. You can create a ‘Page’, ‘WebLink’, ‘Assignment’, ‘Discussion’, ‘Quiz’, and when you click ‘More’, you can create ‘Self Assessment’ and ‘Surveys’.
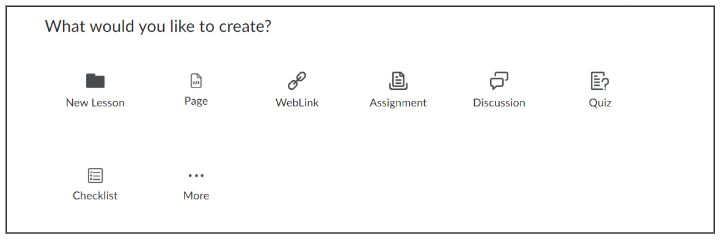
- With a ‘Page’ you can create a web page with text, images, and optionally files.
- With a ‘WebLink’ you can place a link to a website.
- With an ‘Assignment’ you can place an assignment that students can submit.
- With ‘Discussion’ you can start a (possibly graded) group discussion.
- With ‘Quiz’ you can place a (possibly graded) test.
- With ‘Checklist’ you can post a checklist that students can use to check off to-dos.
- With ‘Self Assessment’ you can place an assignment for the student to practice.
- With ‘Surveys’ you can create questionnaires.
How do you add files to Content?
You can add files to Content in two ways:
- By dragging one or more files from your computer directly into a Unit, Lesson, or Folder.
- Via ‘Add Existing‘ you can select files via a menu
Via ‘Add Existing’
- When you click ‘Add Existing’ the following screen appears:
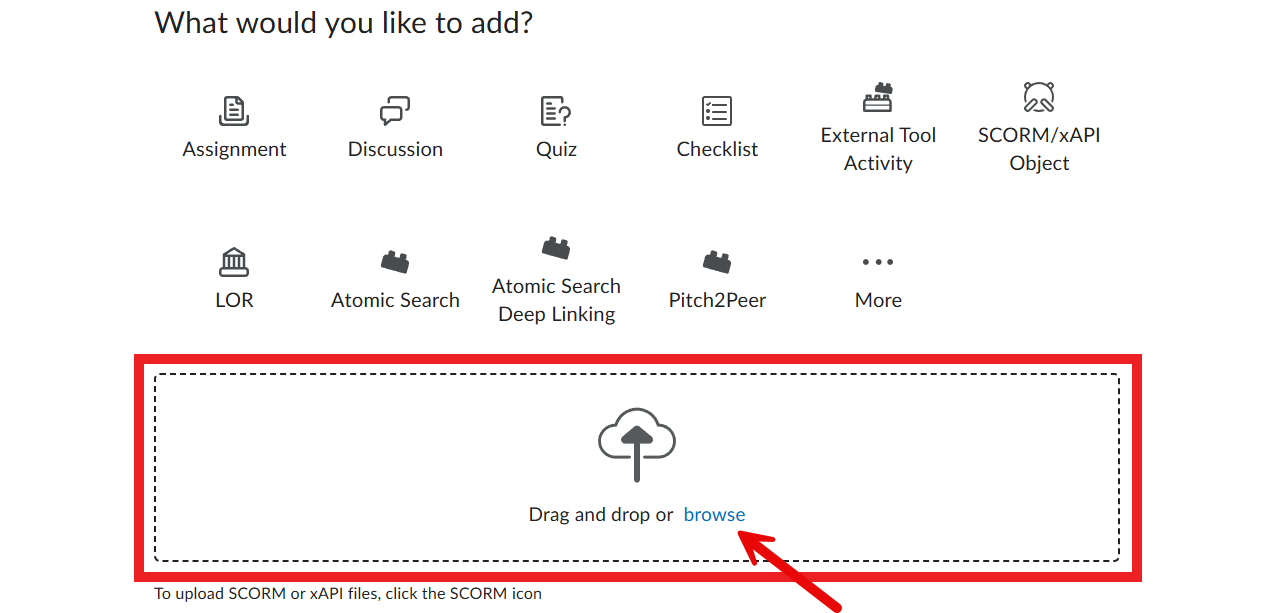
- If you want to add a file to the course content (Content) such as a PowerPoint slide, PDF, or Word file, you can drag files from your computer to this screen (the Drag and drop functionality) or use the Browse functionality. It is possible to add multiple files at once.
Brightspace will convert the preview document to a PDF so the file is displayed directly in Brightspace.
If you want students to download the original file, they can use the cloud icon with an arrow at the top of the page. For instructors, this feature can be found by clicking the three dots and selecting Download.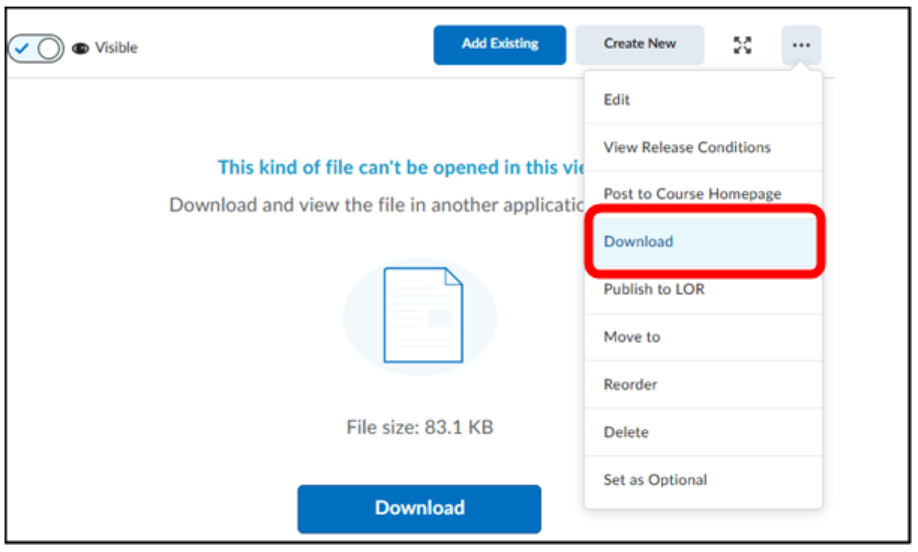
You can also add other file types.
Note!
– When you add a document in Brightspace, it is not possible to see the extension (.pdf/.word/etc.), the student will only see a preview. When the student downloads the document, the entire document will be visible.
– If you want to upload a new version of a document, you must delete the old version and upload the new version. You cannot replace the document with a new version.
– Documents are automatically visible to students. You can use the ‘Visibility’ setting to adjust whether a student can see the item or not.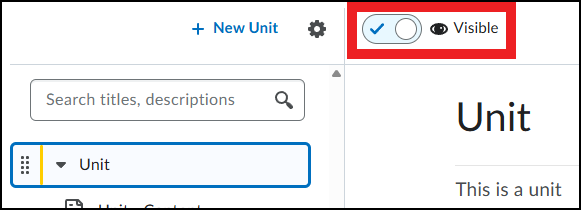
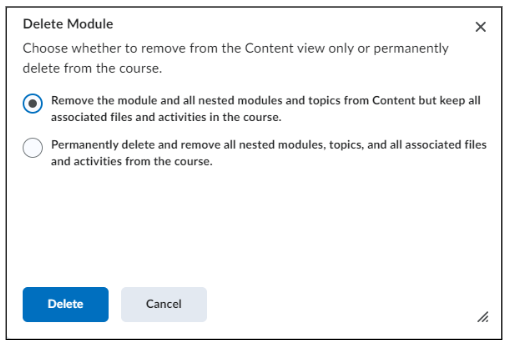
How do you delete Content?
There are two options:
- ‘Remove the module and all nested modules and topics from Content but keep all associated files and activities in the course’
- Choose this option if you want to reuse the content in the current course environment.
- (recommended) ‘Permanently delete and remove all nested modules, topics and all associated files and activities from the course.’
- Choose this option if you no longer need the file; it will be permanently deleted.
- Choose this option if you no longer need the file; it will be permanently deleted.