Change document
Replacing an existing document can be useful, for example to update a document to a more recent version. This guide explains how to do this in one step, without having to delete the old version first.
- Click ‘Course Admin’ in the course navigation bar

- Then click ‘Manage Files’ under Site Resources.
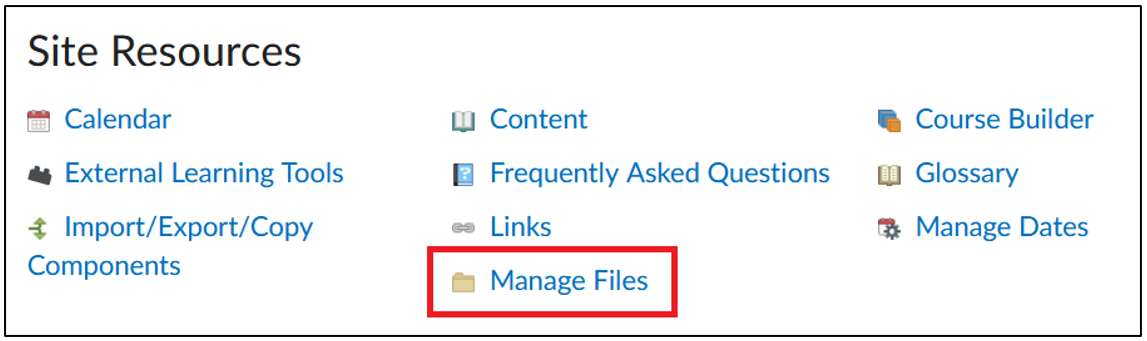 In Manage Files you have an overview of all documents in the course and can adjust the structure of files and folders. You can also replace a document here by uploading a document with exactly the same name. The document already present in the course content will now be automatically replaced.
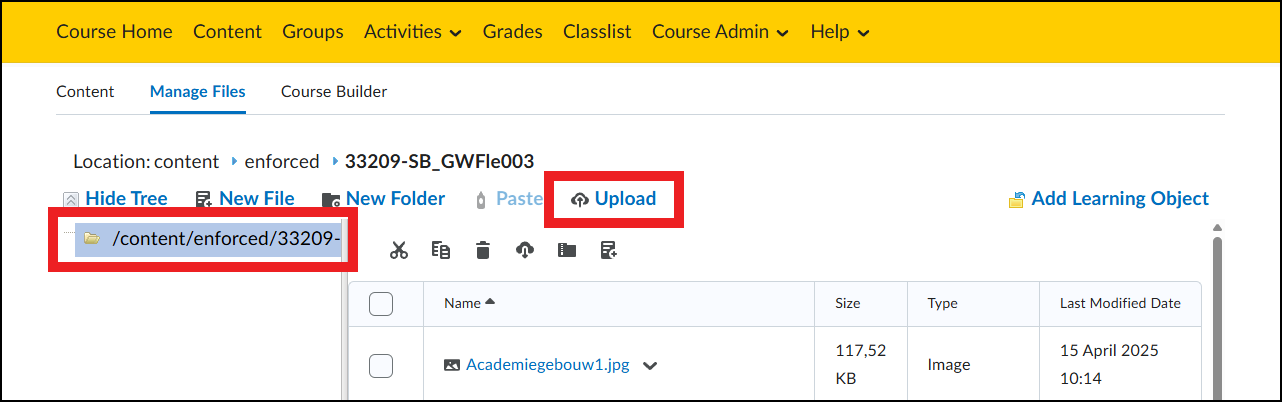
 - Select the folder containing the file to be replaced
- Click ‘Upload’
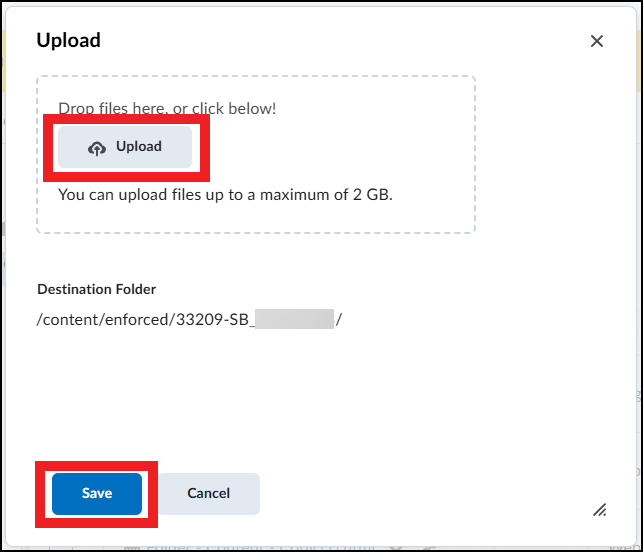
- Click ‘Upload’ again in the pop-up menu and choose the file you want to upload. Make sure it has exactly the same name as the file you want to replace.
- Save the added file by clicking ‘Save’. A new pop-up will automatically open.
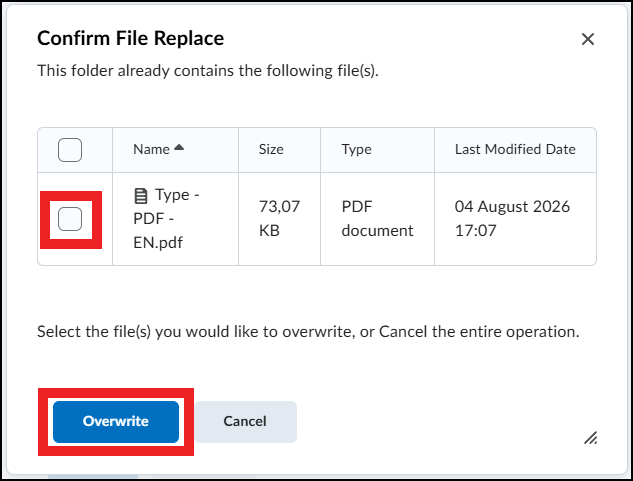
- The pop-up shows a message stating that there is already a file with the same name. Select the file to be replaced.
- Click ‘Overwrite’. If the file is also integrated in another course, it will also be replaced there.