Adding Release Conditions
In Brightspace, you can set Release Conditions for most items. Release conditions allow you to add requirements to content or an assignment, so that these materials only become available to the student after meeting the condition.
Release conditions must always be linked to an assignment. If the availability of assignment B depends on the grade for assignment A, the release condition must be added to assignment B. Once a release condition is created, you can reuse it in the course, and it will be available in the drop-down menu when adding a release condition.
Communicate clearly with your students that they are responsible for the availability of certain materials, to avoid misunderstandings about the course.
This guide contains instructions for the following items:
- Assignments
- Content
- Discussions
- Grades
Assignments
Example:
The student must first complete assignment A before assignment B becomes available.
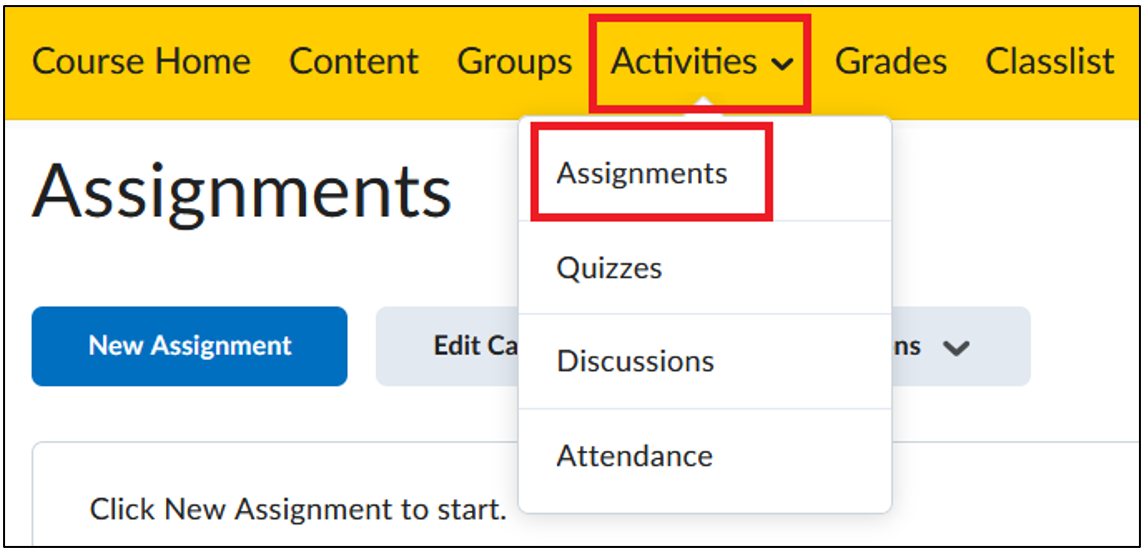
- Create a new assignment by navigating to ‘Assignments’ via ‘Activities’ in the correct course.
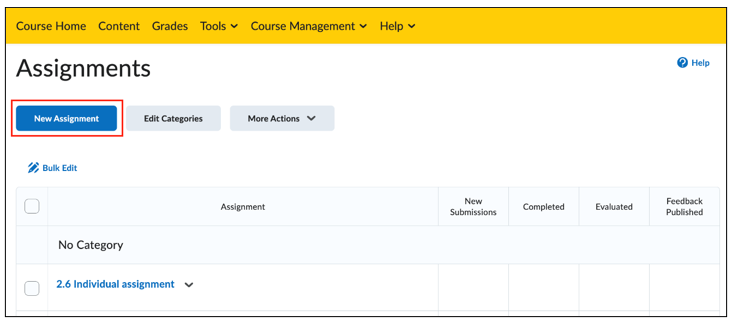
- Then click ‘New Assignment.’
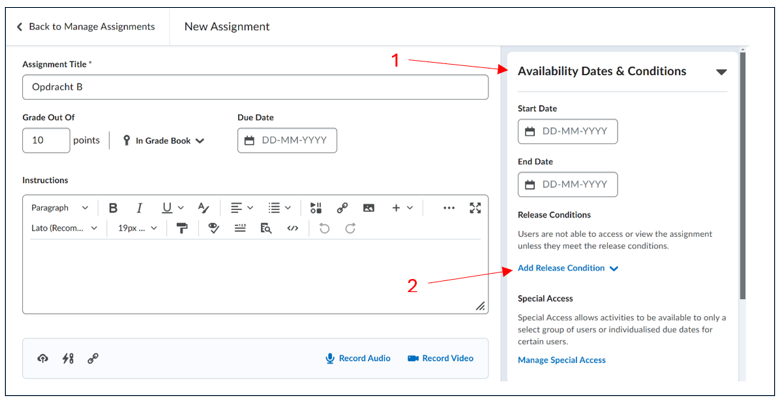
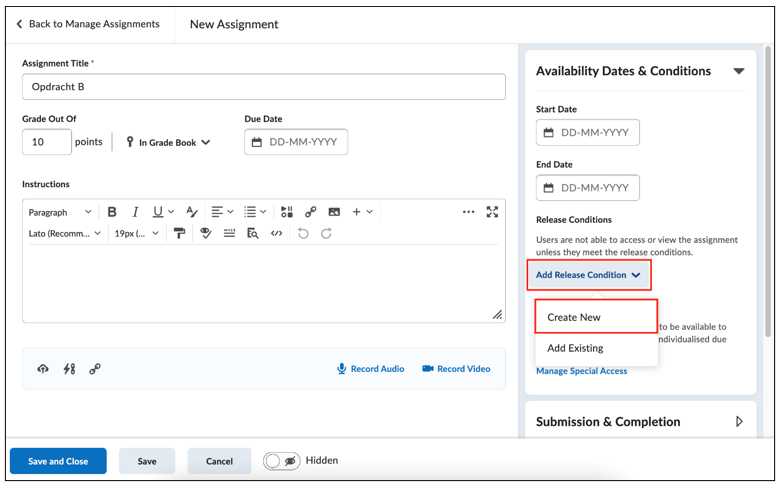
- Fill in all specifications and expand the ‘Availability Dates & Conditions’ menu. Under Release Conditions, click ‘Add Release Condition.’
- Click ‘Create New’ and select from the drop-down menu what type of condition you want to add.
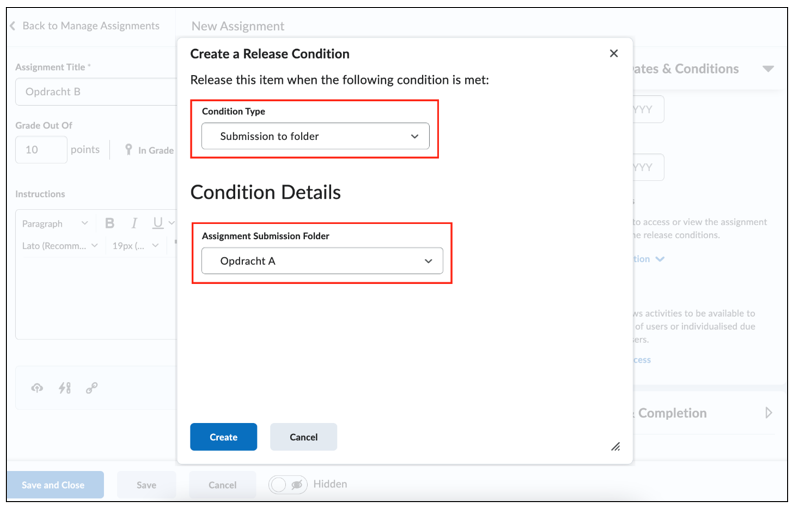
- For the example where a student must submit assignment A before assignment B becomes available, choose ‘Submission to folder.’ Under Condition Details, you can select the assignment that must be submitted (in this case, assignment A) before the current assignment (assignment B) becomes available.
Content
Release conditions can be added to content in two ways.
Example:
The student must pass the week 1 quiz to view the materials for week 2.
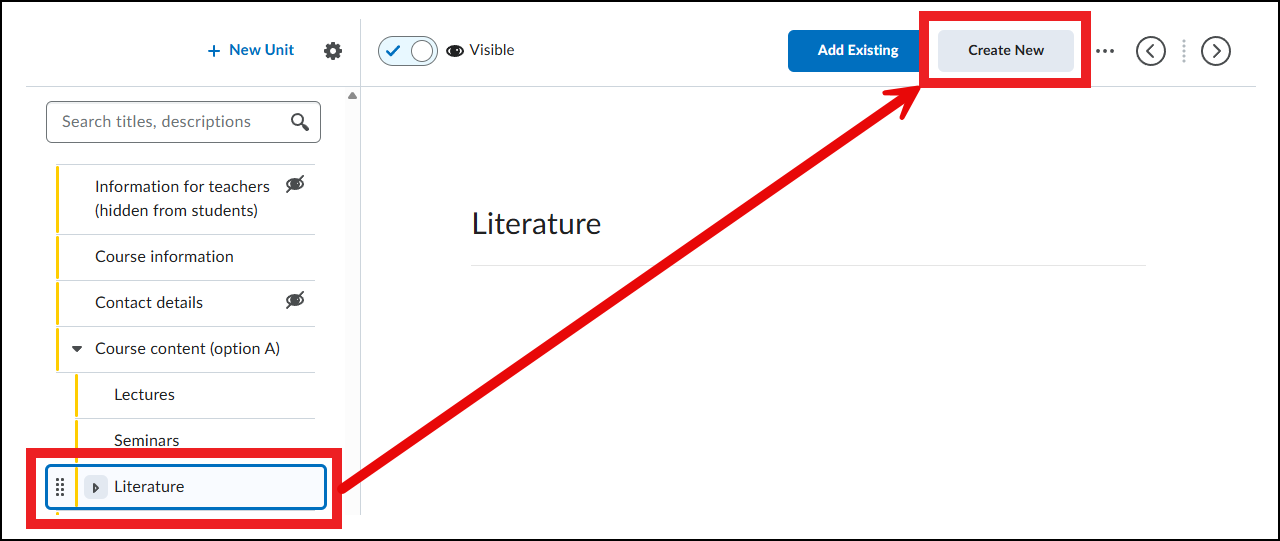
- In the first method, you add release conditions when you add an item to the course. Navigate to ‘Content’ in the correct course and create the new item in the correct unit. Click ‘Create New.’
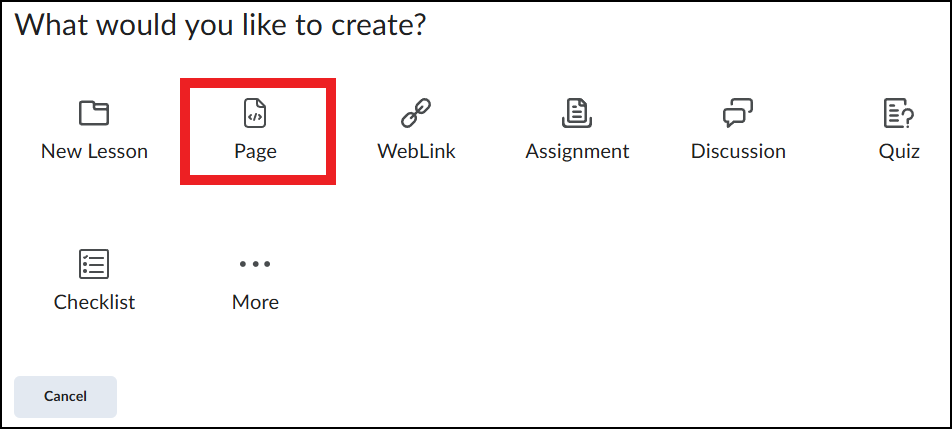
- Select the type of content you want to add. In the example, we add a page with lesson materials, so we click ‘Page.’
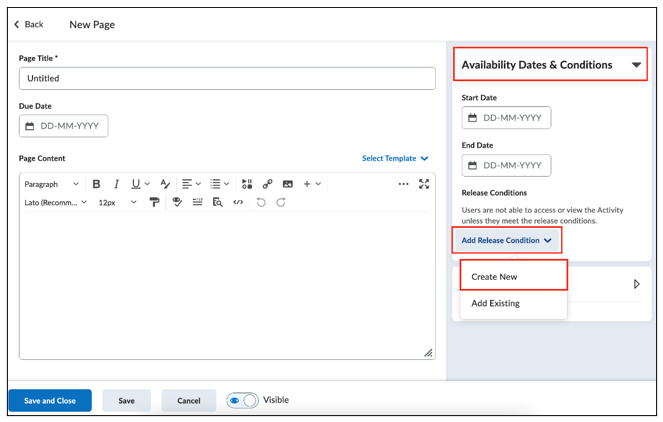
- Fill in all specifications and add the lesson materials. Then follow the same steps as for Assignment: click ‘Availability Dates & Conditions’, then ‘Add Release Condition’ and ‘Create New.’
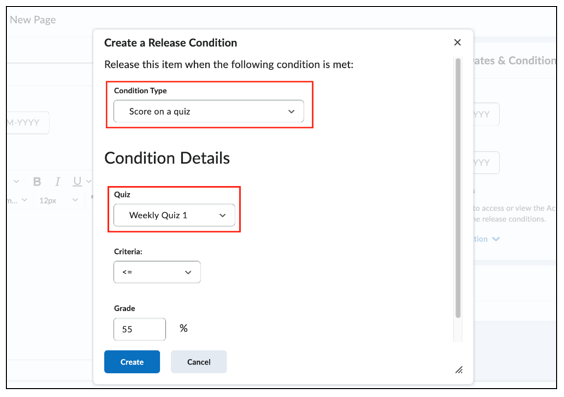
- Then choose ‘Score on quiz’ under Condition Type. Under Condition Details, select the quiz that must be passed and enter the grade requirements. The image below shows the correct settings if, according to the example, students must pass a quiz.
In the second method, you add release conditions to items that have already been added to the content.
Example:
The weekly quiz is only available if the student has opened the lesson materials.
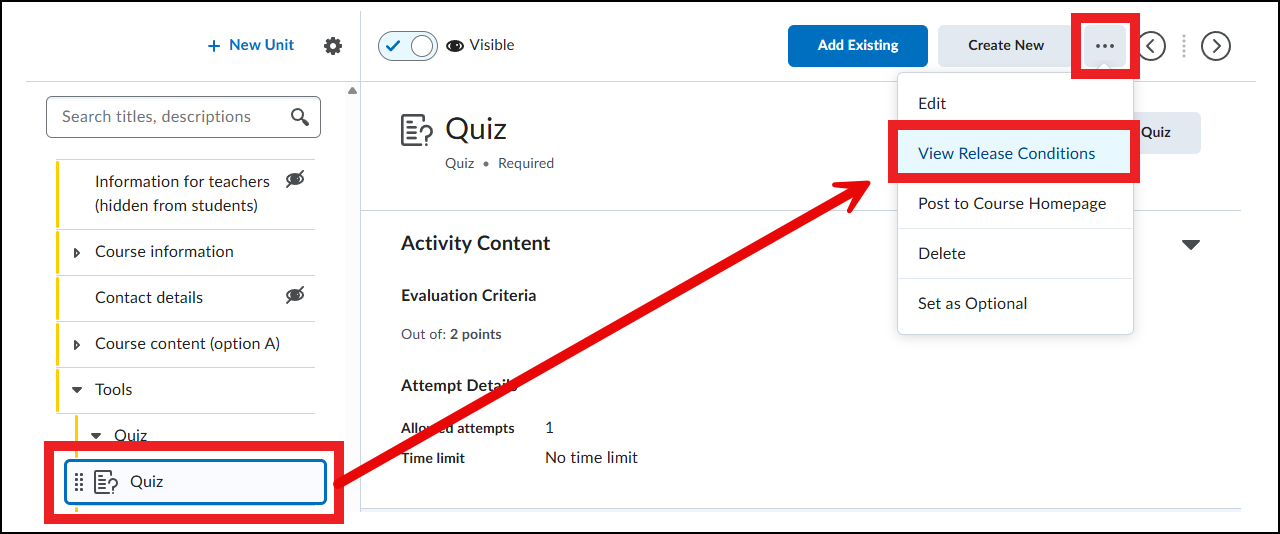
- Navigate via ‘Content’ in the correct course to the item you want to add release conditions to. In this case, we want to make the quiz in week 1 available only if the student has opened the lesson materials for week 1, so we click the quiz in the menu on the left side of the page. When you open this item, you will see the following page. Click the three dots in the top right.
- You will get a drop-down menu with the second option ‘View Release Conditions’ — click on it.
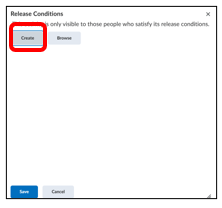
- You will get a pop-up screen with an overview of the release conditions, but since there are none yet, click ‘Create.’
- From here, you enter the familiar pop-up window. In this case, we want students to have viewed a content item, so under Condition Type scroll to ‘Completed content topic.’ Under Condition Details, select the item students must have viewed (in this case, the lesson materials for week 1).
When creating or editing the lesson materials for week 1, there are options available (on the right side of the page) for when the item is completed. If you do not change anything here, an item is automatically marked as completed when the student opens it. If you want the student to mark this item themselves, you can select that in the drop-down menu.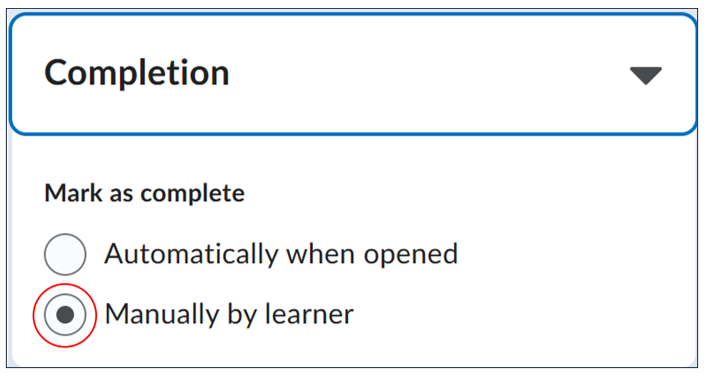
Discussions
Example:
A student must first make three posts before being able to respond to other students.
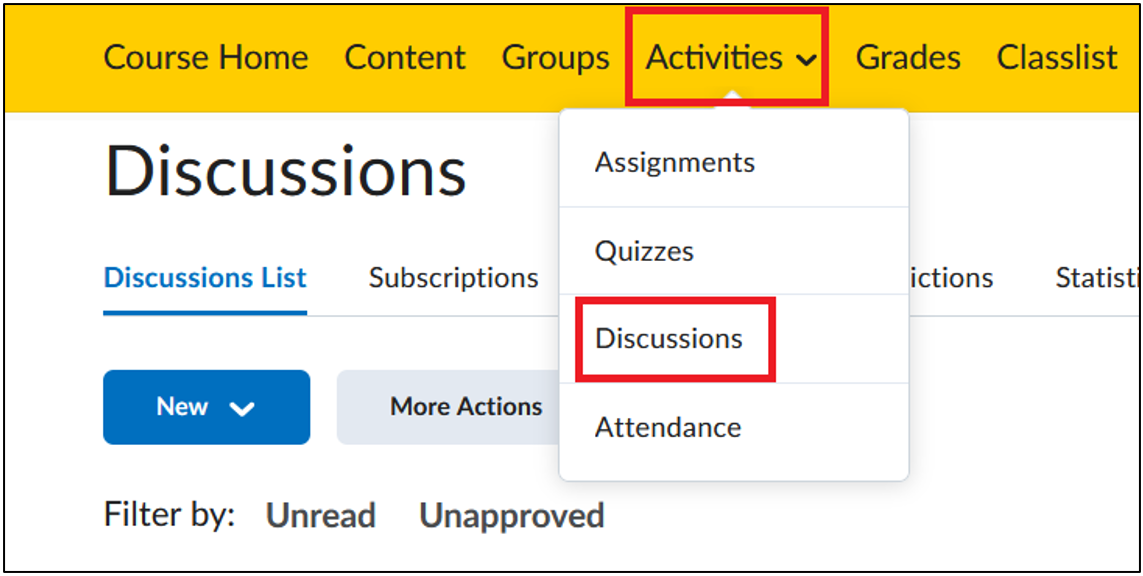
- In the correct course, navigate via ‘Activities’ to ‘Discussions.’
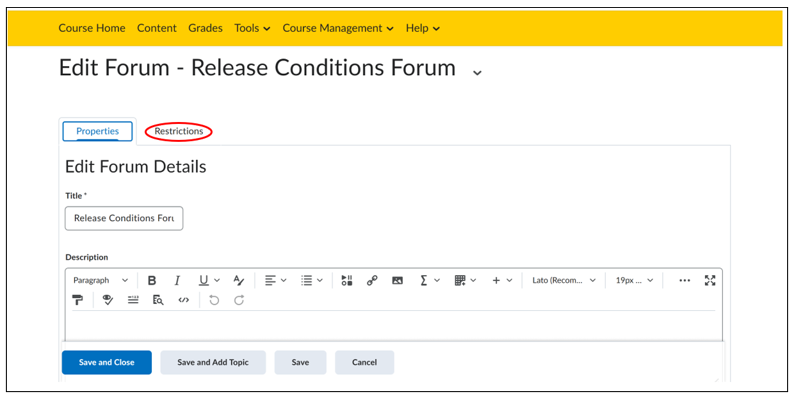
- When creating a new forum, first enter a title. Then you can click ‘Restrictions’.
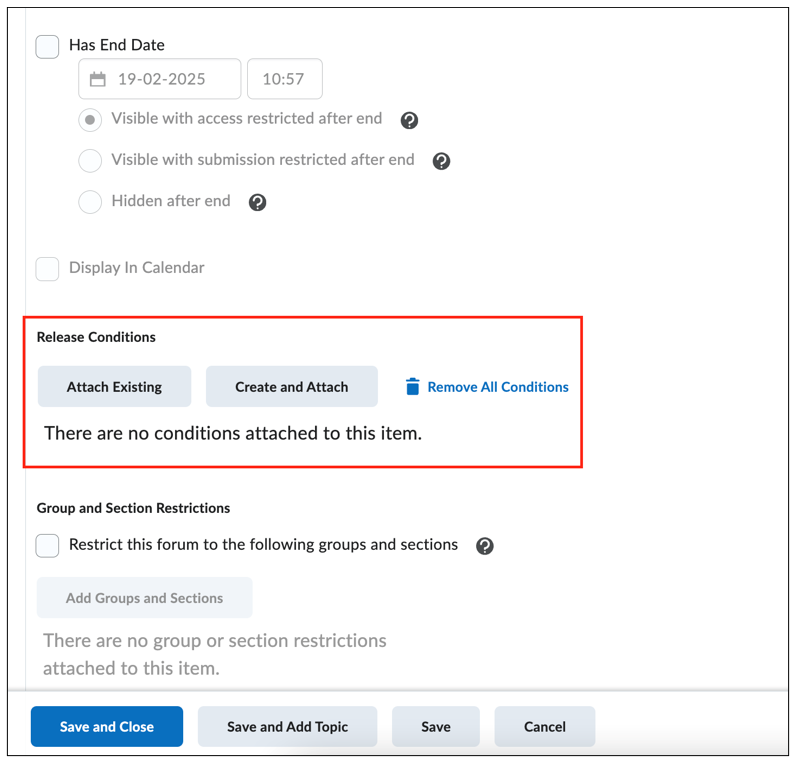
- If you scroll down here, you will find a section Release Conditions where you can click ‘Attach Existing’ to add an existing release condition.
- Or click ‘Create and Attach’ to create a new release condition.
Grades
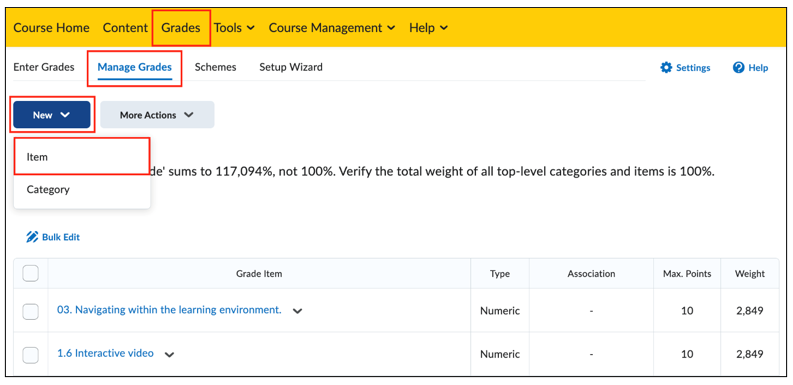
- In the correct course, navigate to ‘Grades’ via the navigation bar, then click ‘Manage Grades’. Here you can create a new grade item or category.
- Let’s create a grade item as an example, click ‘New’ and then select ‘Item.’
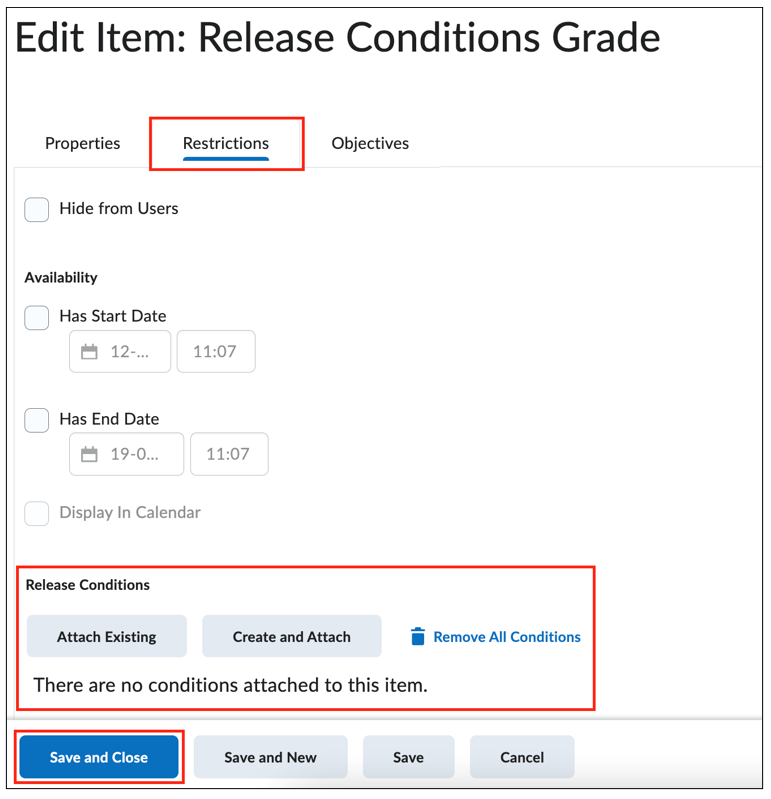
- When creating a new grade item or category, you get the option ‘Restrictions’ after you have given the category or item a name. Then you can enter dates from or until when the grades are available to the student, and below that you can add existing or new Release Conditions as you are now familiar with.
- Add the rest of the properties to your item or category and click ‘Save and Close.’