Manage files
In Manage Files you can find an overview of all the files in your course. With Manage Files you can organize your files so that they are easy to find and can easily be added to your course content.
All of the files that you upload in Brightspace via Content (‘Upload/Create’) will also be placed in Manage Files.
If you have created folders in Manage Files, you will be presented with the option to place them directly into these folders when you upload a file under Content.
This article consists of two parts:
- Organizing your files with Manage Files
- Opening Manage Files
- Functionalities within Manage Files
- Pop-up menus
- Uploading files
- Adding content with Manage Files
Opening Manage Files
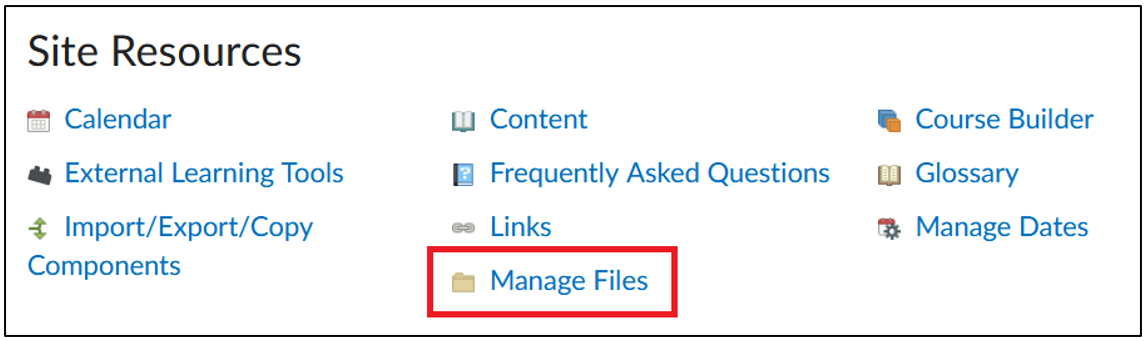
- Navigate to ‘Course Management’ in the yellow menu and select ‘Course Admin’.

- Click on ‘Manage Files’ under the header Site Resources.
Funcionalities within Manage Files
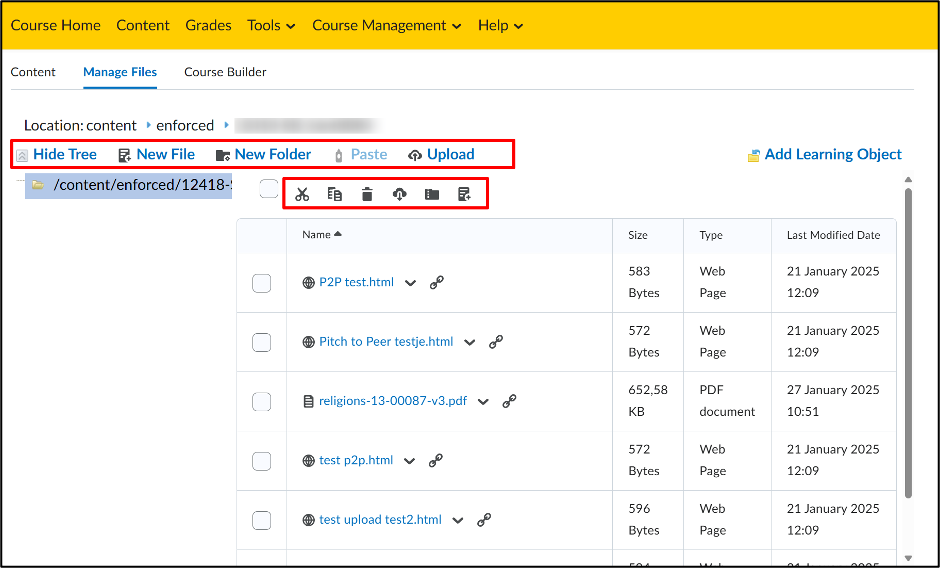
You will now see an overview of all the files in this course. On the left side, you can see the folder structure. The folder with the blue highlight is the folder that is currently opened. The table on the right side of the screen shows you which subfolders and/or files are located in this folder. The top toolbar will let you perform certain actions:
- Click on ‘Hide Tree’ to hide the folder structure (and click on ‘Show Tree’ to then make this structure visible again).
- Click on ‘New File’ to create a new document in the folder.
- Click on ‘New Folder’ to create a new subfolder in the folder.
- Click on ‘Upload’ to upload files and folders from your computer
Note: all the files that you add, create and upload using this upper toolbar do not automatically appear in the Content. In the end of this article, we will explain how to add files from Manage Files into the Content.
The toolbar below will let you perform certain actions with selected documents and folders:
- ‘Selection Box’: Select all the items in the current folder. This does not have any effect on the Content (yet).
- ‘Scissor icon’ : Cut selected item(s). Use this function to cut, copy, and paste to other folders/locations. This does not have any effect on the Content (yet).
- ‘Document icon’: Copy selected item(s). Use this function to cut, copy, and paste to other folders/locations. This does not have any effect on the Content (yet).
- ‘Bin icon’: Delete selected items. Note: everything that is deleted this way will also be deleted from the Content. To avoid error messages, we recommend removing everything that you wish to permanently delete from the Content before you delete it.
- ‘Arrow icon’: Download selected item(s). This does not have any effect on the Content (yet).
- ‘Folder icon’: Turn selected item(s) into a zip file. The zip file will automatically be placed in the same folder. This does not have any effect on the Content (yet).
- ‘Document icon with a plus’: Note: this does not work with folders. After selecting the desired documents and clicking this icon, you can choose to which module in the Content you wish to add these files. You can also add titles to the topics. Note: this action adds an existing item to a module in Content.
Pop-up menus
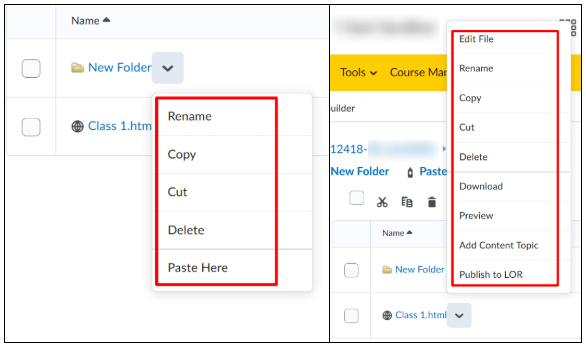
Every folder and every file has a pop-up menu. This section will explain what these pop-up menus can do.
Actions available for both folders and files:
- ‘Rename’: Give the document or folder another name.
- ‘Copy’: Copy the folder or document
- ‘Cut’: Cutthe folder or document.
- ‘Delete’: Permanently delete the folder or file. Note: everything that you delete in this way will also disappear from Content.
Actions only available for folders
- ‘Paste here’: Paste selected copied documents to this folder.
Actions only available for documents
- ‘Download’: Download the file
- ‘Add content Topic’: Moves a file to a module in Content.
- Publish to LOR: Add a learning object to the Brightspace Learning Repository (LOR)
Uploading files
Content in Brightspace is structured in three levels: Unit – Lesson – Folder. It is possible to add content to all three levels. This three-fold structure can be recreated on your personal computer so that you can then directly upload the entire structure to the Manage Files tool in Brightspace. The structure must then first be compressed into a zipfile. This section explains how you can upload files or folders from your computer to Manage Files.
- Select the folder in which you wish to upload the files and click ‘Upload’.
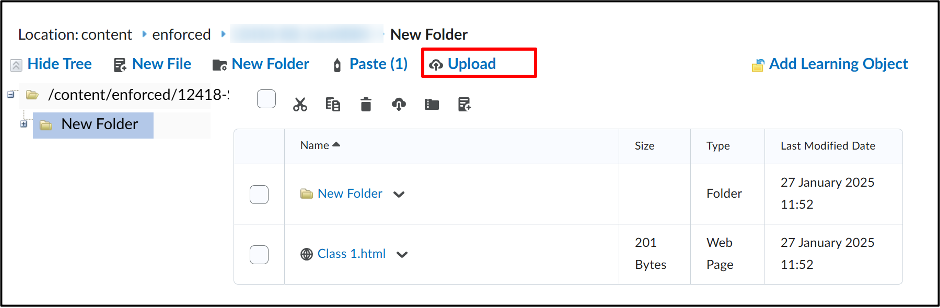
- Click ‘Upload’ again in the pop-up menu.
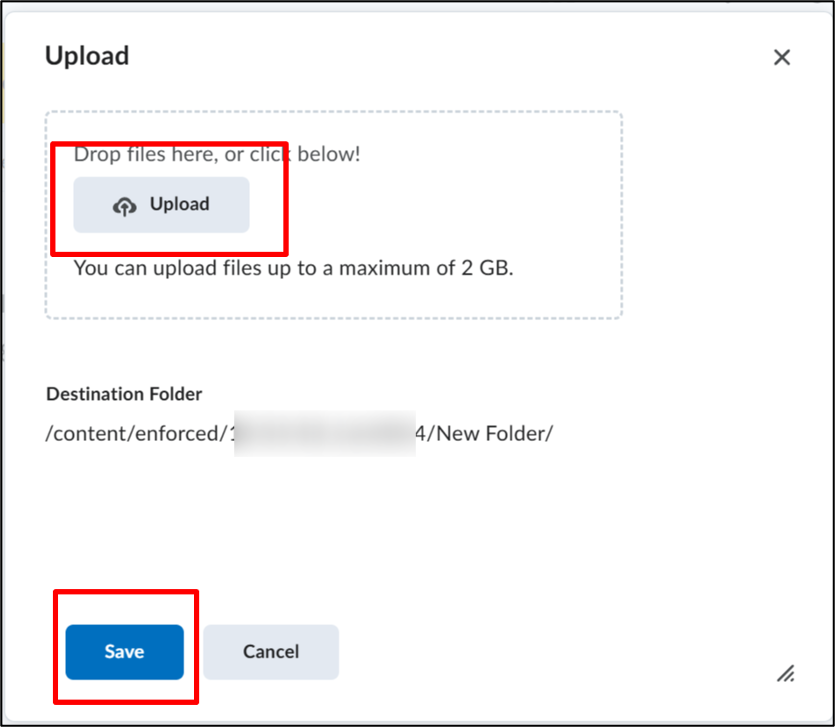
- Then choose the file that you wish to upload. If you wish to upload a folder, it must first be compressed into a ZIP-file.
- Click ‘Save’
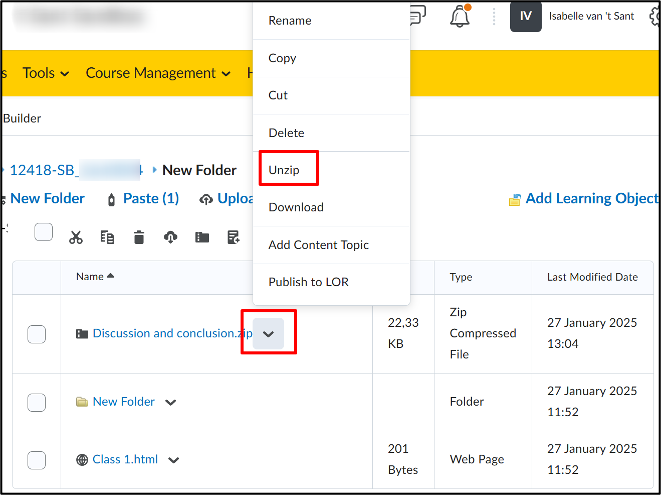
- After you upload a file, it will appear in your file overview. If it is a zip-file, you will first have to unzip it.
Extracting zip files
Extracting a zipfile is very simple.
- Click on the arrow next to the name of the zipfile
- Then click ‘unzip’.
- You can now use and alter the files in Manage Files.
Adding content with Manage Files
Now that you’ve organised all your files with Manage Files and created a tidy environment for yourself and your colleagues, it’s time to add your hard work to the Content.
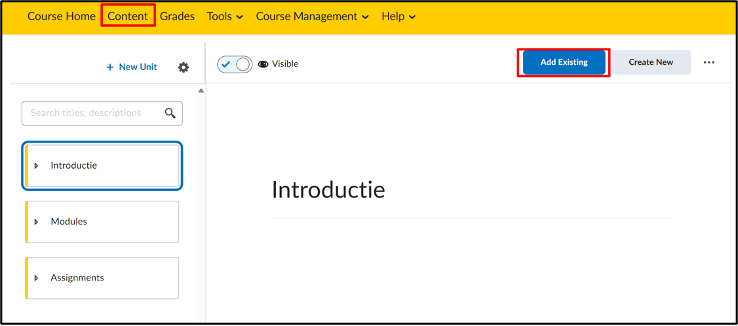
- Navigate to Content en go to the Unit, Lesson, or Folder where you wish to add your files.
- Click on ‘Add Existing’.
3. Click on the three little dots with ‘More’
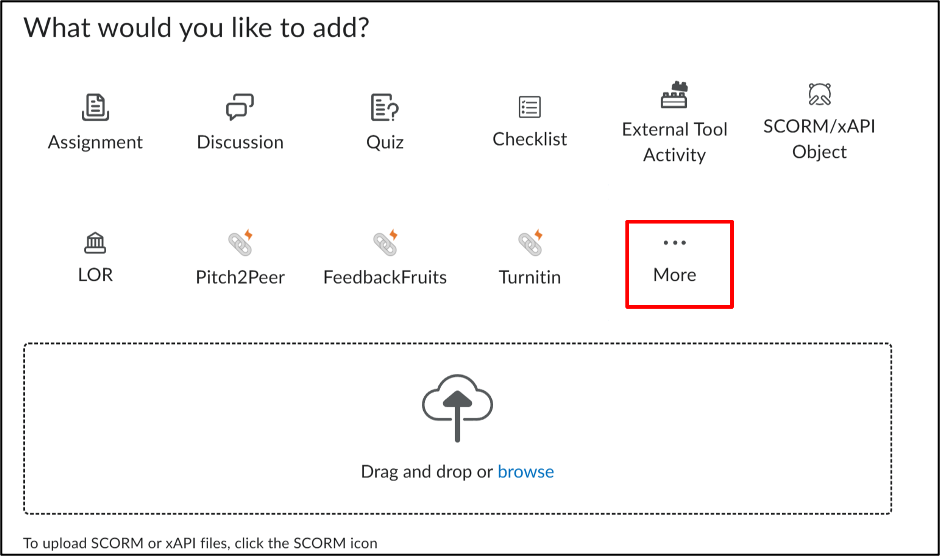
4. Click on ‘Course File’.
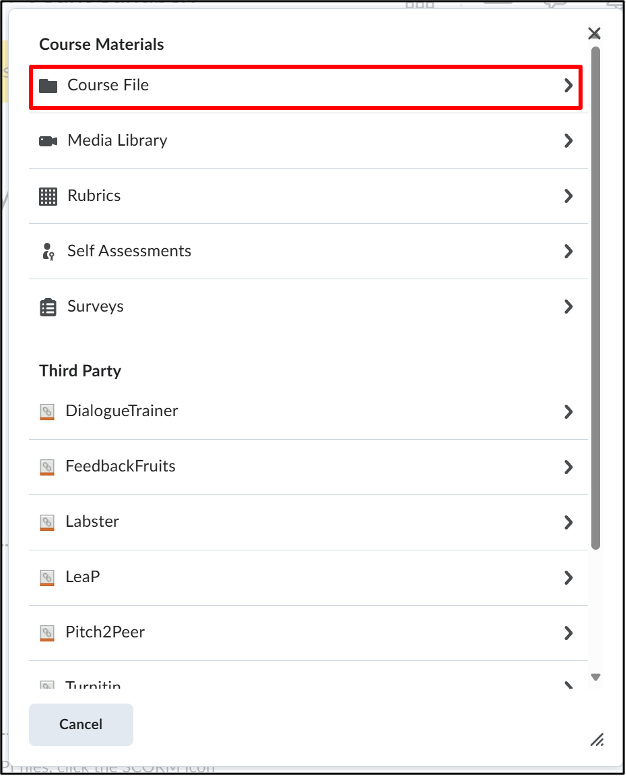
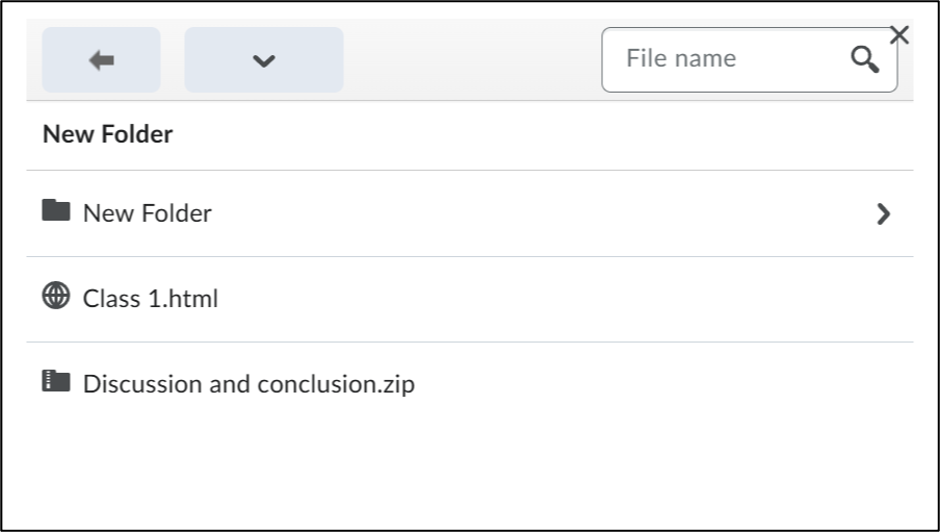
- You will now get to see an overview of everything that you have added and organized in Manage Files.
- Navigate to the right file, or use the search function, and click on it.
- The file will now automatically be added to the Content.
In Manage Files you can also find files that you have deleted from the Content . They can be re-added to the Content in the same way as described above. This, however, is only possible if the files have not been permanently removed.
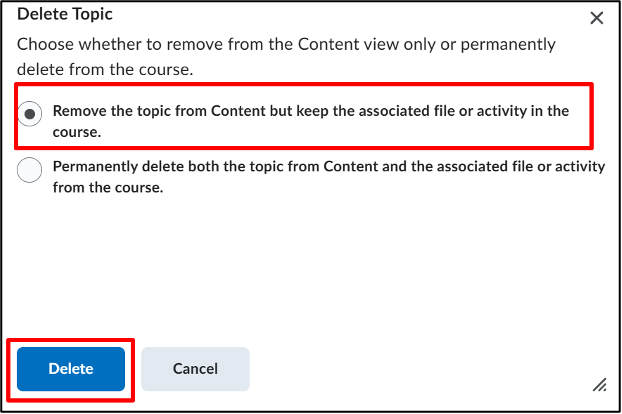
When you remove a file, make sure the box next to ‘Remove the topic from Content but keep the associated file or activity in the course’ is ticked before you press ‘Delete’. Only tick the bottom box if you are completely sure that you wish to permanently delete the file.