Restrictions and due dates
In this manual, there is explained how you can set restrictions for an assignment and/ or set different (due) dates for different groups of students.
- Navigate to your assignment by going to ‘Activities’ > ‘Assignments’.
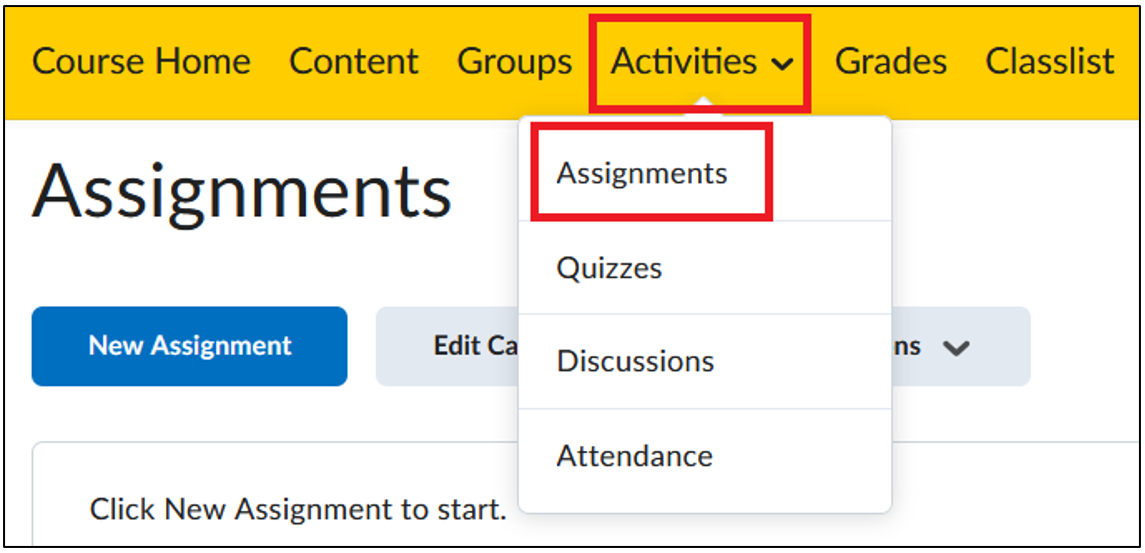
- If you have not made an assignment yet, click on ‘New Assignment’, otherwise:
- Click on the arrow next to the assignment, then click on ‘Edit assignment’

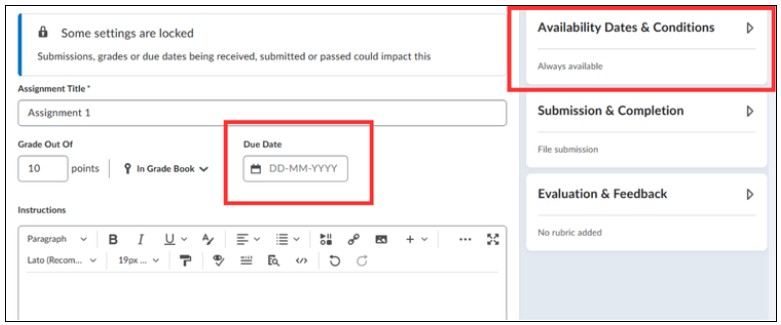
- Here you can indicate if a deadline has a due date. When selecting ‘now’ as due date the properties assignment type and submission type become unchangeable. Make sure to communicate this deadline in advance with your students.
- Go to the ‘Availability Dates & Conditions’ tab to edit more condition settings.
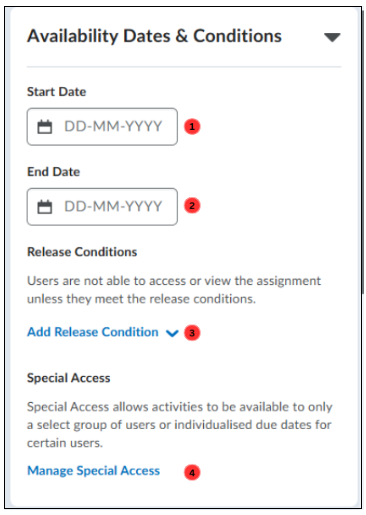
The Availability dates & conditions tab is shown in the picture below. We will now discuss what the different options in this tab can be used for. The different options are marked with a number in the picture below.
- The start date. This is the time and date when students can start submitting the assignment. You can use now if you want the start date to start immediately.
- The end date. This is the time and date when the assignment closes and students are no longer able to view or submit the assignment. Only use the Now option of you want to close the assignment directly.
- Release conditions. Here you can add different release conditions if you want.
- Manage special access. Here you can select whether certain students get special access to the assignment.
Set different (due) dates per group of students: add users to special access.
- As explained in the previous section go to the availability dates & conditions tab and click ‘manage special access’ to give certain students special access to the assignment.
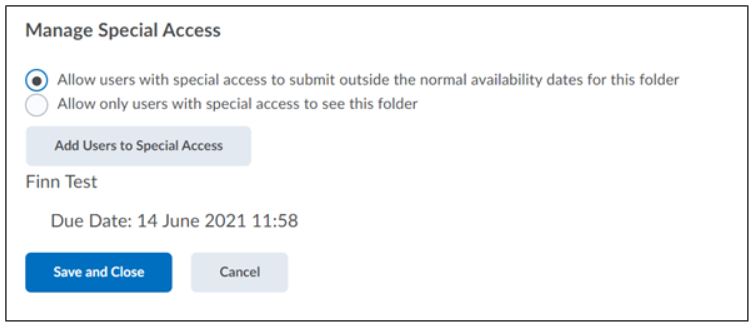
- Under Manage Special Access, you can select whether you want to:
- ‘Allow users with special access to submit outside the normal availability dates for this folder’ if certain students get different submission dates for this assignment.
- ‘Allow only users with special access to see this folder’ if only certain students are allowed to see this assignment.
- Then click ‘Add Users to Special Access’ to select students who will get special access.
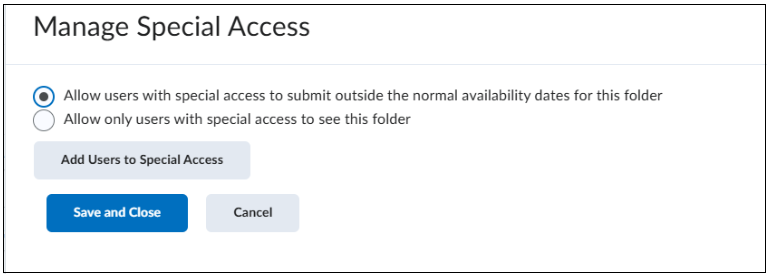
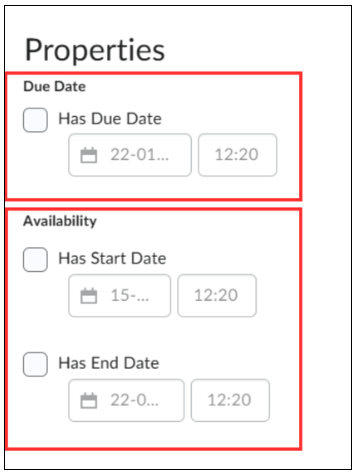
- After clicking on ‘Add Users to Special Access’ a new window will show. Here you can set the properties and the users. We start by discussing the properties.
- If you want certain students to be given a different deadline than the rest of the group, set a separate deadline at ‘Due Date’.
- If you want the assignment to be displayed differently to certain students, fill in a customized Start Date’ and/or ‘End Date’.
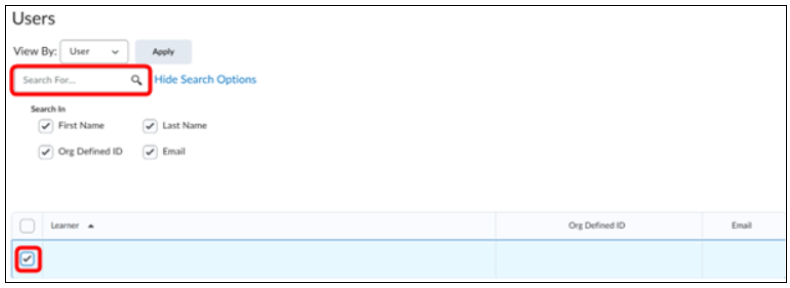
Steps for selecting the users who get special access are shown with a number in the picture below and will be discussed per number.
- Use ‘Search Options’ to find students that you want to give special access:
- Select in the drop-down menu under View By if you want to search among all students in the course (User) or in a certain group (Groups) and click ‘Apply’. If you chose a group, you can then select which group you would like to search in the drop-down menu, (click ‘Apply’ once more).
- By searching per group, you can easily give the entire group within the course special access, without having to look up each individual student separately to add them. If you want to give different groups different access, add them per group.
- In the search bar, fill in (a part of) the student’s name or their student number to quickly find them. Click ‘enter’ or click the ‘magnifying glass icon’.
- Select the student(s) it concerns. Tick the box at the top to select all the students that are showing up through the search filter.
- Click ‘Save’ to return to the Manage Special Access page. You will now see an overview of the students added to special access. Click ‘Save and Close’ to exit Special Access and return to the Edit Assignment page.
