
Edit a survey
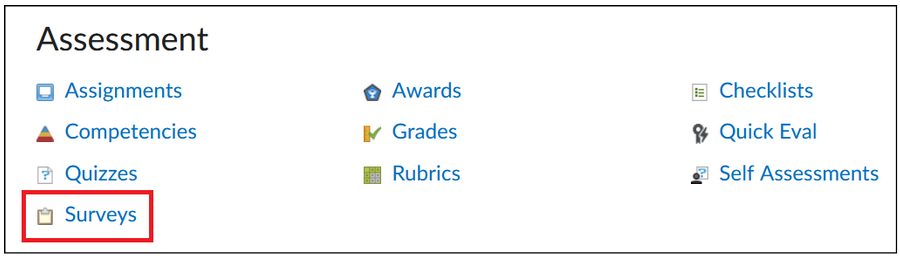
- Klik op ‘Course Admin’ in de navigation bar

- Klik onder ‘Assessment’ op ‘Surveys’
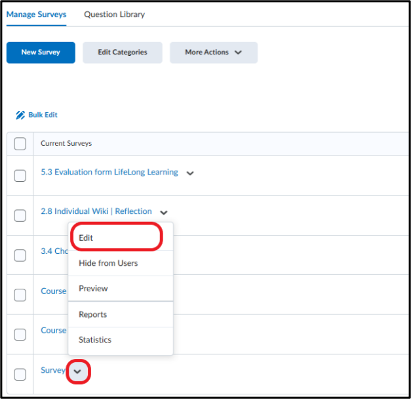
- You will see an overview of all the surveys within the course. Click on the arrow next to a survey and select ‘Edit Survey’ in the dropdown menu.
5. Scroll down and click ‘Add/Edit Questions’.
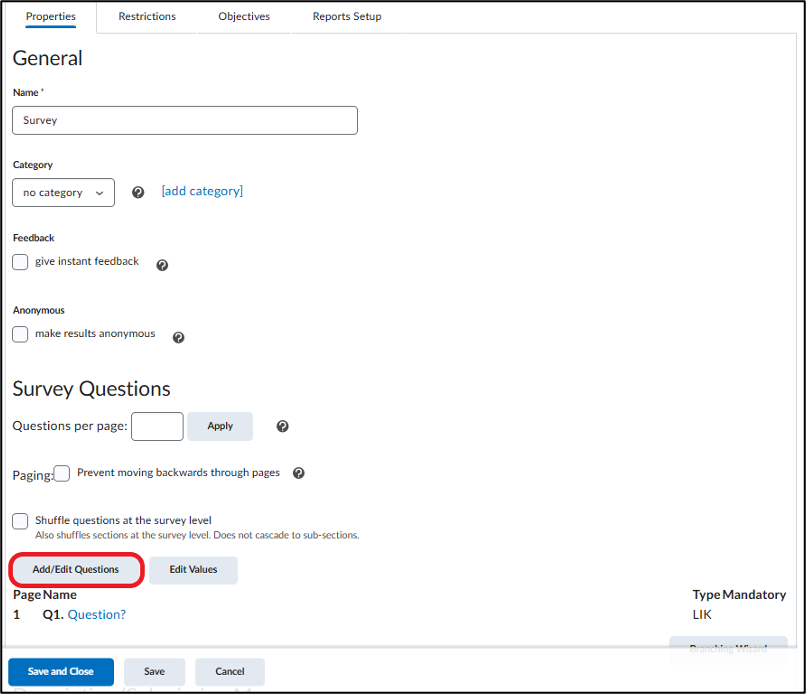
- Then, you’ll land on the overview page of the questions. There are 3 ways to add questions to a survey:
- Creating new questions.
- Uploading existing questions.
- Import existing questions from your Question Library.
Uploading existing questions and import existing questions from your Question Library:
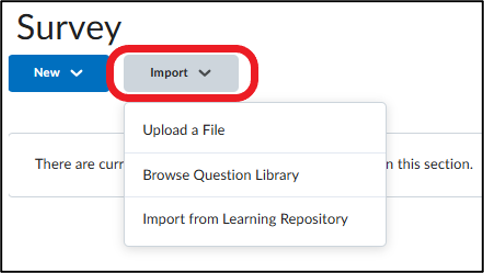
- Click on ‘Import’ to import already existing questions. There are 3 ways to do so:
- Upload a File
- Browse Question Library
- Import from Learning Repository
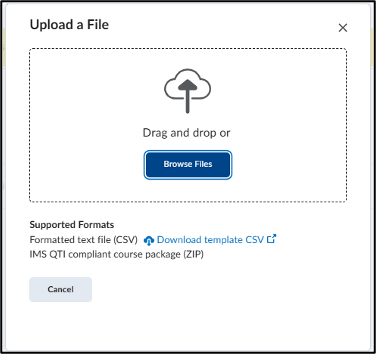
- Option A: Upload a File. Click ‘Upload a File’ to import and upload files from your computer.
- Click on ‘Browse Files’ or use ‘drag and drop’.
- Note: you can only import .csv or .zip files.
- Option B: Click on ‘Browse Question Library’ to import previously created or imported questions.
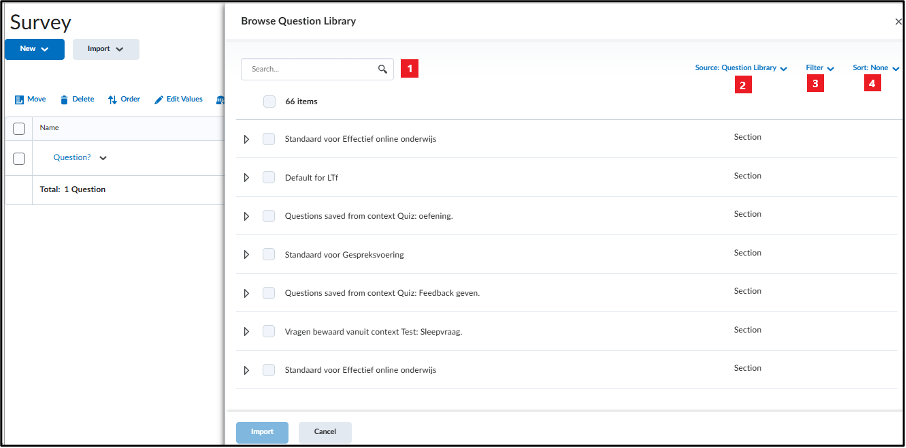
- Use the search bar to find a question by filling in a (part of a) question.
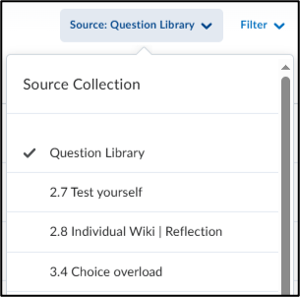
- Source: Question Library: Use the dropdown menu to select from which soure you want to add a question. You can search through the whole library, but you can also filter it down to specific quizzes or surveys.
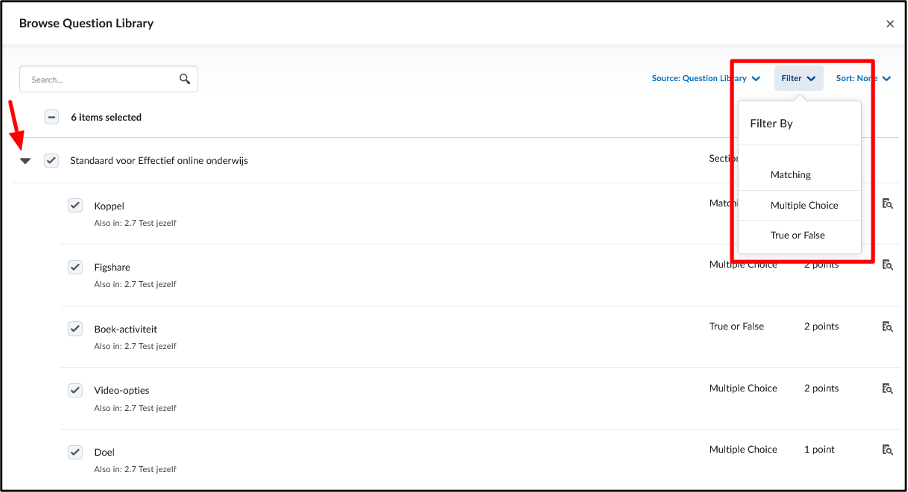
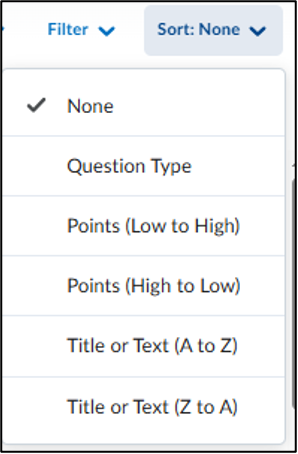
- Filter: Open a section in the Question Library by clicking on the arrow on the left. Then click ‘Filter’ to see a drop-down menu with the different question types you can sort by.
- Sort: Choose how you want to sort the questions.
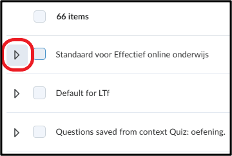
- Click on the arrow next to a section to see the questions of that specific section.
- Click on the square next to a question to select the question.
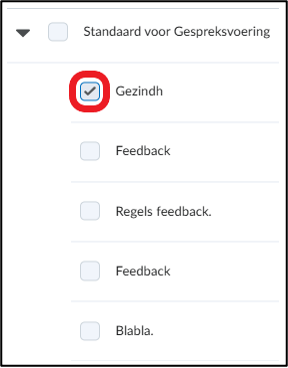
- Click on ‘Import’ to import the selected question(s).
4. Option C: Click on ‘Import from Learning Repository’.
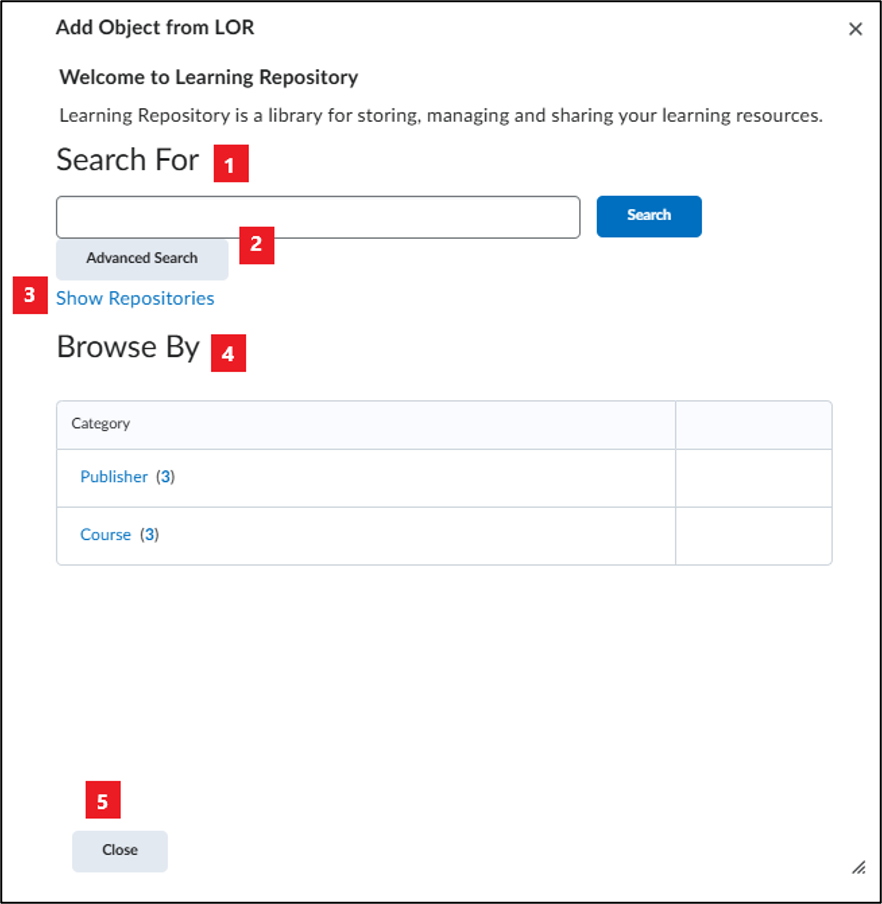
- Use the search bar to find a question by filling in a (part of a) question.
- Use ‘Advanced Search’ to further specify your search.
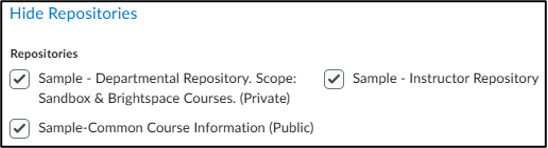
- Use ‘Show Repositories’ to select in which repositories you wish to search.
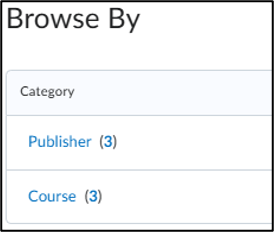
- Use ‘Browse By’ to further specify your search; click on ‘Publisher’ to search by publisher and click ‘Course’ to search by course.
- Click on ‘Close’ to import the selected questions.
Creating new questions:
- On the overview page of the survey questions, click on ‘New’ and select the type of question you wish to add to the survey. Note: because this concerns a survey, there are no correct answers. Therefore, it is also not possible to assign points to the answers. The different types of questions available are as follows:
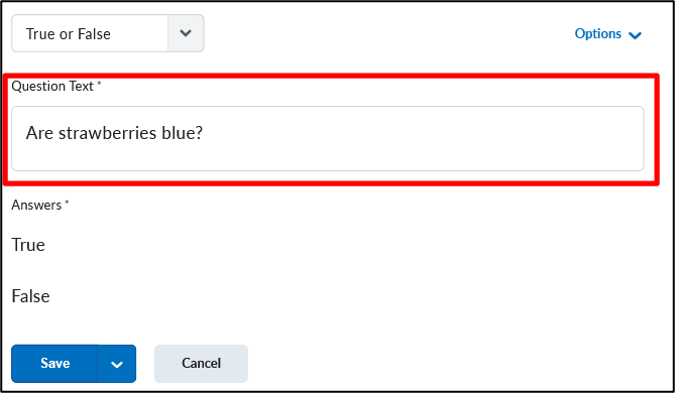
- True or False Question (T/F): The true or false question can be used to have students evaluate a statement on the basis of its correctness. Use: Fill in the statement students have to judge under ‘Question Text’
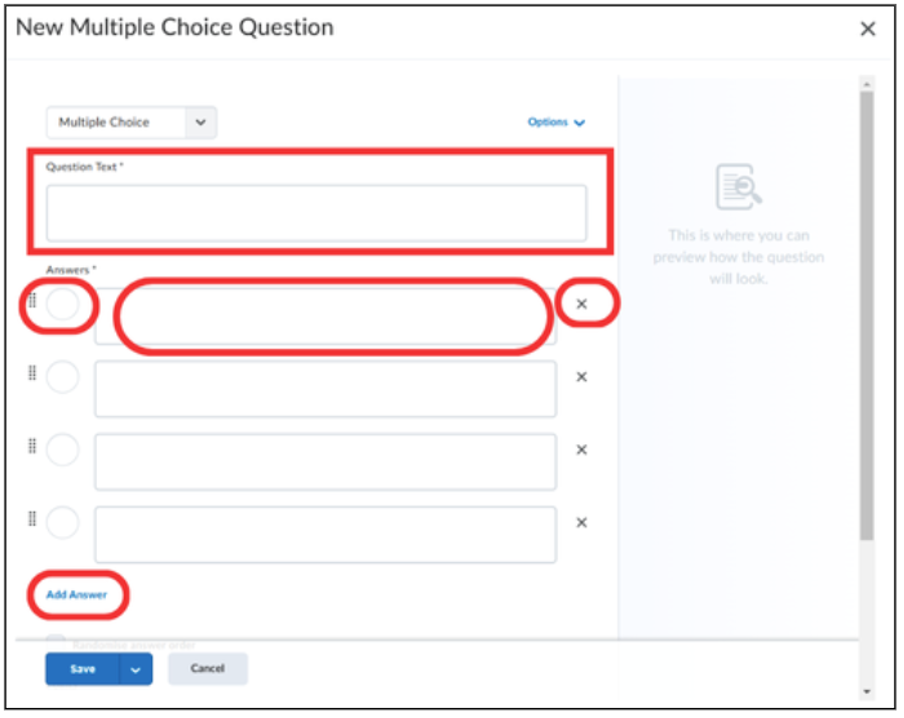
- Multiple Choice Question (MC): In this type of question, multiple answer options are presented. The student picks the answer they believe is correct. Tip: if you wish to have multiple correct answers, use the Multi-Select type of question. Use: Fill in the question under ‘Question Text’. And add the answers under ‘Answers’. If you want to add an answer, then click ‘Add Answer’ underneath the answer options.
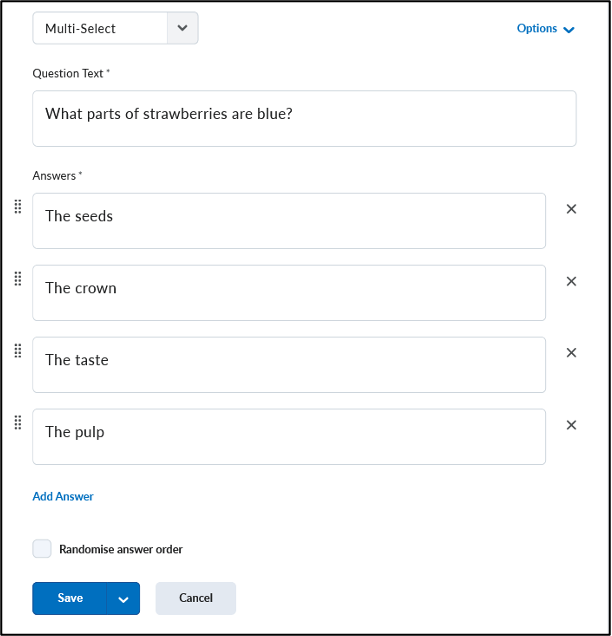
- Multi-Select Question (M-S): This looks like a multiple choice question, but the difference here is that students can select multiple answers. Follow the same steps as you would for multiple choice, but select multiple correct answers.
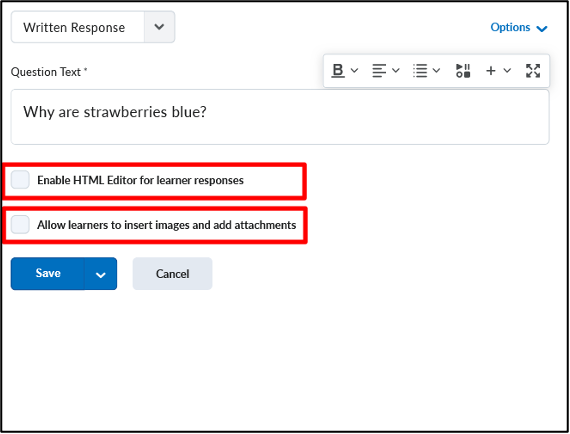
- Written Response Question (WR): This type of question can be used for open questions. Students can use multiple sentences for their answers and could even structure their text with paragraphs and alineas. It is also possible to enable to HTML Editor, so students can use different fonts and styling options, and to allow them to upload images and attachments in their answer. Use: to make this question, all you have to do is fill in the question under ‘Question Text’. Tick the box next to Enable HTML Editor if you wish to do so. Similarly, tick the box next to Allow learners to insert images and add attachments if you wish.
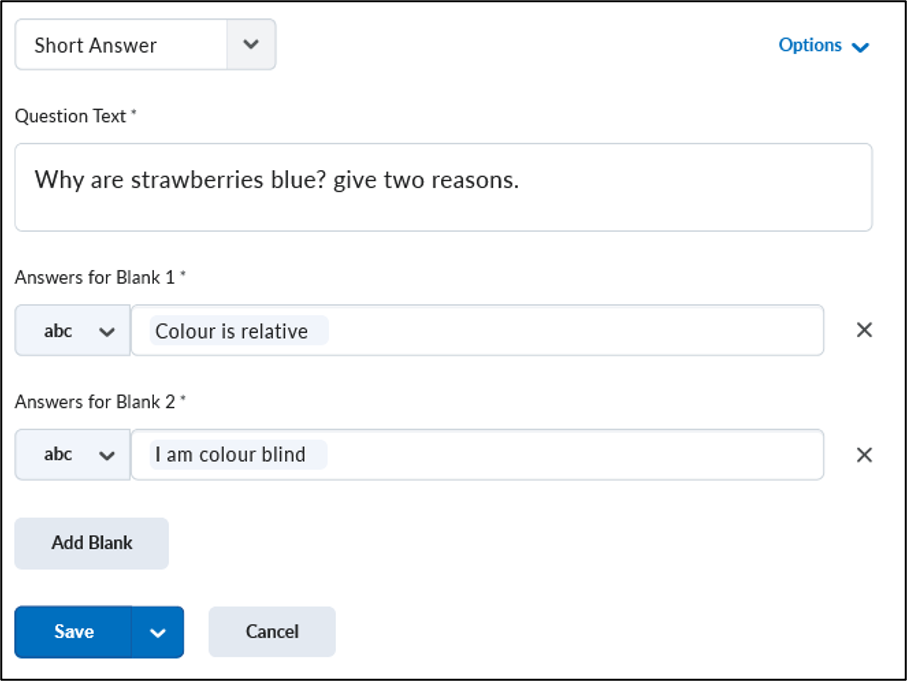
- Short Answer Question (SA): This question is identical tot he written response question, but students are limited in the amount of words they are allowed to use.
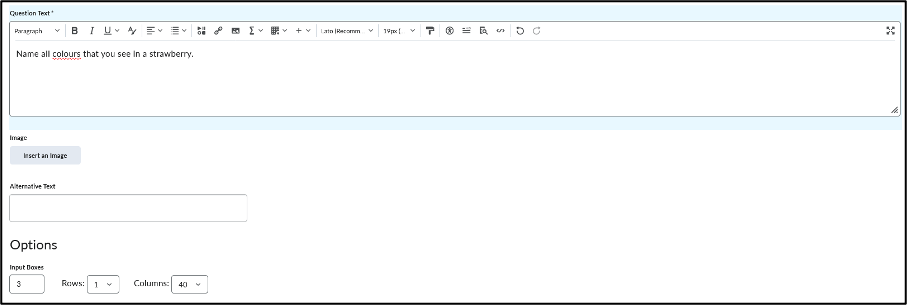
- Multi-Short Answer Question (MSA): Here, students answer a question with multiple answers and use multiple answer boxes. Under ‘Input Boxes’, you select the amount of answers the student has to give.
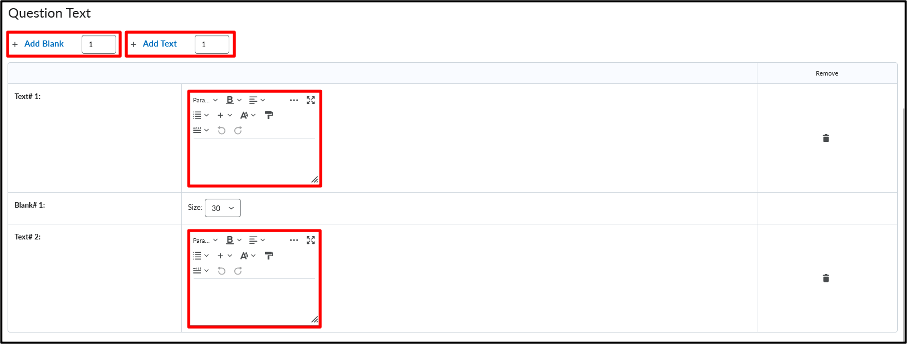
- Fill in the Blanks Question (FIB): In this type of question, students have to fill in the missing words in a sentence or list. Use: Fill in the parts of the sentence that the student can see under ‘Text #1’ (first part of the sentence, before the missing word), and ‘Text #2’ (second part of the sentence, after the missing word. If there is no second part of the sentence, you can leave this open). Click on ‘+ Add Blank’ to add a blank space, and on ‘+ Add Text’ to add a textbox.
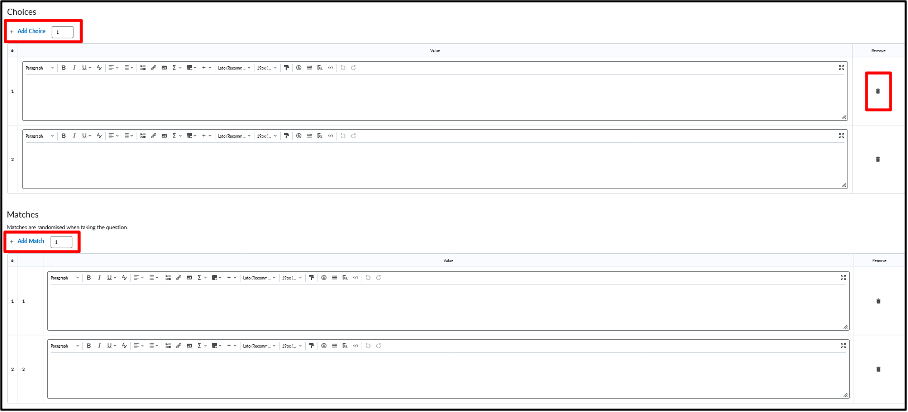
- Matching Question (MAT): Students will be asked to match the correct term to a question. Use: Add the questions under ‘Choices’ and then add terms that can be matched under ‘Matches’. Click ‘+ Add Choice’ or ‘+ Add Match’ to add choices or matches, and click on the tresh can on the right to delete them.
- Ordering Question (ORD): Students will be asked to place the terms in the correct order. Fill in the terms in the textboxes underneath ‘Value’.
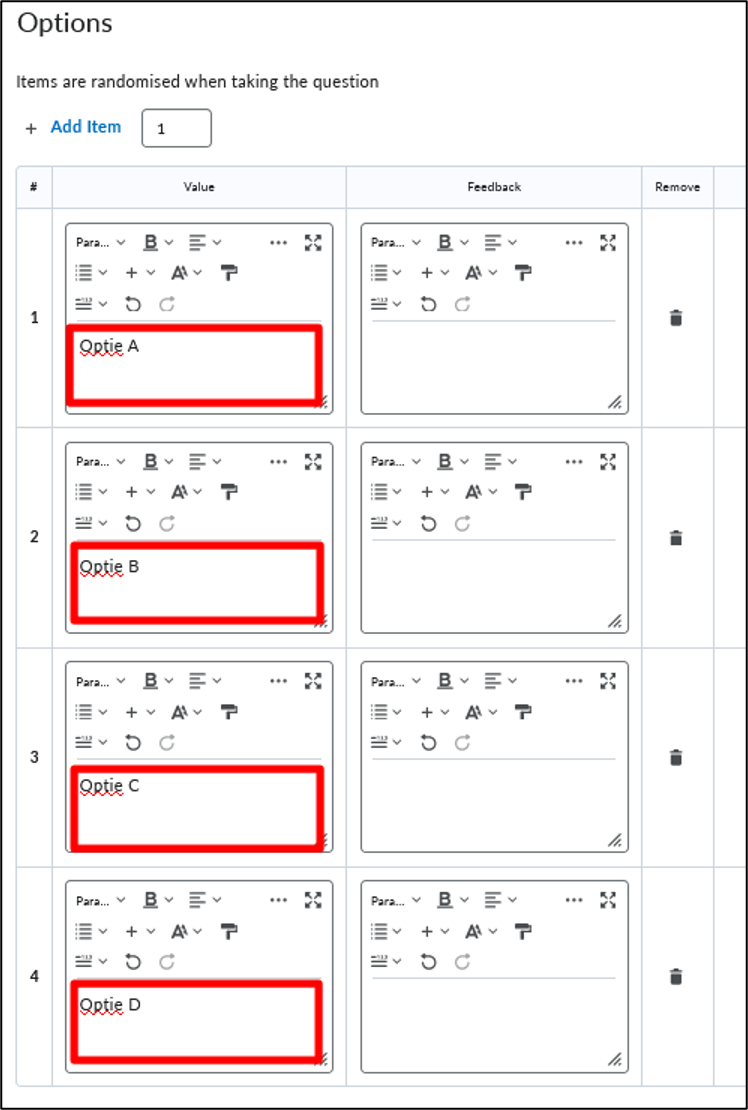
The question will look like this to the students. Option A, B, C, and D are the components that need ordering. Students can fill in the correct position by clicking on the drop down menu next to each option.

- Likert Question (LIK): Using the Likert Question students can answer on the basis of a Likert Scale. Use: it is possible to add an image, when the image has been added it is also possible to add the Alternative Text, this will appear underneath the image. You can choose the type of scale that will be used by selecting the right one underneath ‘Questions’. It is also possible to add a ‘Not Applicable’ option.
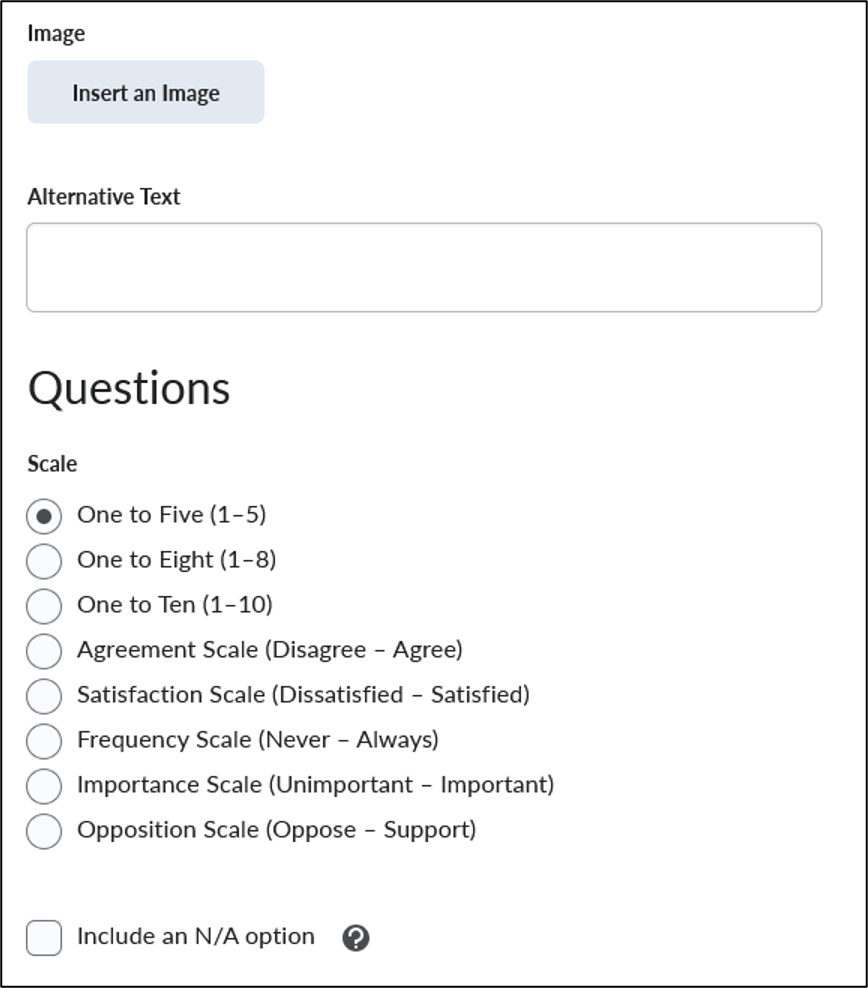
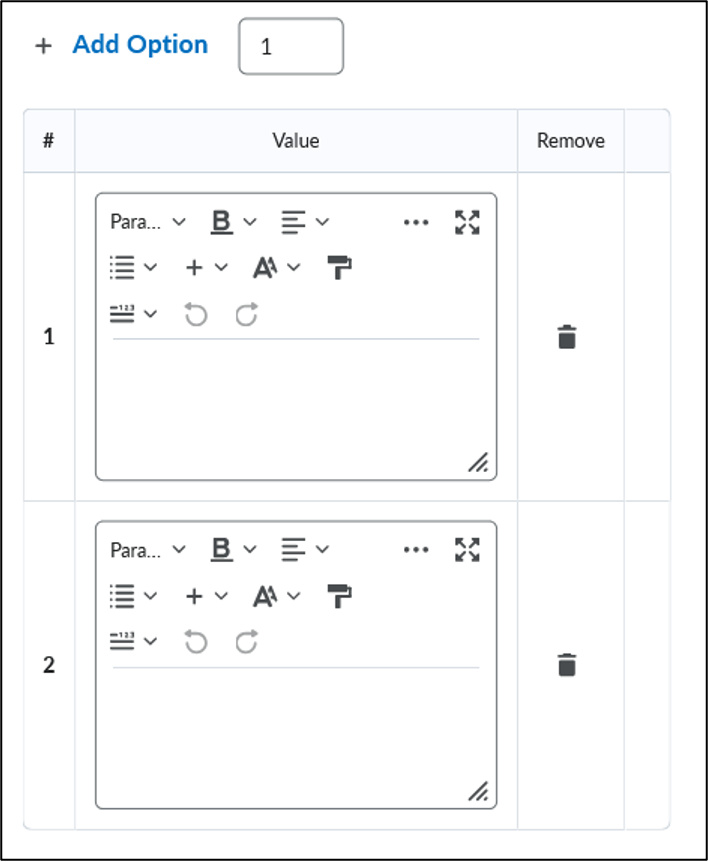
Underneath those settings you can add the statements to which the students will be responding. Fill in the statements in the textboxes. Click ‘+ Add Option’ to add more textboxes.
- Fill in the Question Text and the answer(s), depending on the type of question you chose, and click ‘Save’.
Editing questions:
Questions that have been added from the question library can now be edited.
- Move: Move questions within the Question Library from one section to the other.
- Delete: Delete questions from the survey (you do not remove them from the Question Library).
- Order: Change the order of the questions.
- Edit Values: Indicate whether a question is ‘Mandatory’ or not.
- Click ‘Save’ to save your changes and return to the previous page.
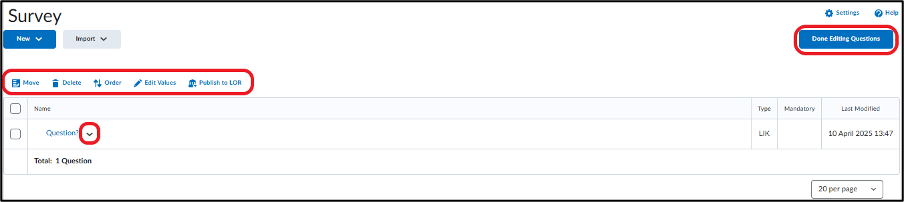
- Click on the arrow next to a question:
- Click ‘Edit’ to edit a question.
- Click ‘Preview’ to preview a question.
- Click ‘Attempts’ to see the attempts on a question.

- Click on ‘Done Editing Questions’ in the top right corner to return back to the page ‘Edit Survey’.