
Survey report
Below, you can read how you can create a report of a survey and how you can make this report available for others (e.g. students or other staffmembers).
Create a Report
Generate a survey report to:
- Collect survey data (statistics);
- Share survey data with other users (for example with colleagues with a different role who do not have access to the survey statistics page with their privileges, or with students)
Attention! You have to explicitly give users in your course access per role in order for the report to become visible to them. Always add the teacher and/or coordinator, otherwise you will not be able to see the report yourself!
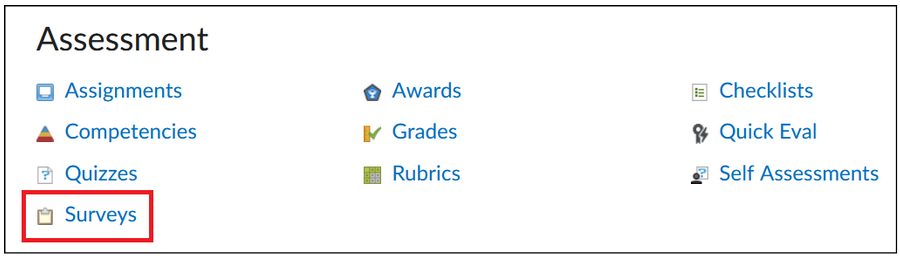
- Click ‘Course Admin’ in the navbar of your course.

- Click ‘Surveys’ below the heading Assessment
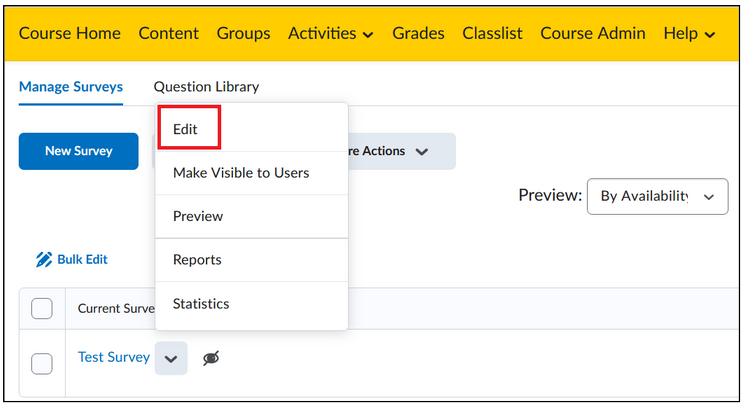
- Click the fold-out arrow of the existing survey and then click ‘Edit’.
- Click ‘Reports Setup’ (the fourth tab).
- Click ‘Add Report’.

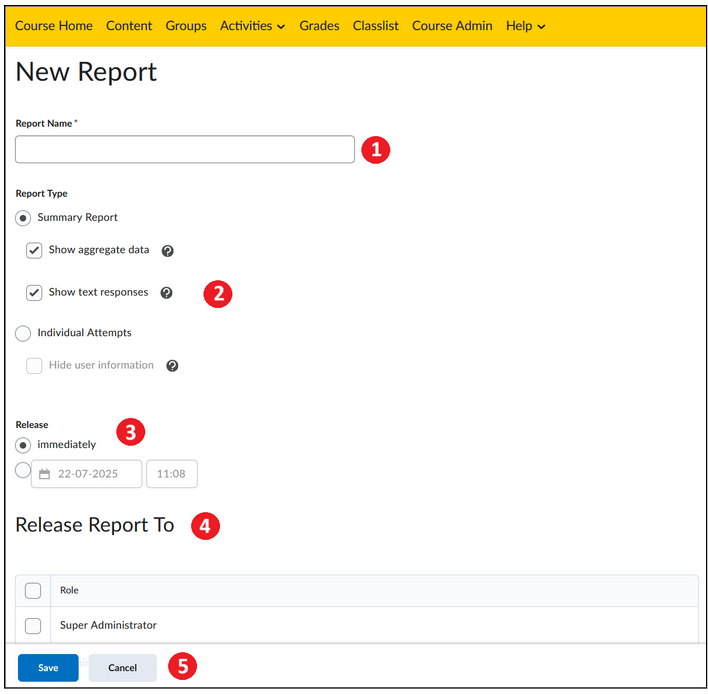
- Give the report a title [1].
- Tick which dates you do and do not want to take into account for the report [2]:
- Select ‘Summary Report’ if you want the results of all submitted surveys to be added up.
- Tick ‘Show aggregate data’ to view the results of the multiple choice, true/false, Likert, multi-select and matching questions.
- Tick ‘Show text responses’ to view individual results of open, short-answer, fill-in-the-blanks en multi-short-answer questions.
- Tick ‘Show signed comments’ to see for each answer who filled it in. Please note: You can only see the respondent’s name if the user has given permission for it.
- Tick ‘Show unsigned comments’ to see the answers without the names being displayed. Please note: if you ticked Show signed comments, this tool enables you to see the answers of the respondents that did not give permission for their names to be displayed
- Select ‘Individual Attempts’ if you want to look at the results from each submitted survey separatelyTick ‘Hide user information’ if you want the names of the respondents in the surveys to be hidden.
- Select ‘Summary Report’ if you want the results of all submitted surveys to be added up.
- Decide under ‘Release’ [3] if you want the report to be released at once (immediately) or set a different date for it to be released.
- Tick which Brightspace roles you want to provide with access to the report. Please note: you can create multiple reports of a survey (for example if you want students to see a more concise version of the statistics than the teachers).
- Click ‘Save to return’ to the Reports-Setup tab: you will now see a list of all reports you made of the survey.
Attention! When setting up the report, always consider to whom it is accessible. For instance, it is possible to decide to hide names in a report that is visible to students but to show them in a report that is exclusively visible to teachers.
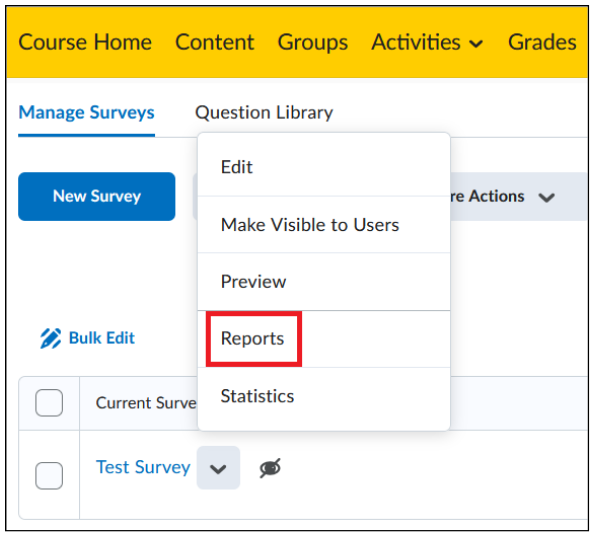
Tip! You get quick-access to the reports of a survey if you use the survey quick-menu. To do so, click on the arrow next to a survey on the Survey homepage, and then click Reports.
View and print Report
You get quick access to the reports of a survey via the survey quickmenu.
- Click ‘Course Admin’ in the navbar of your course.
- Click ‘Surveys’ below the heading Assessment.
- Click the fold-out arrow behind the desired survey and click ‘Reports’.
- Click the name of the report. A new window will open.
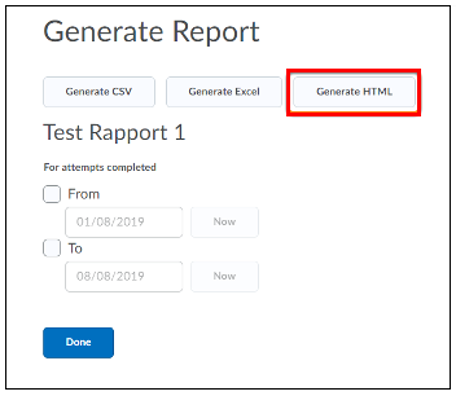
- Enter a date range for which you want to see the results (optional).
- Click ‘Generate HTML’ to open the report in Brightspace. You can also download the report in Excel.
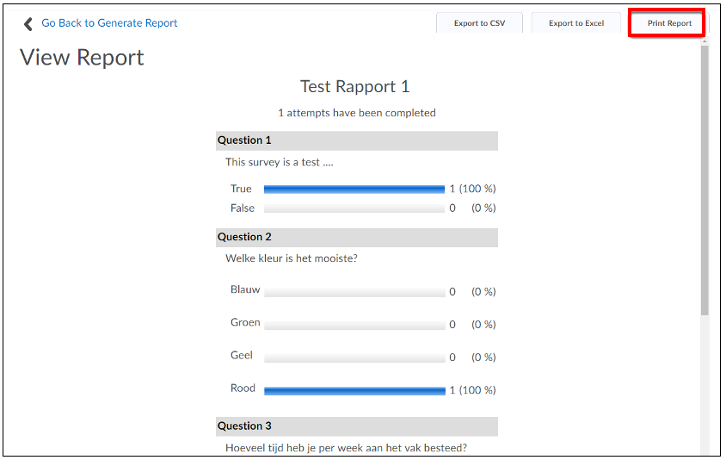
- You are now able to view the report.
- Click ‘Print Report’ to print the report.
You can find instructions on how to do this in the manual Survey report.